Poor belt tension can cause layer shifting and other printing issues. All printers are shipped with the belts adjusted most recently in our facilities, unless you are experiencing layer shifting issues or your belts have lost tension over time, there's no need to adjust these.
| Required Tools for this Routine |
|---|
| 5.5mm nut driver |
| 2mm hex key |
| 2.5mm hex key |
| Belt tensioner (optional) |
¶ X-Axis Belt Adjustment
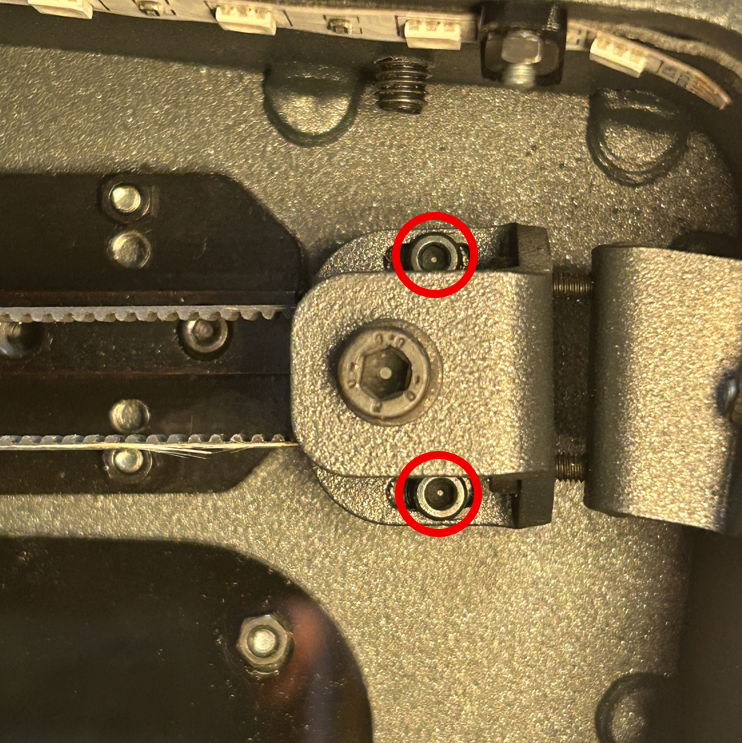
1. Using a 2.5mm hex key slightly loosen the pair of screws located on the bottom of the X gantry so that the tensioner is released.
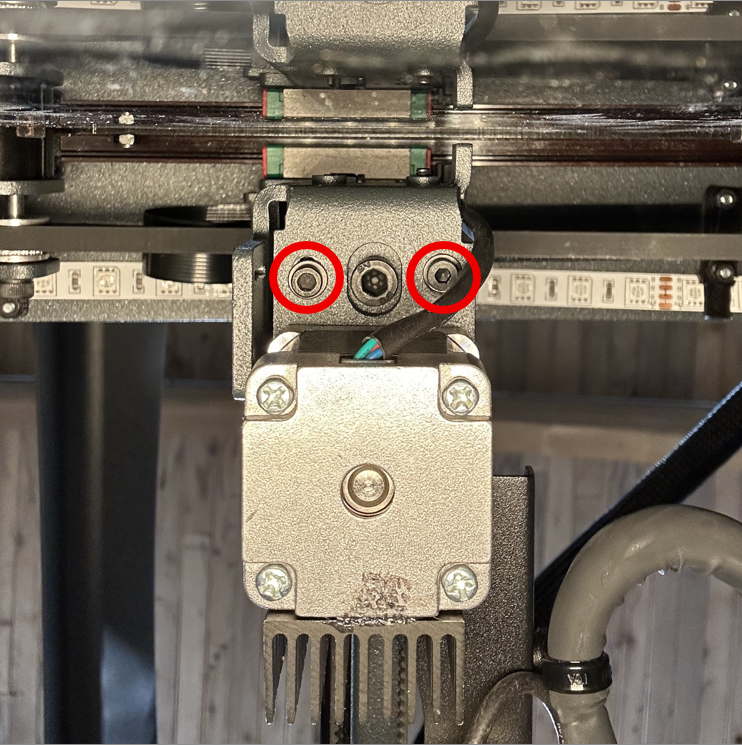
2. Adjust the both the front facing idler screw and the rear facing idler screw to increase or decrease the amount of tension on the belt, ensure that both screws have been adjusted equally.
|
|
3. Once the desired tension is reached, tighten the pair of screws that were loosened in step 1.
4. Repeat steps 1 - 3 on the opposite side of the X gantry to adjust the tension of the other extruder belt. Try to match the tension of the two belts.
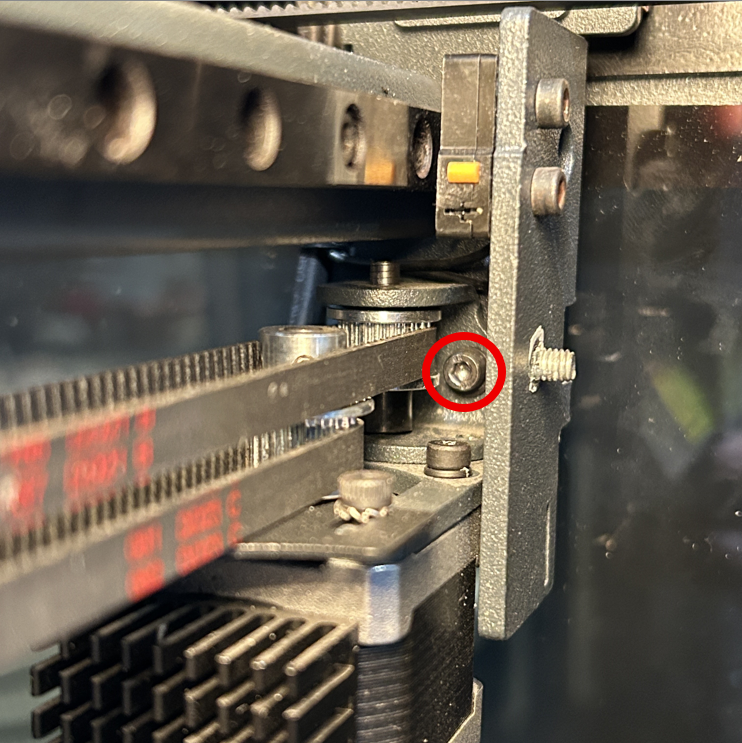
¶ Y-Axis Belt Adjustment
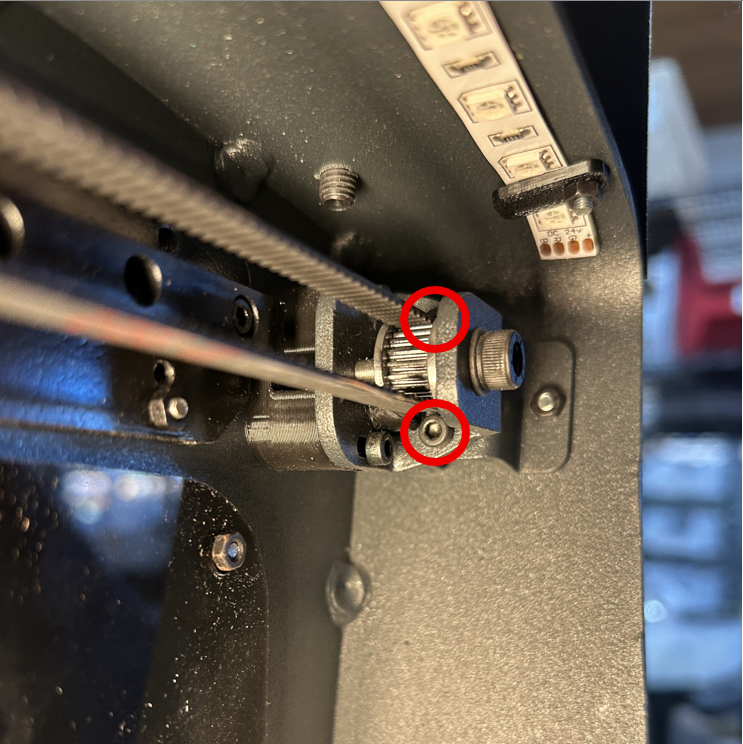
5. Loosen both side set screws that hold the tensioner in place for the Y belt.
6. Adjust the tensioning bolts to increase of decrease the belt tension.
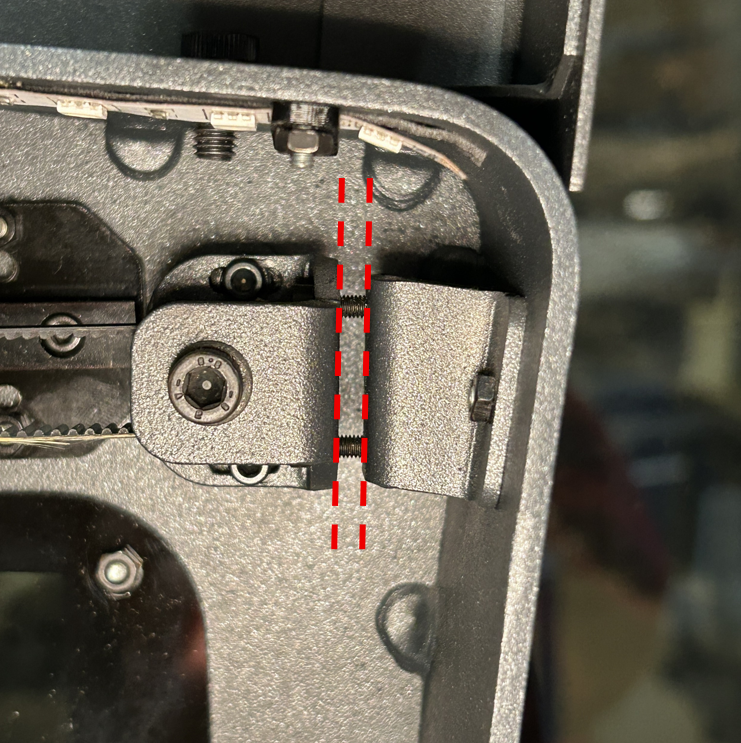
7. Once the desired tension is reached on the Y belt check the parallelism of the idler and the holder. Once those components are parallel and the tension is correct tighten the screws that were loosened in step 5.
8. Repeat steps 5 - 7 on the opposing side of the machine ensuring to match the tension of the two sides.
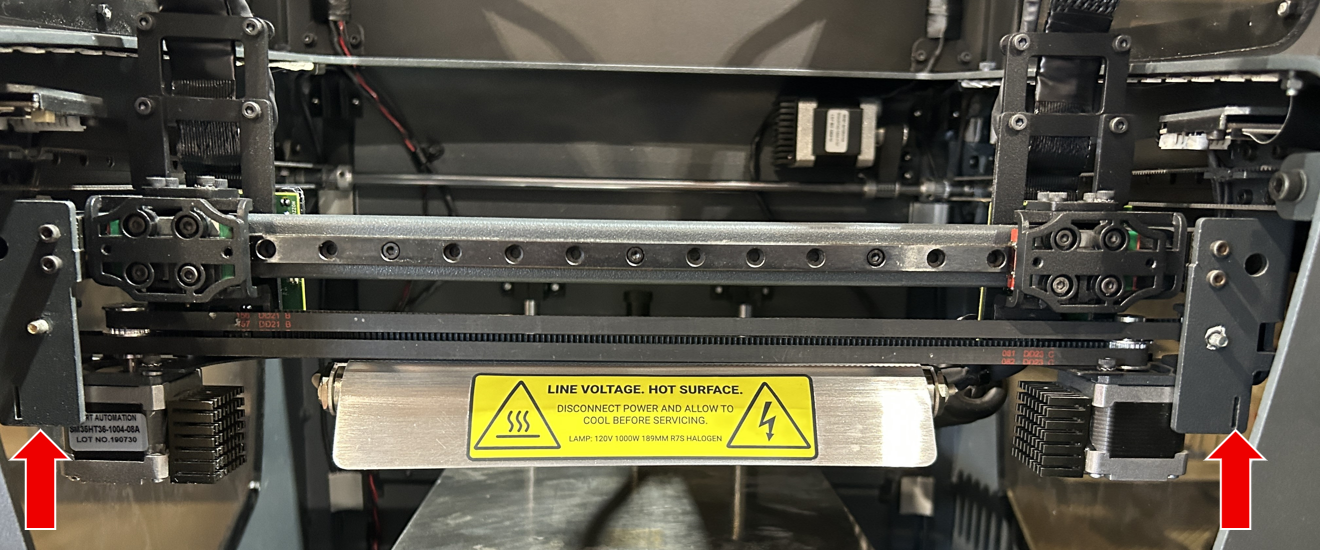
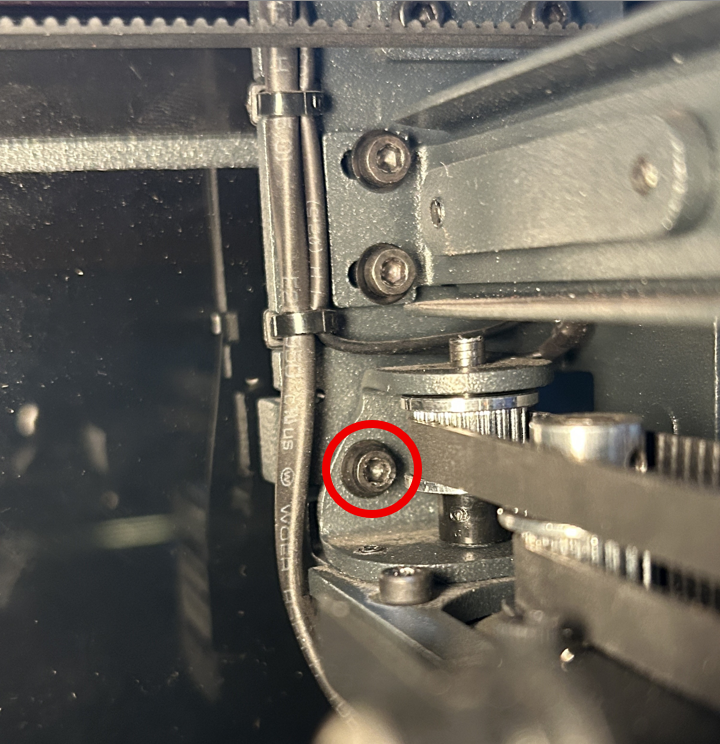
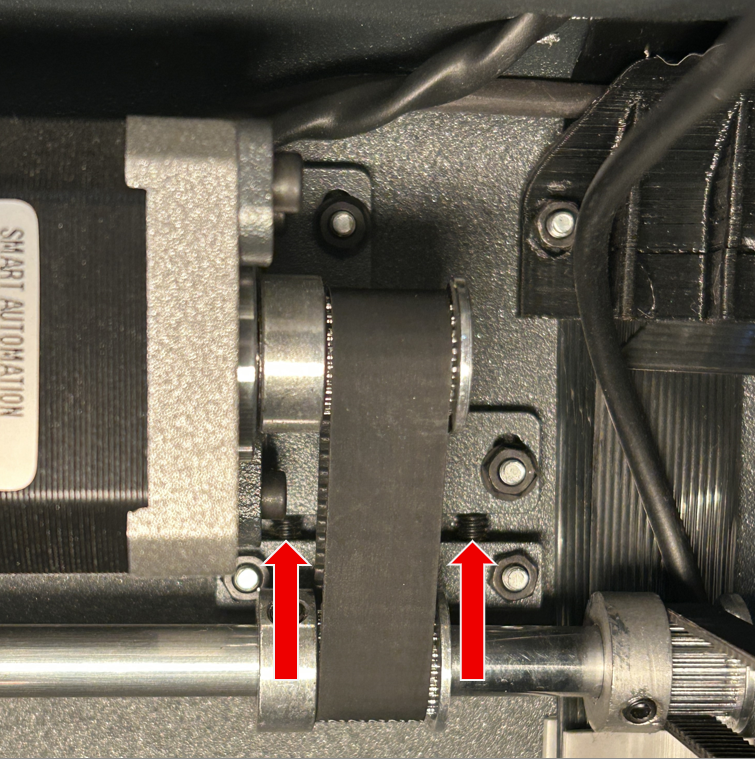
¶ Y Motor Belt Adjustment
9. To modify the belt tension use a 5.5mm nut driver loosen the two nuts that hold the stepper motor to the printer's frame without removing them.
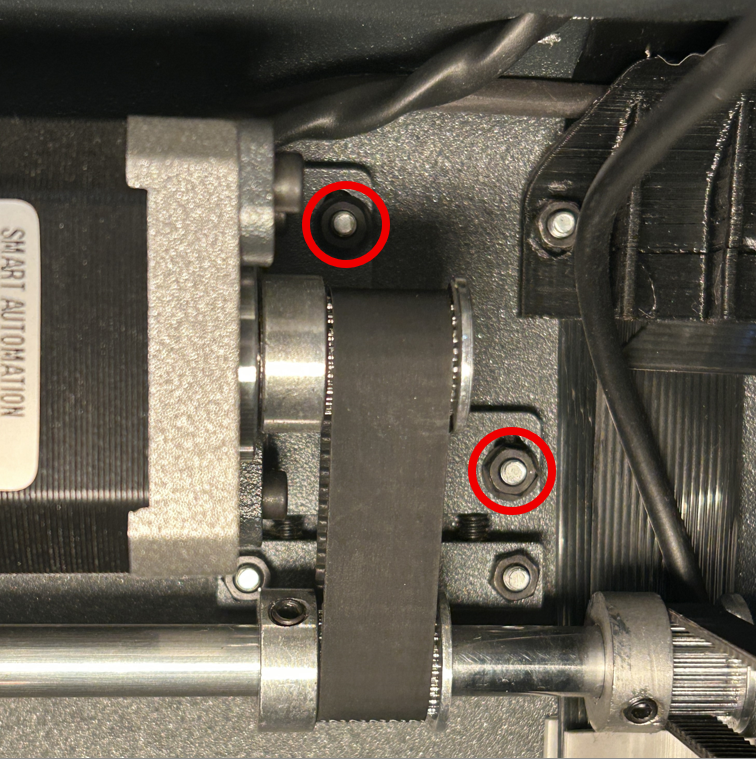
10. Below the motor a rectangular piece of metal with two hollow screws, adjusting these screws will increase or decrease the amount of tension on the belt. To adjust these hollow screws use a 2mm hex key inserted into the hollow screws following the direction of the arrows in the image below.
11. Once the desired tension is reached tighten the nuts loosened in step 9.