It is recommended to periodically clean and lubricate the axes of the Rapidia Conflux 1 3D printer with the included grease and oil from the spares kit to provide smooth and precise performance of the mechanical components.
| Tools Required for Cleaning the Axes |
| Absorbent Paper Towels or Cloths |
| Cleaning Solvent (Isopropanol) |
| Machine Oil |
| High Temperature Grease |
¶ Cleaning and Lubricating the X-Axis
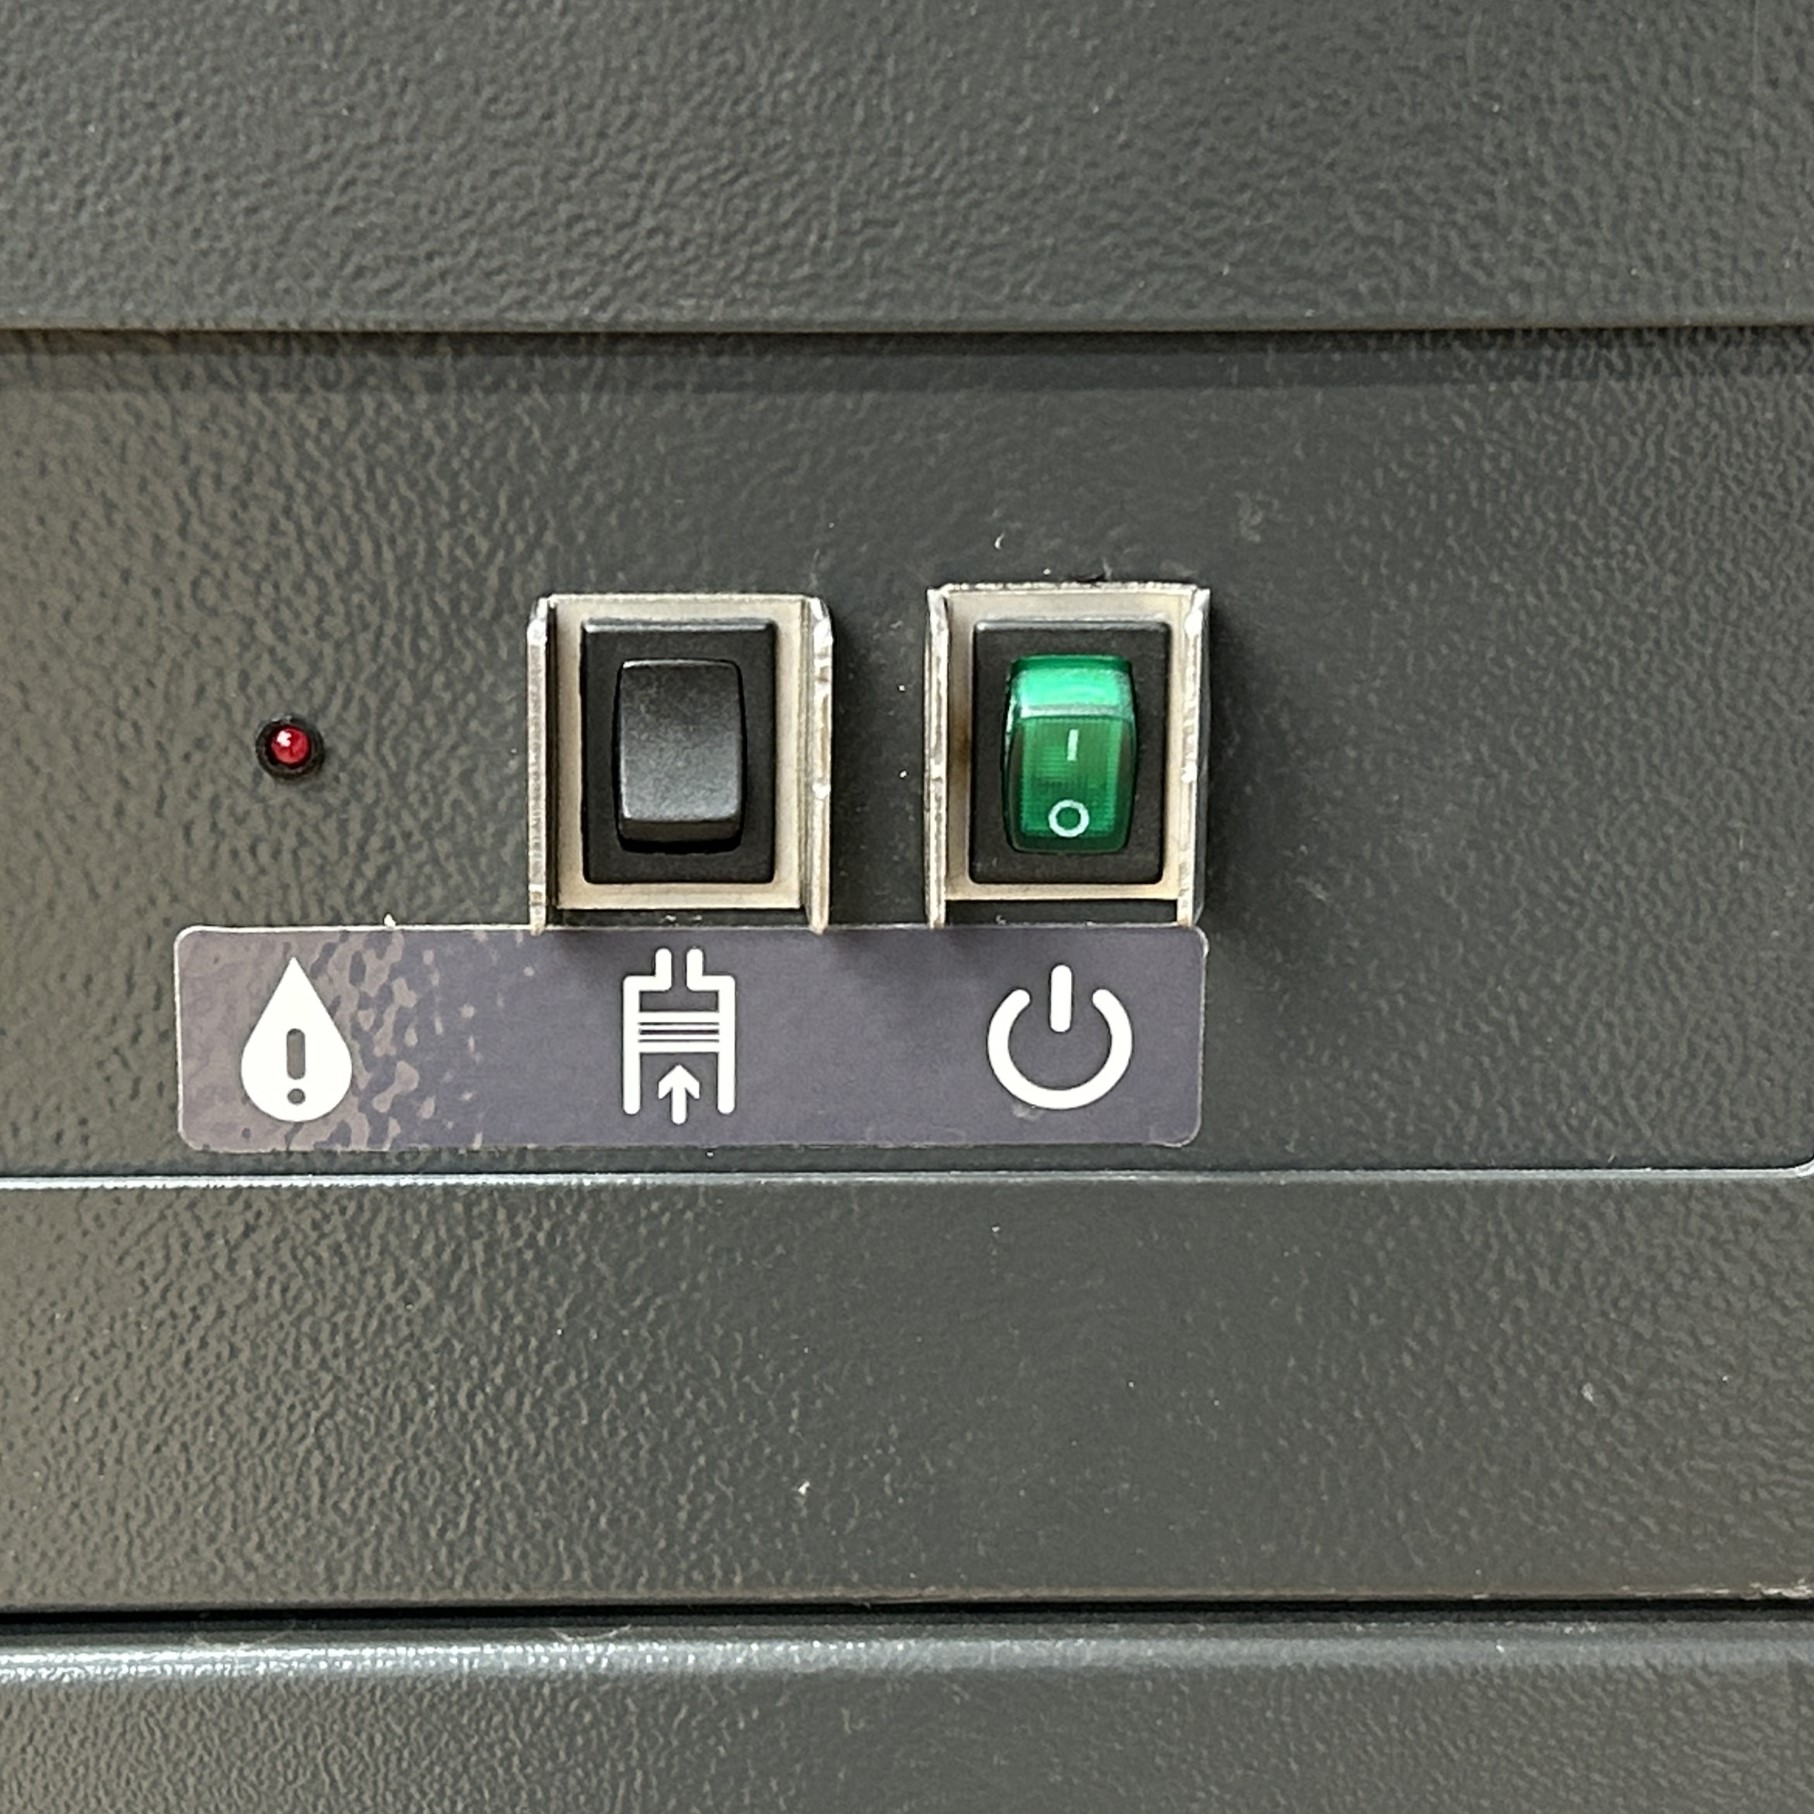
1. Turn off the printer via the switch on the lower cabinet. During this process it is advised to move the axes manually in order to reach all parts of the linear guides.
 |
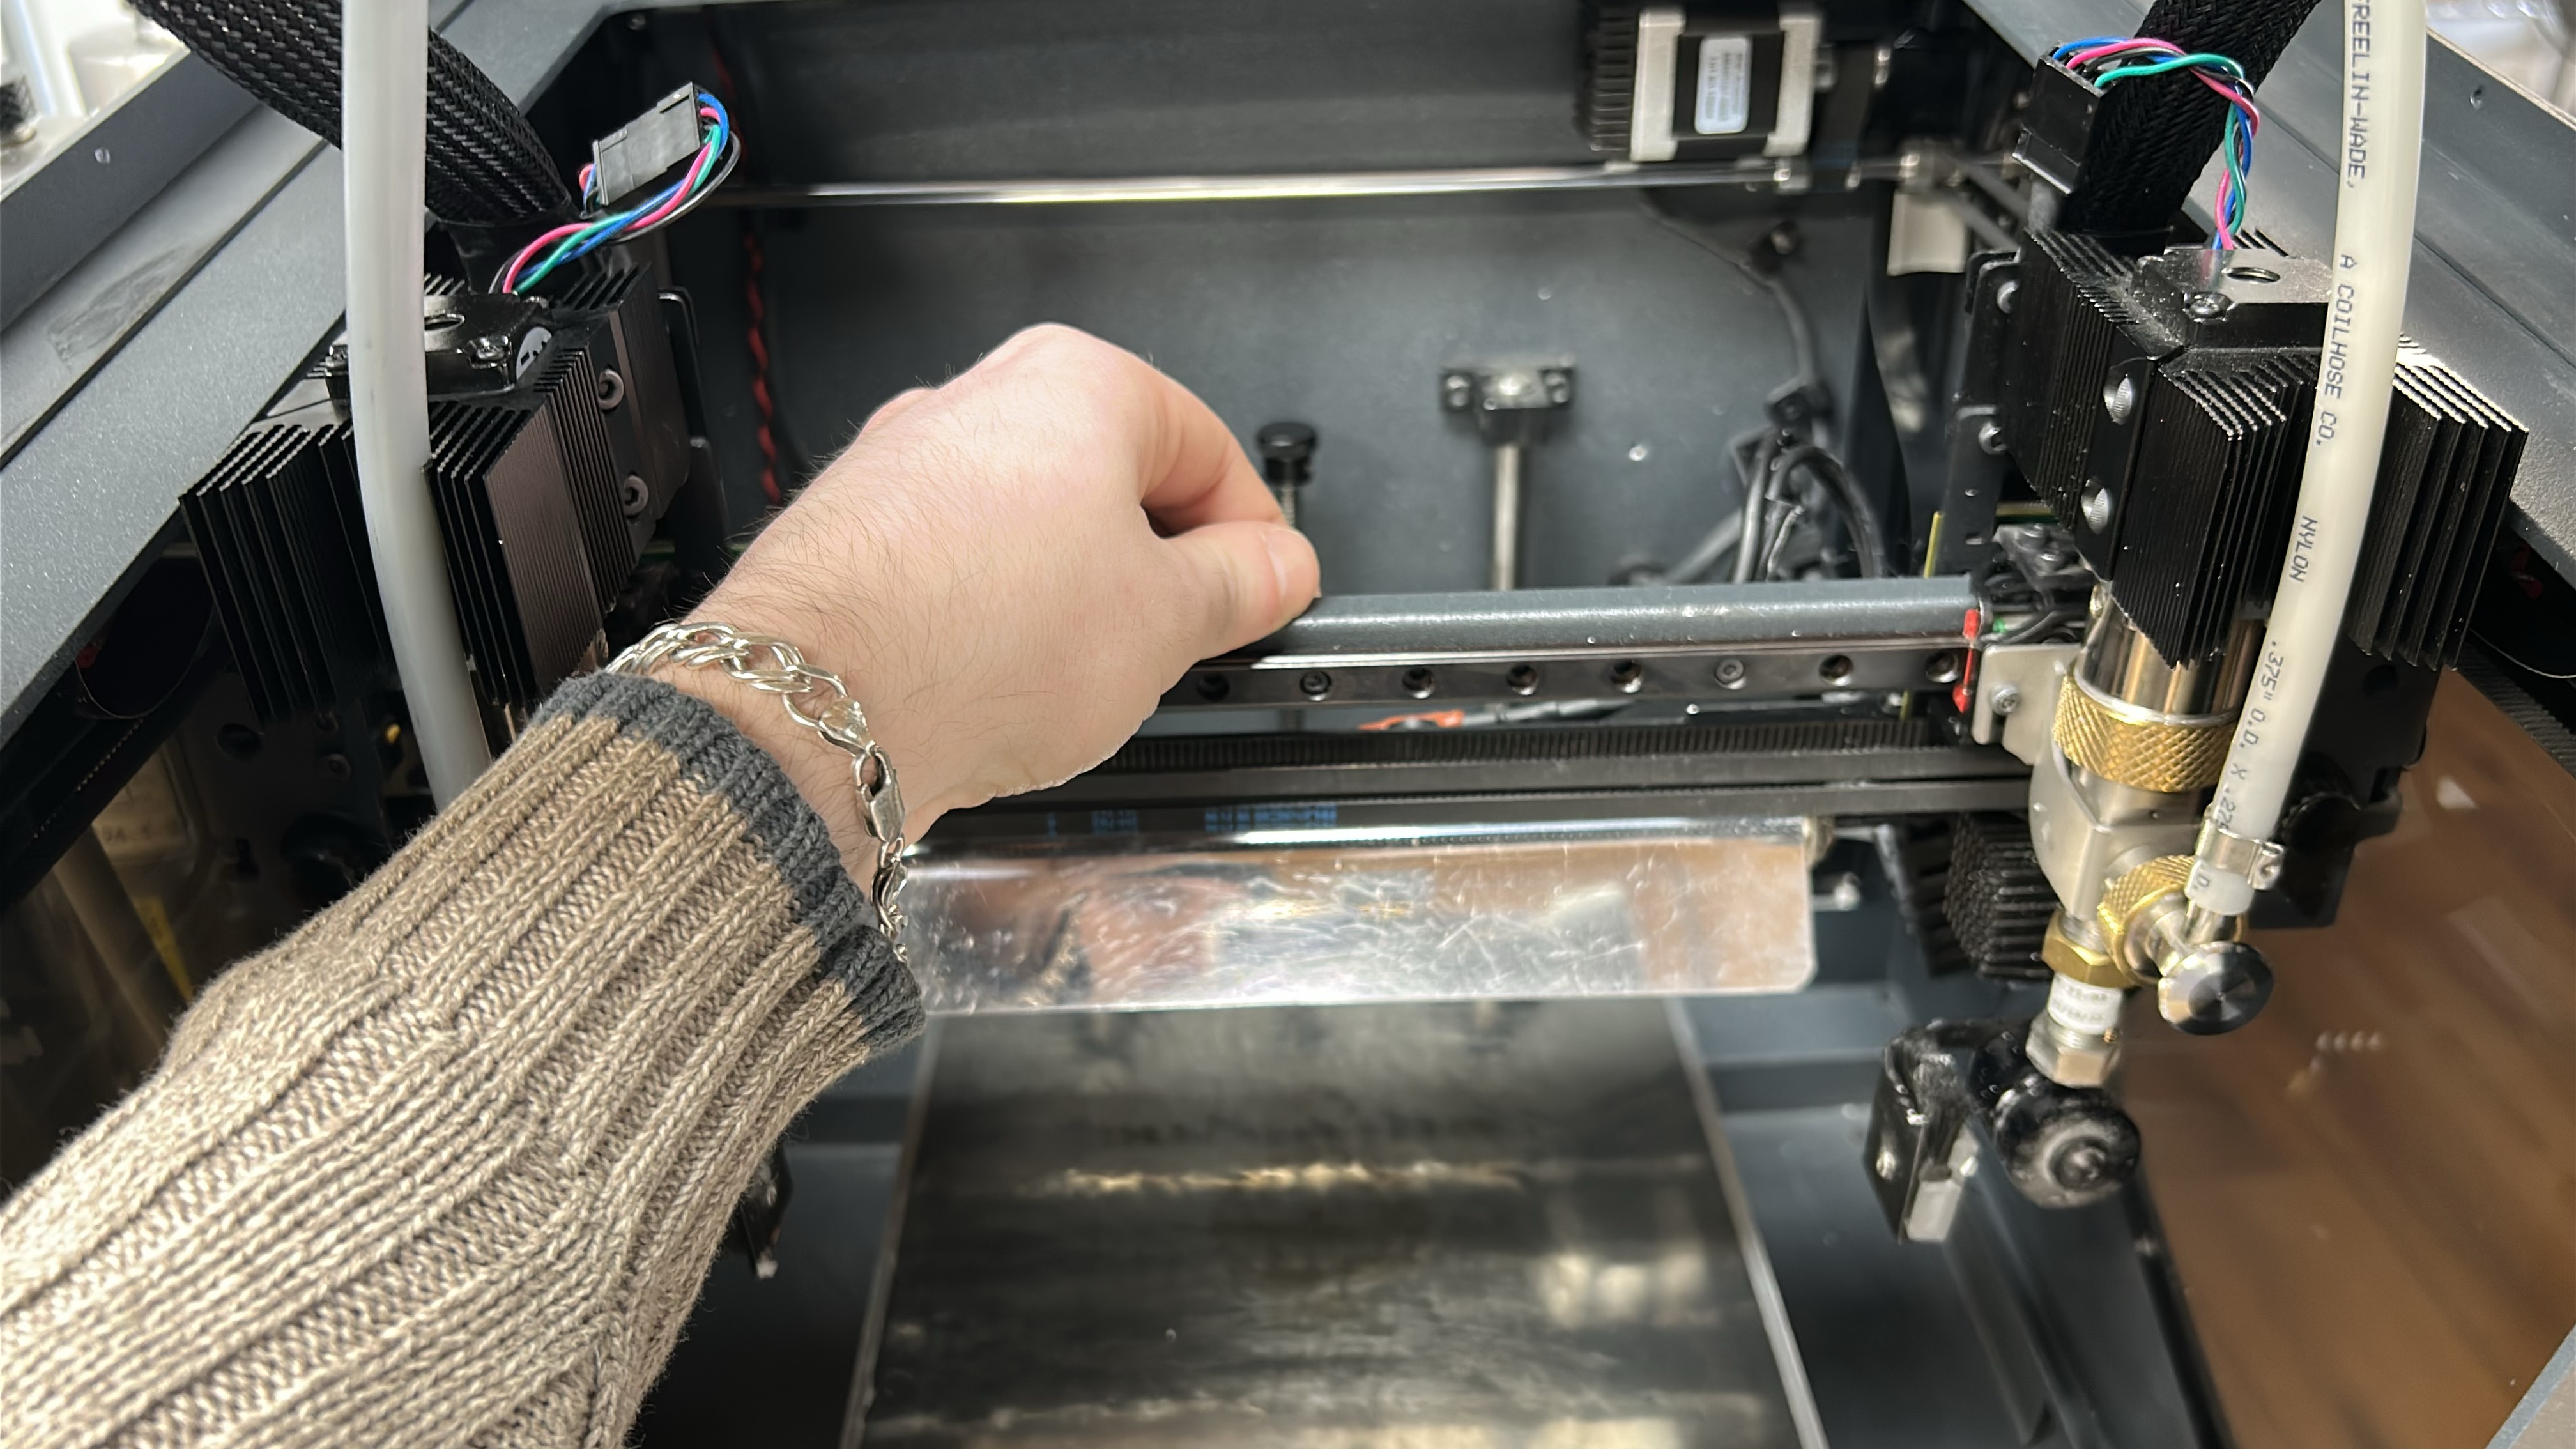 |
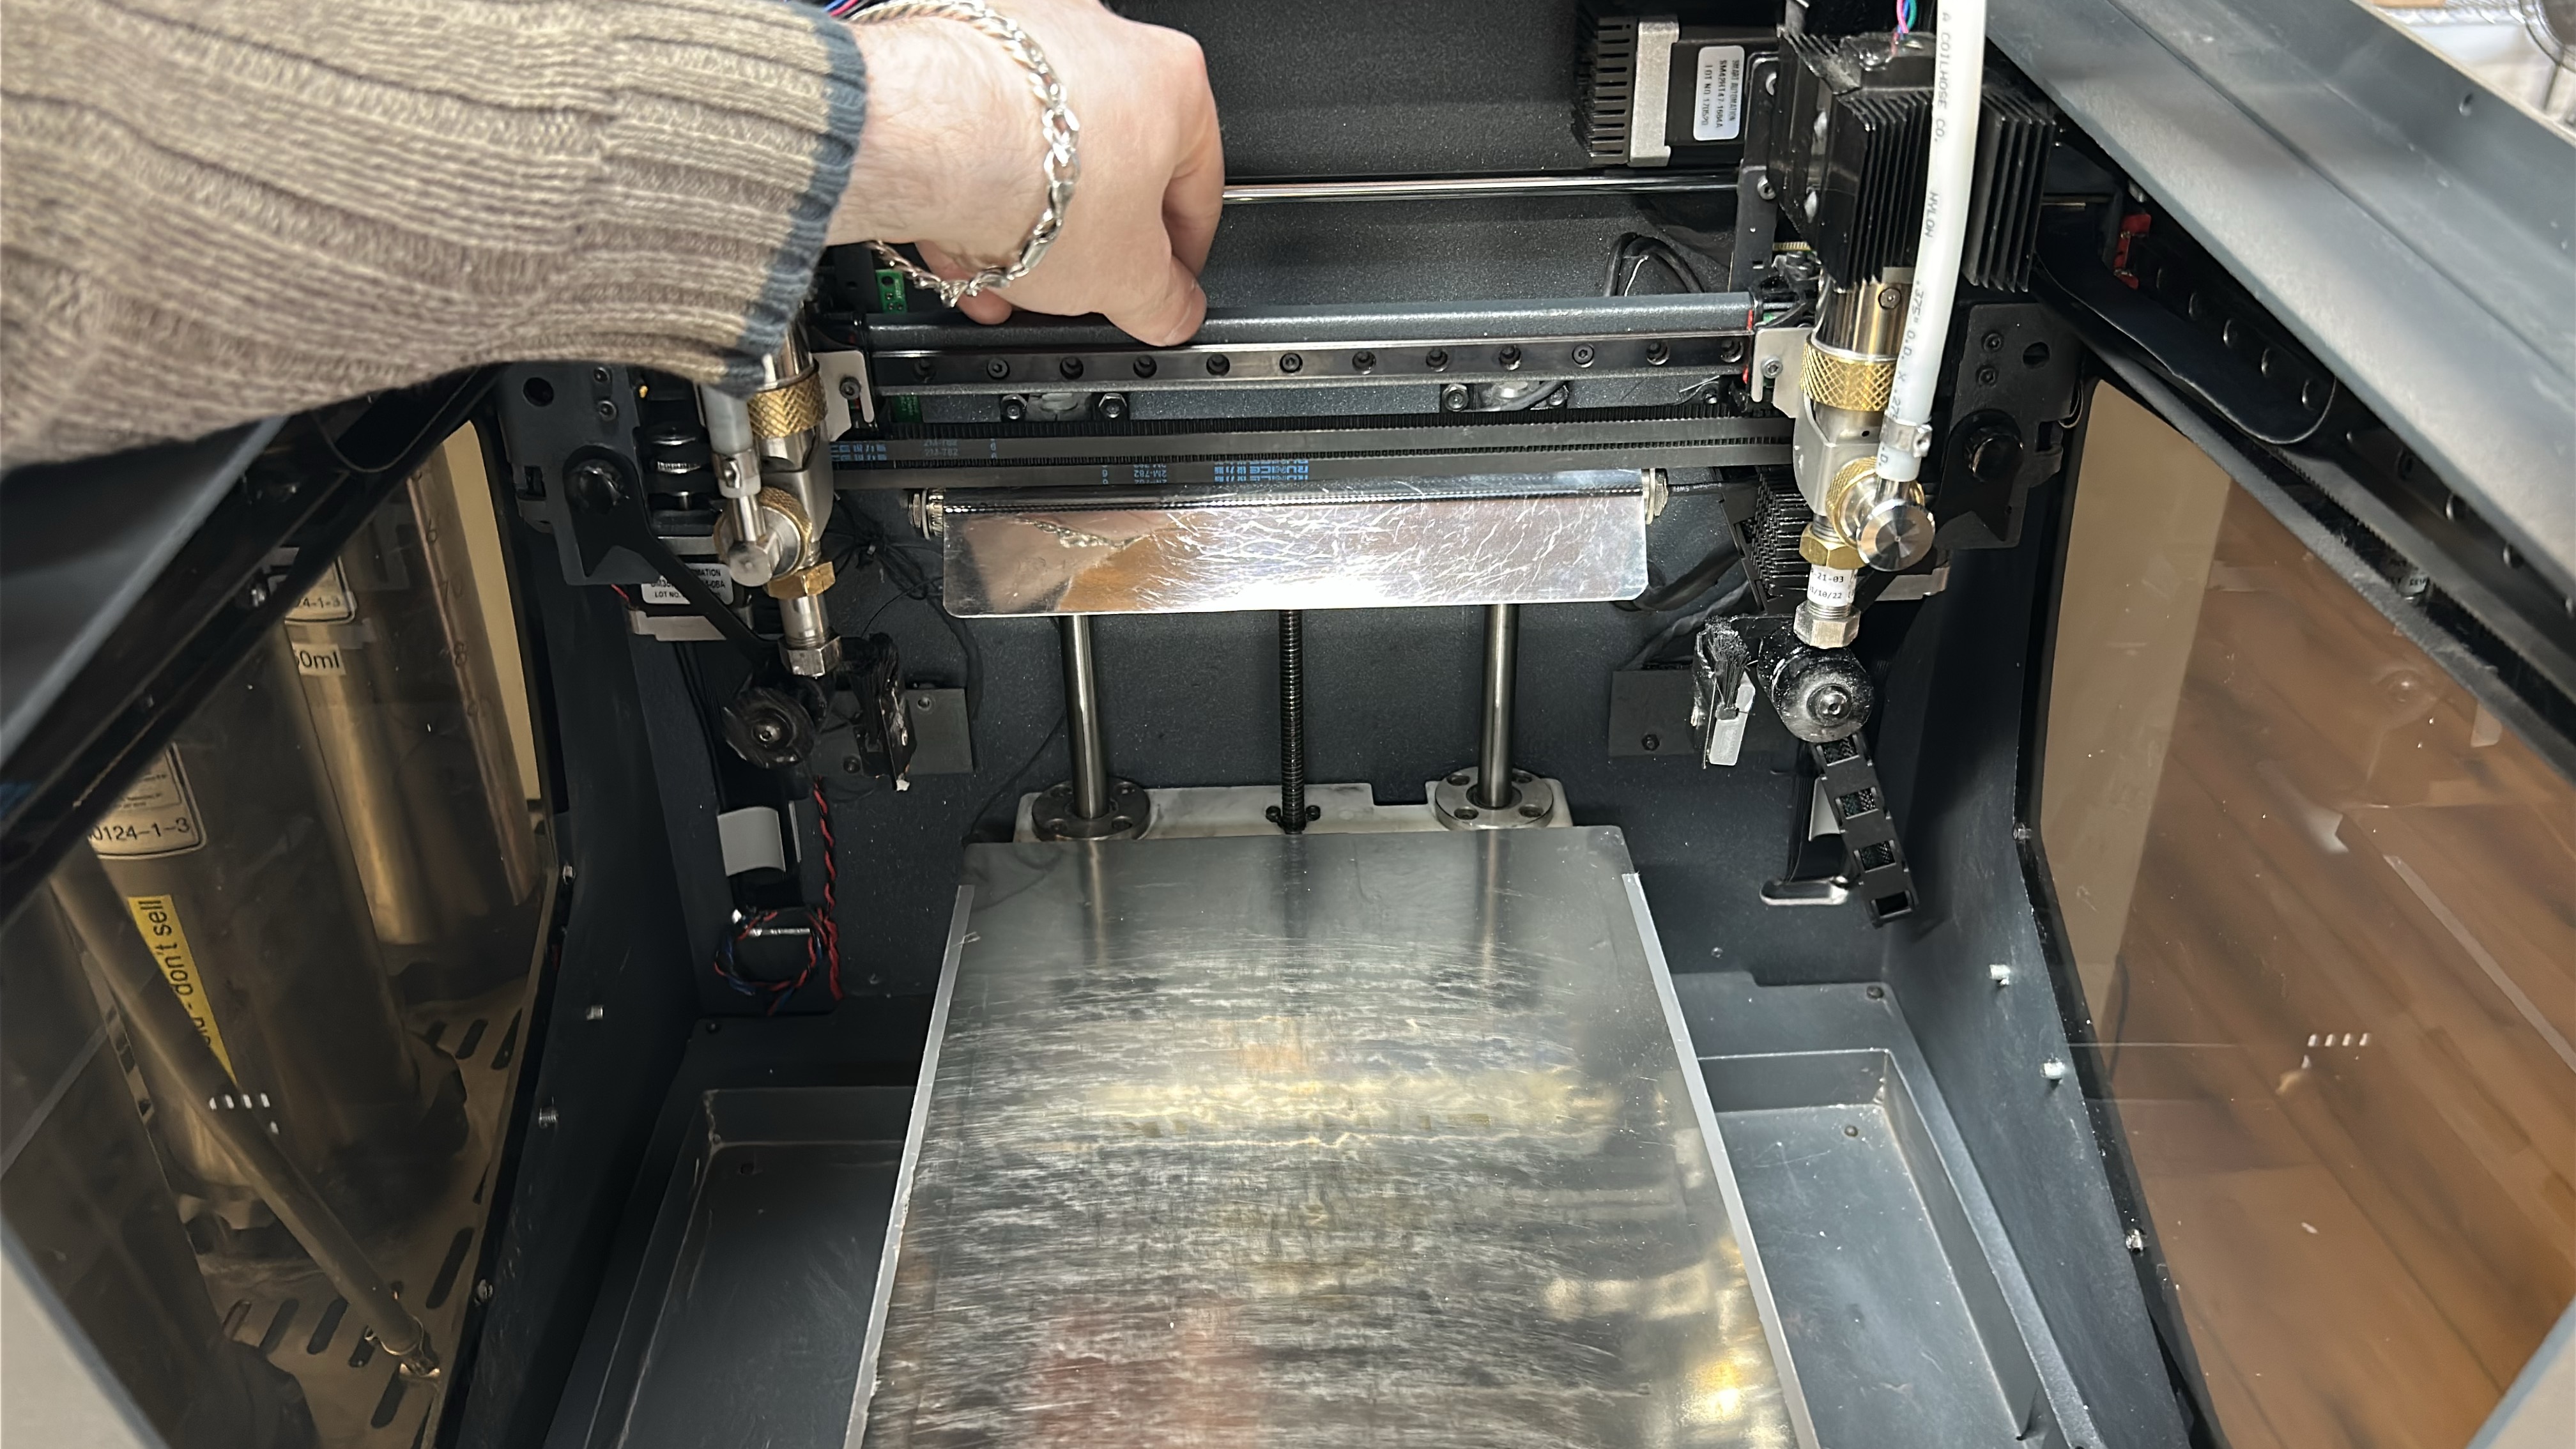
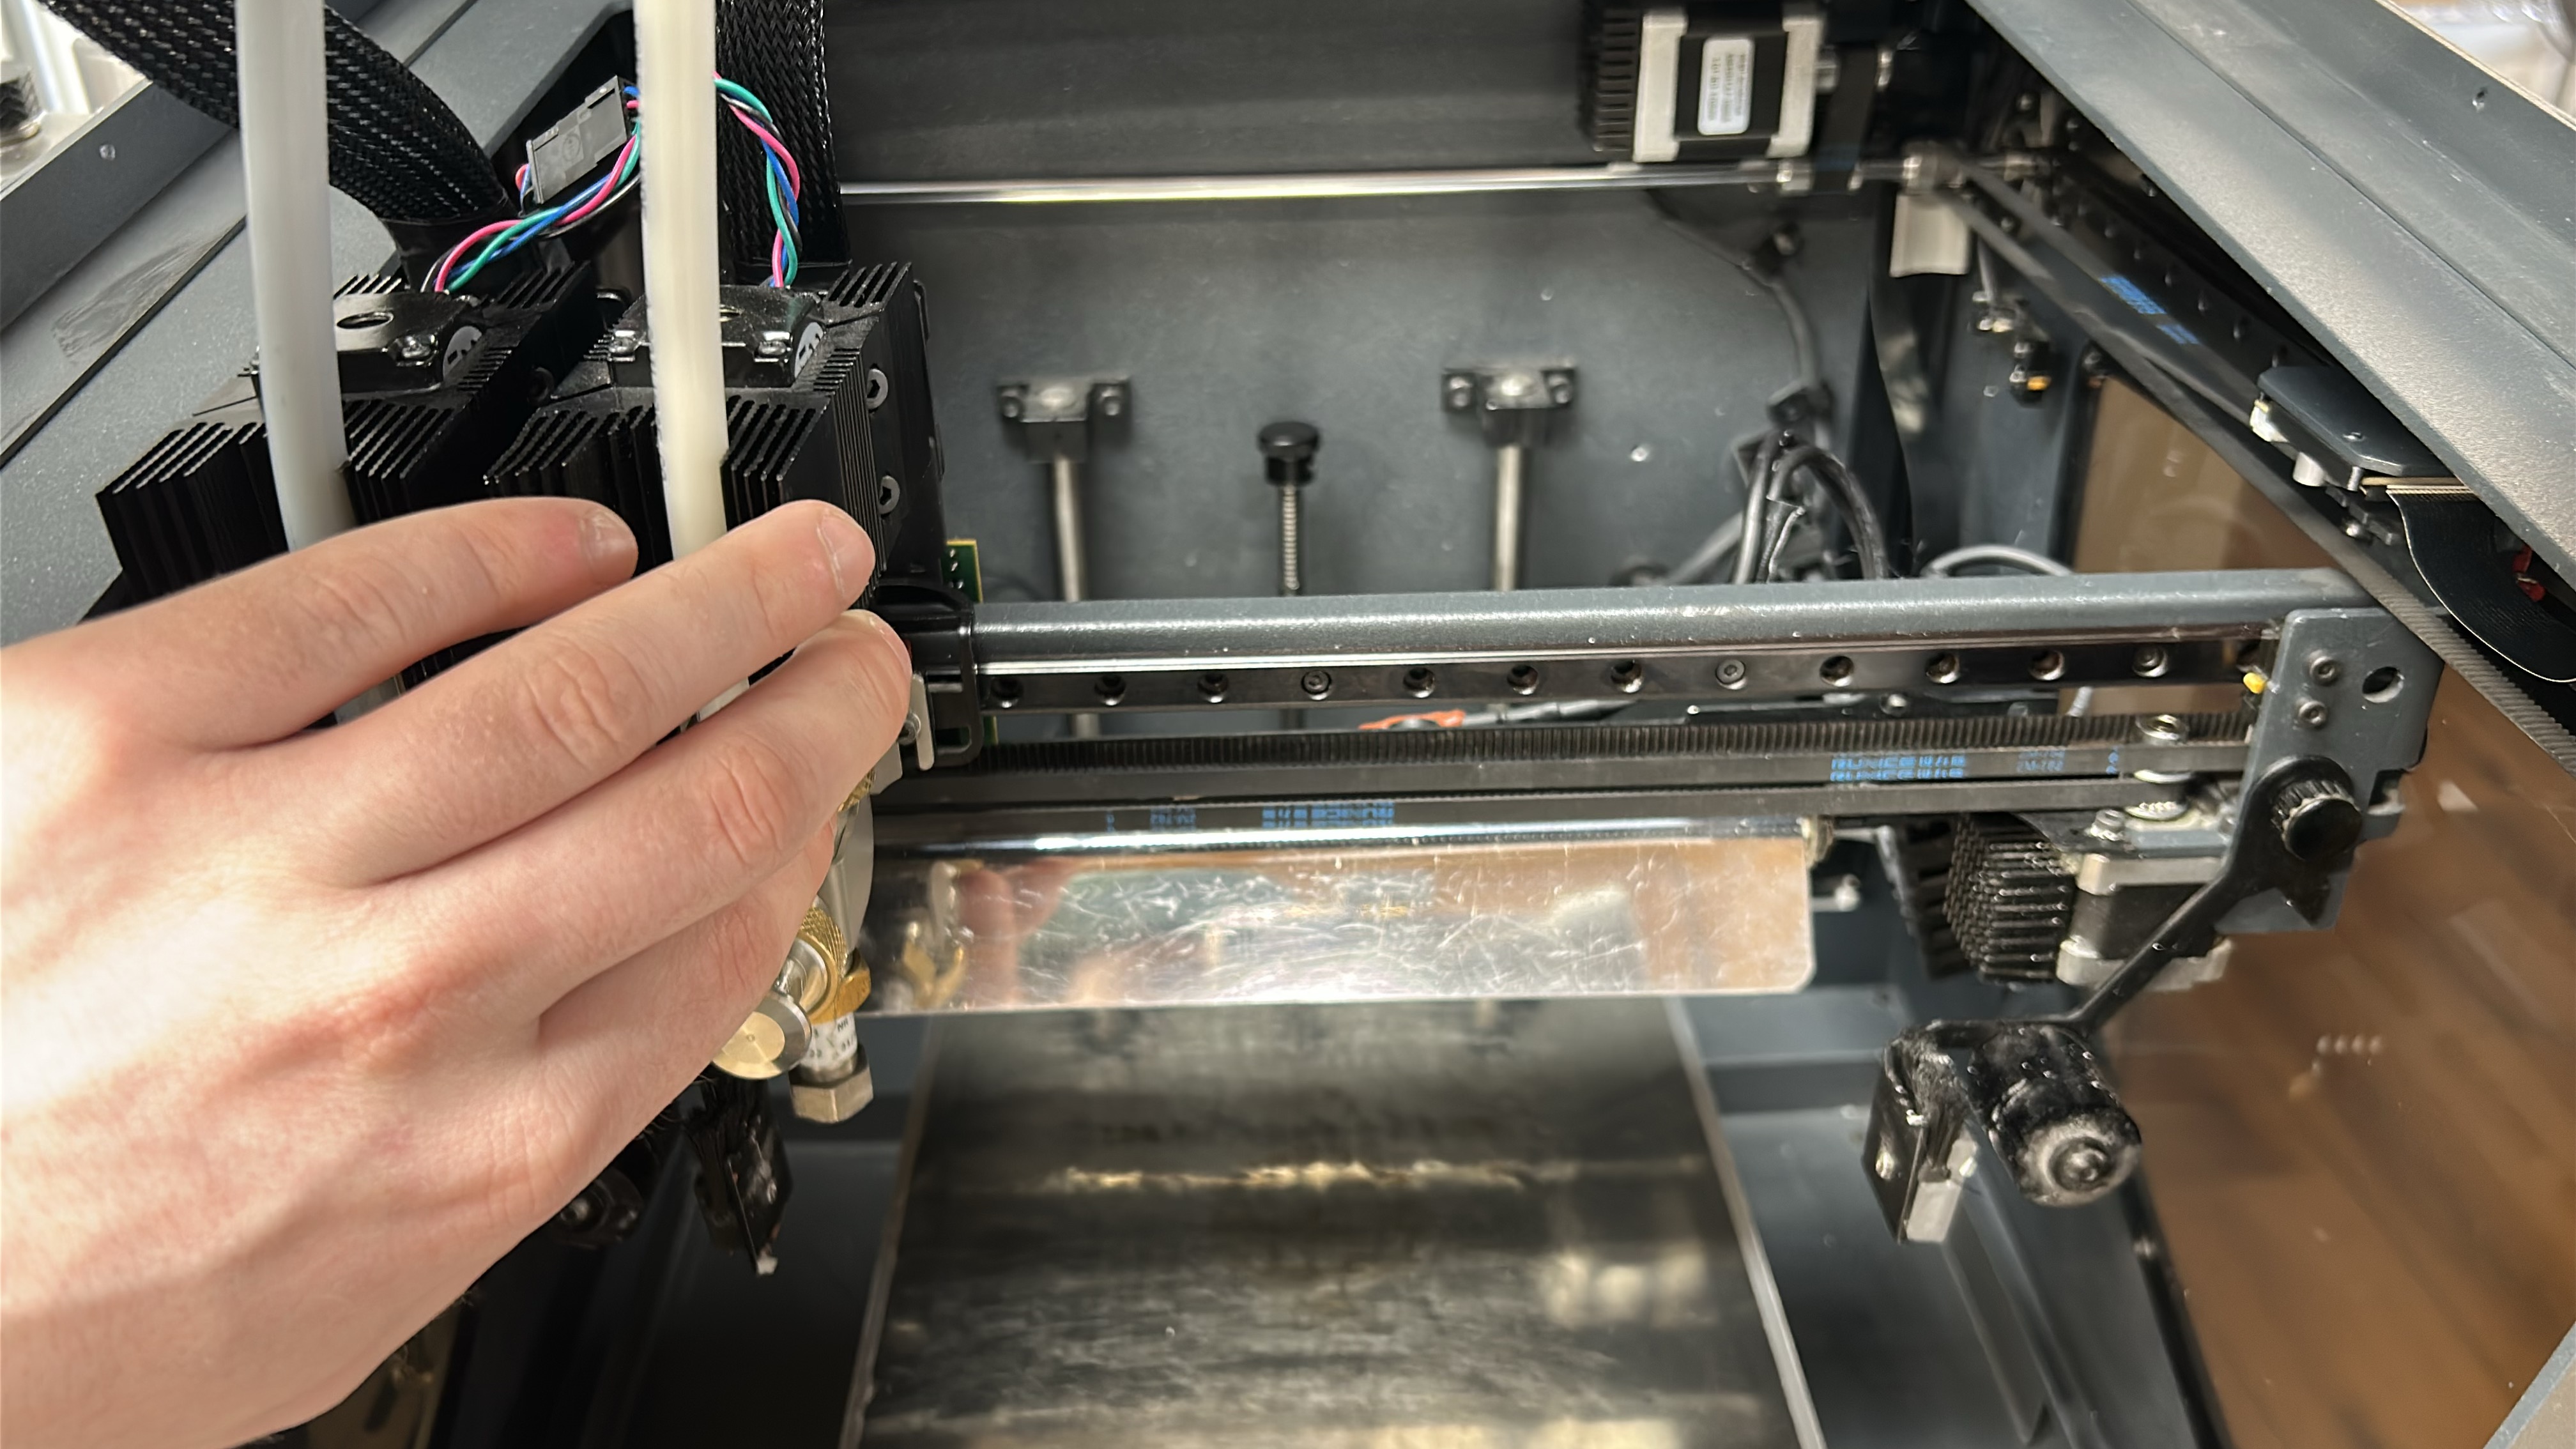
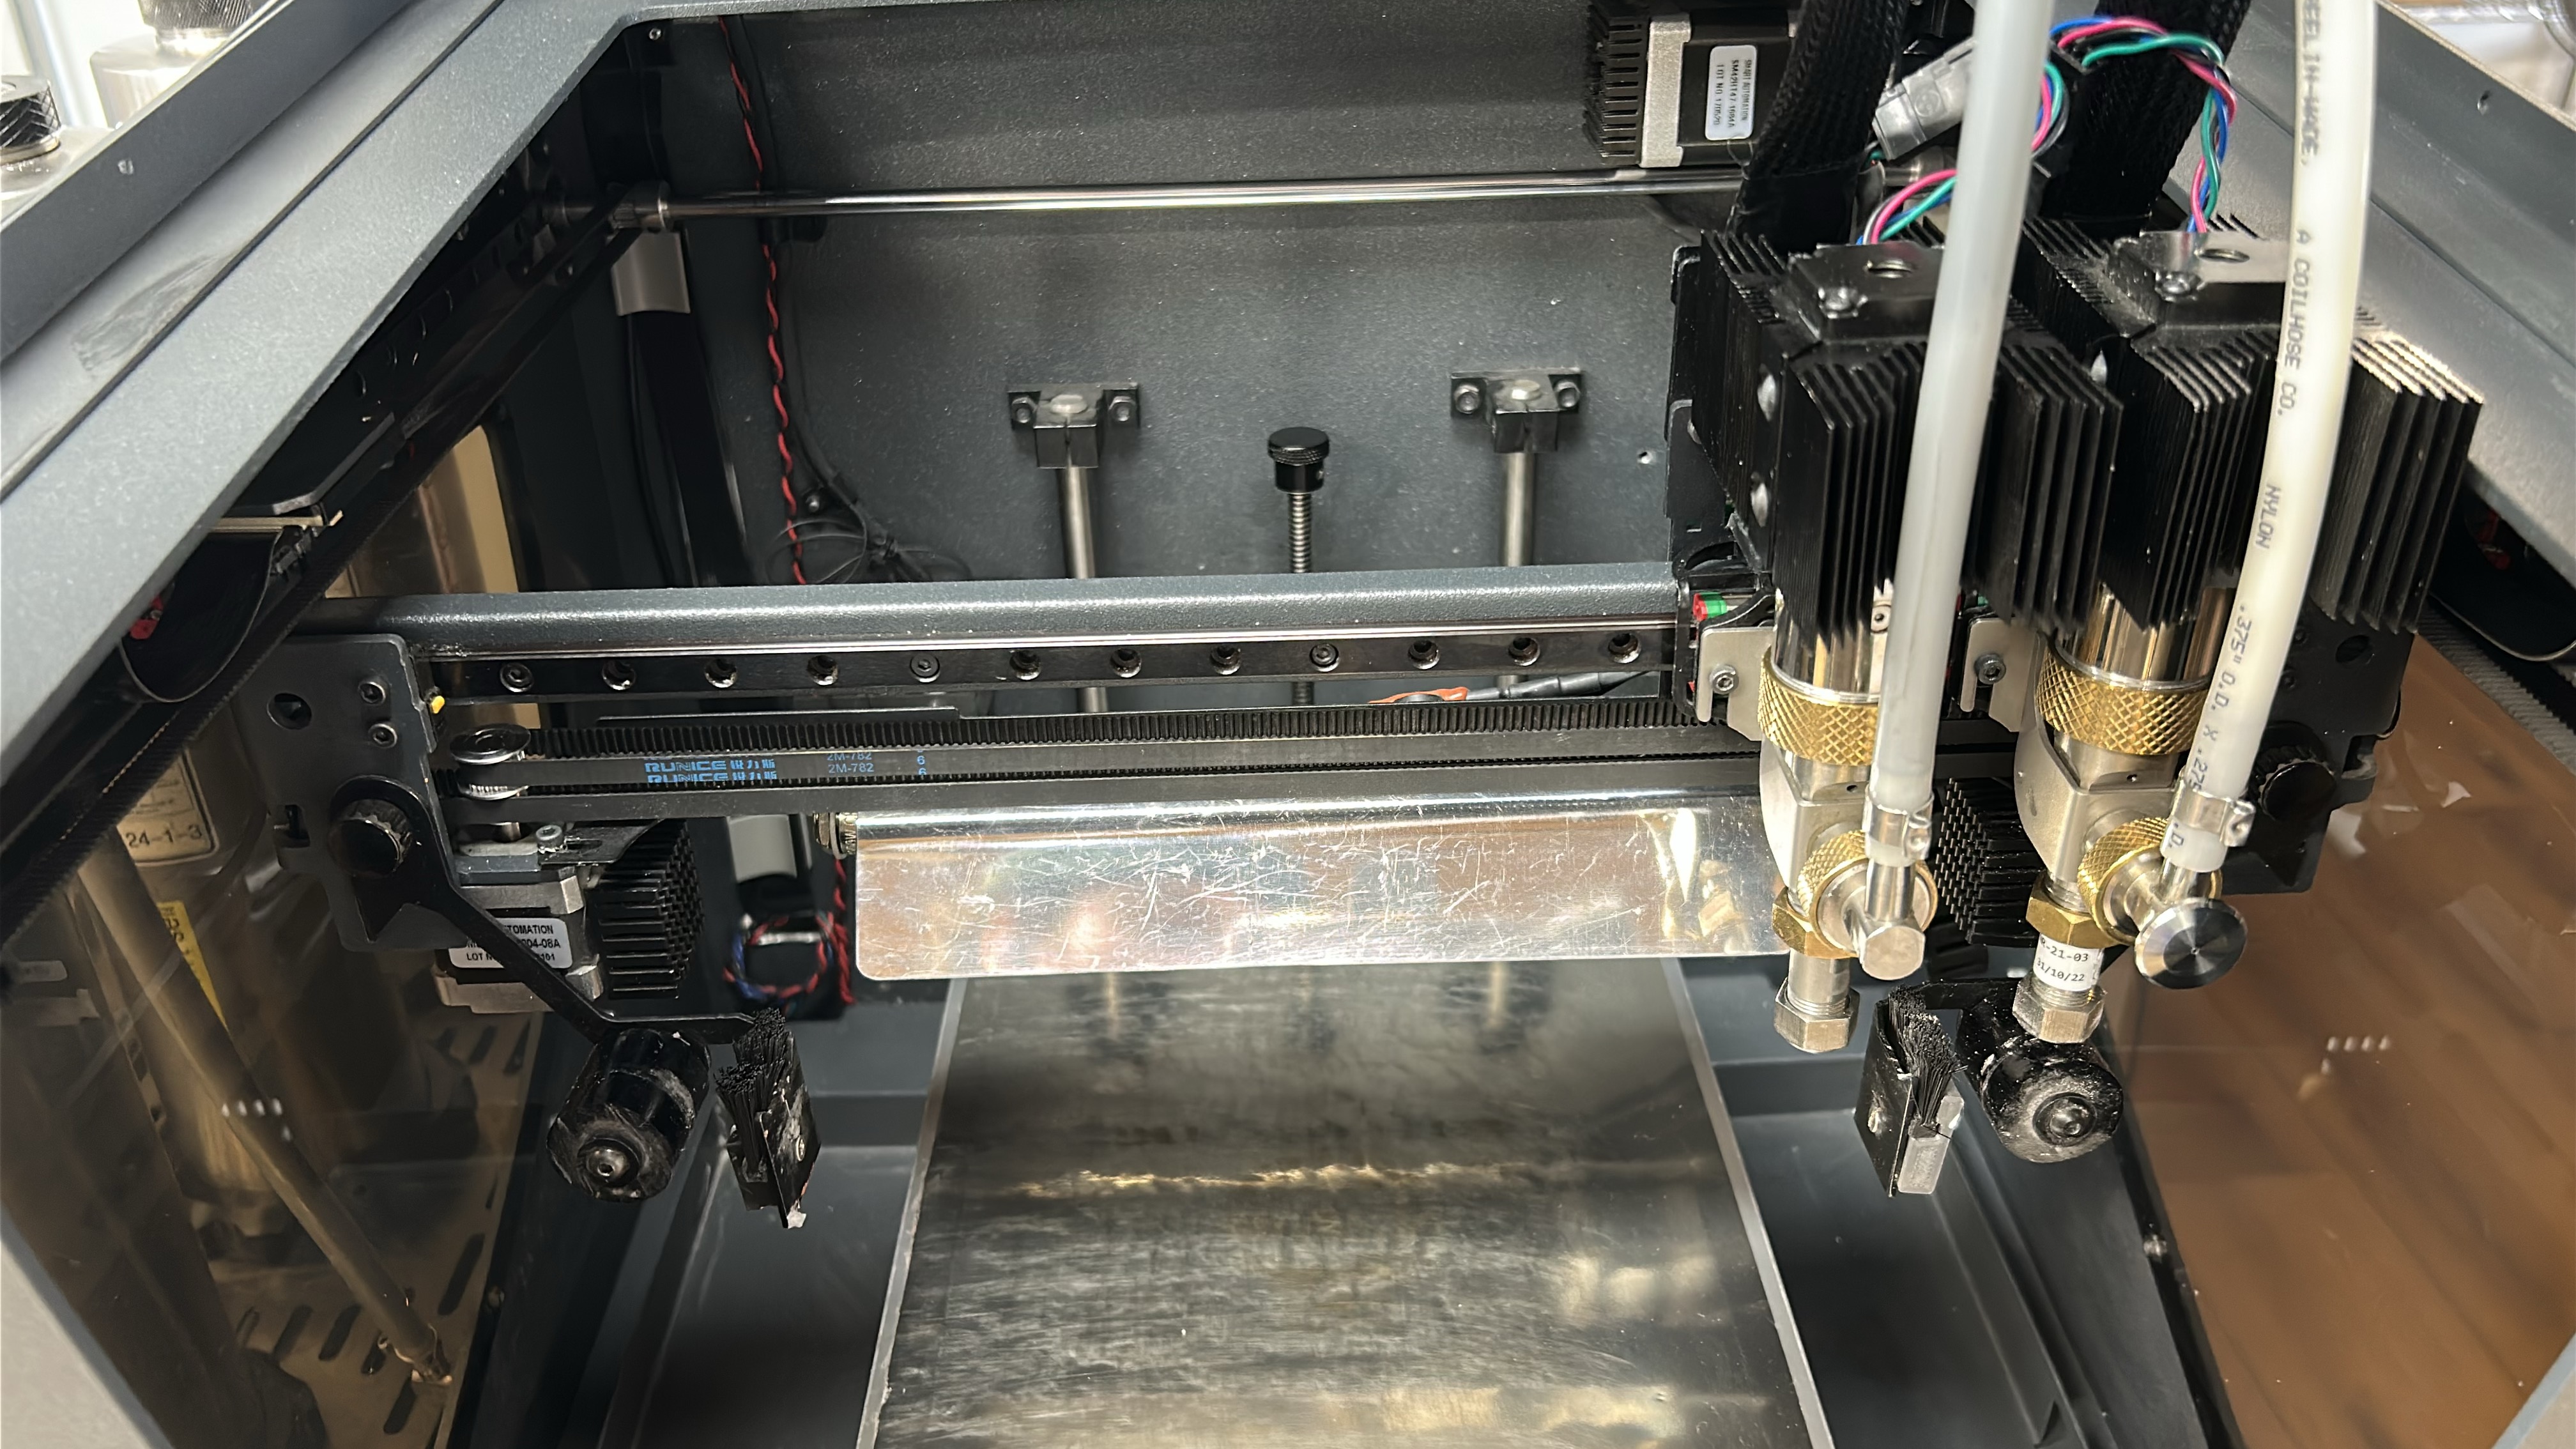
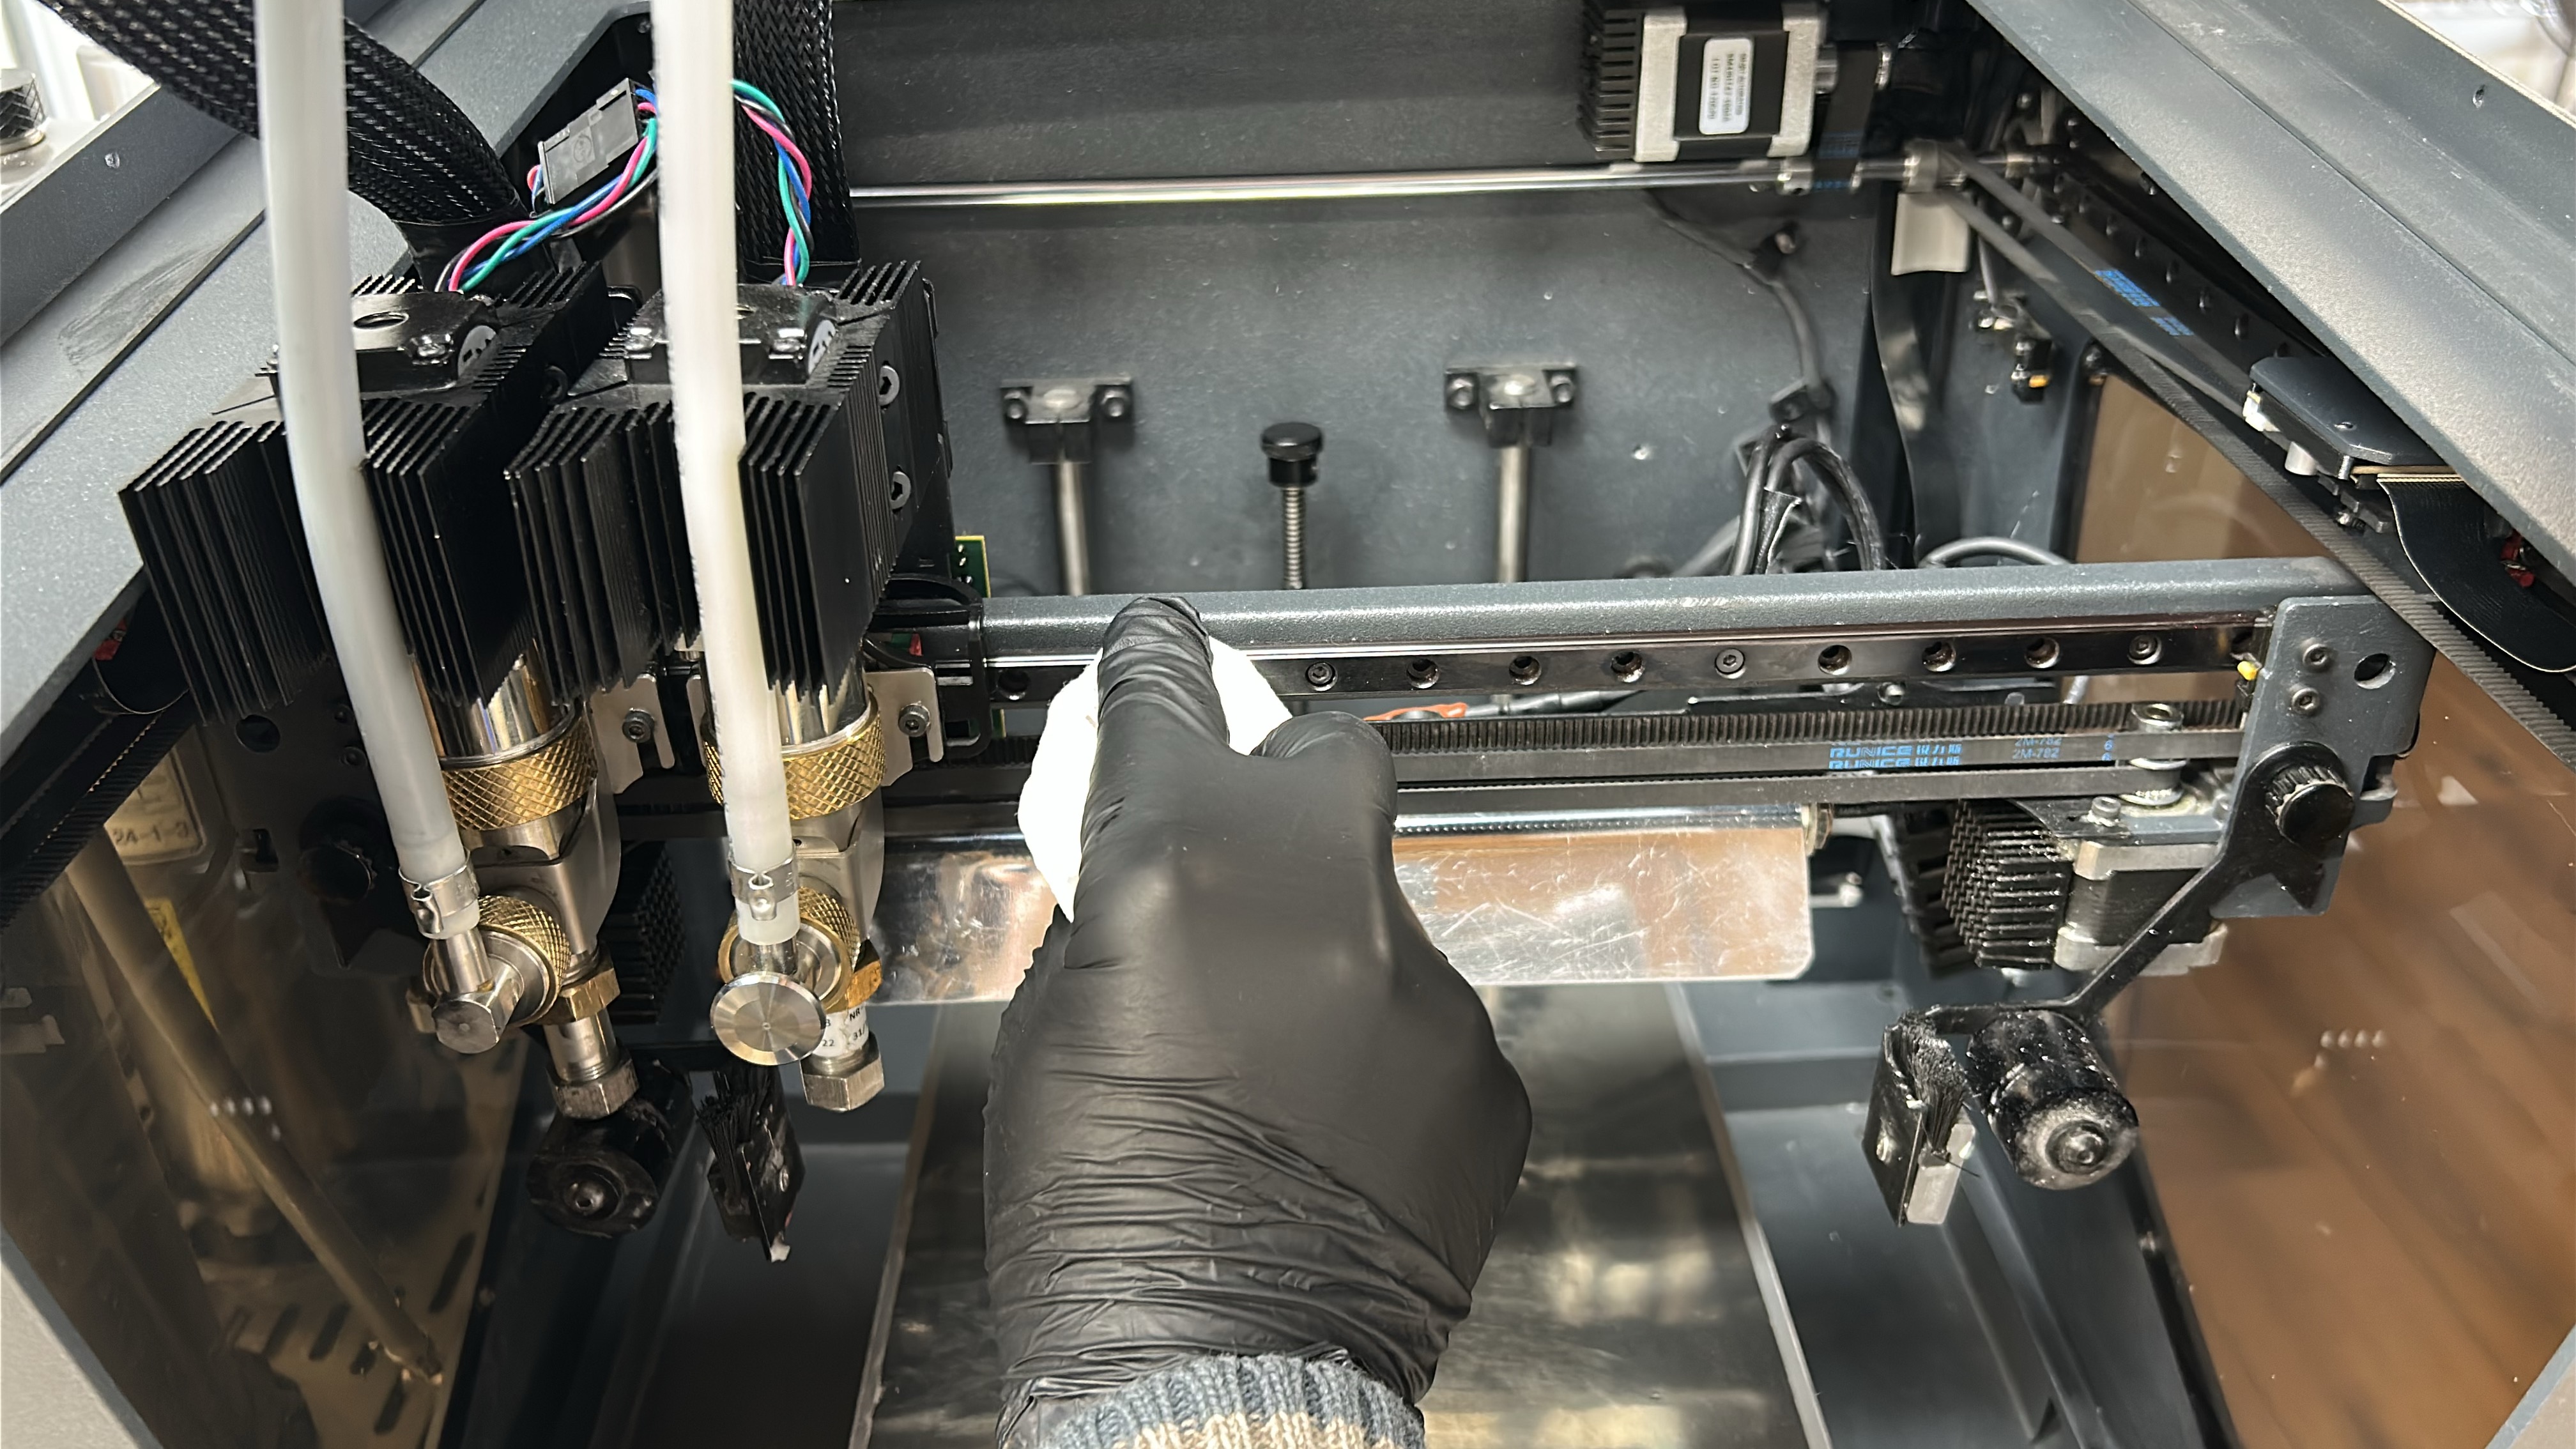
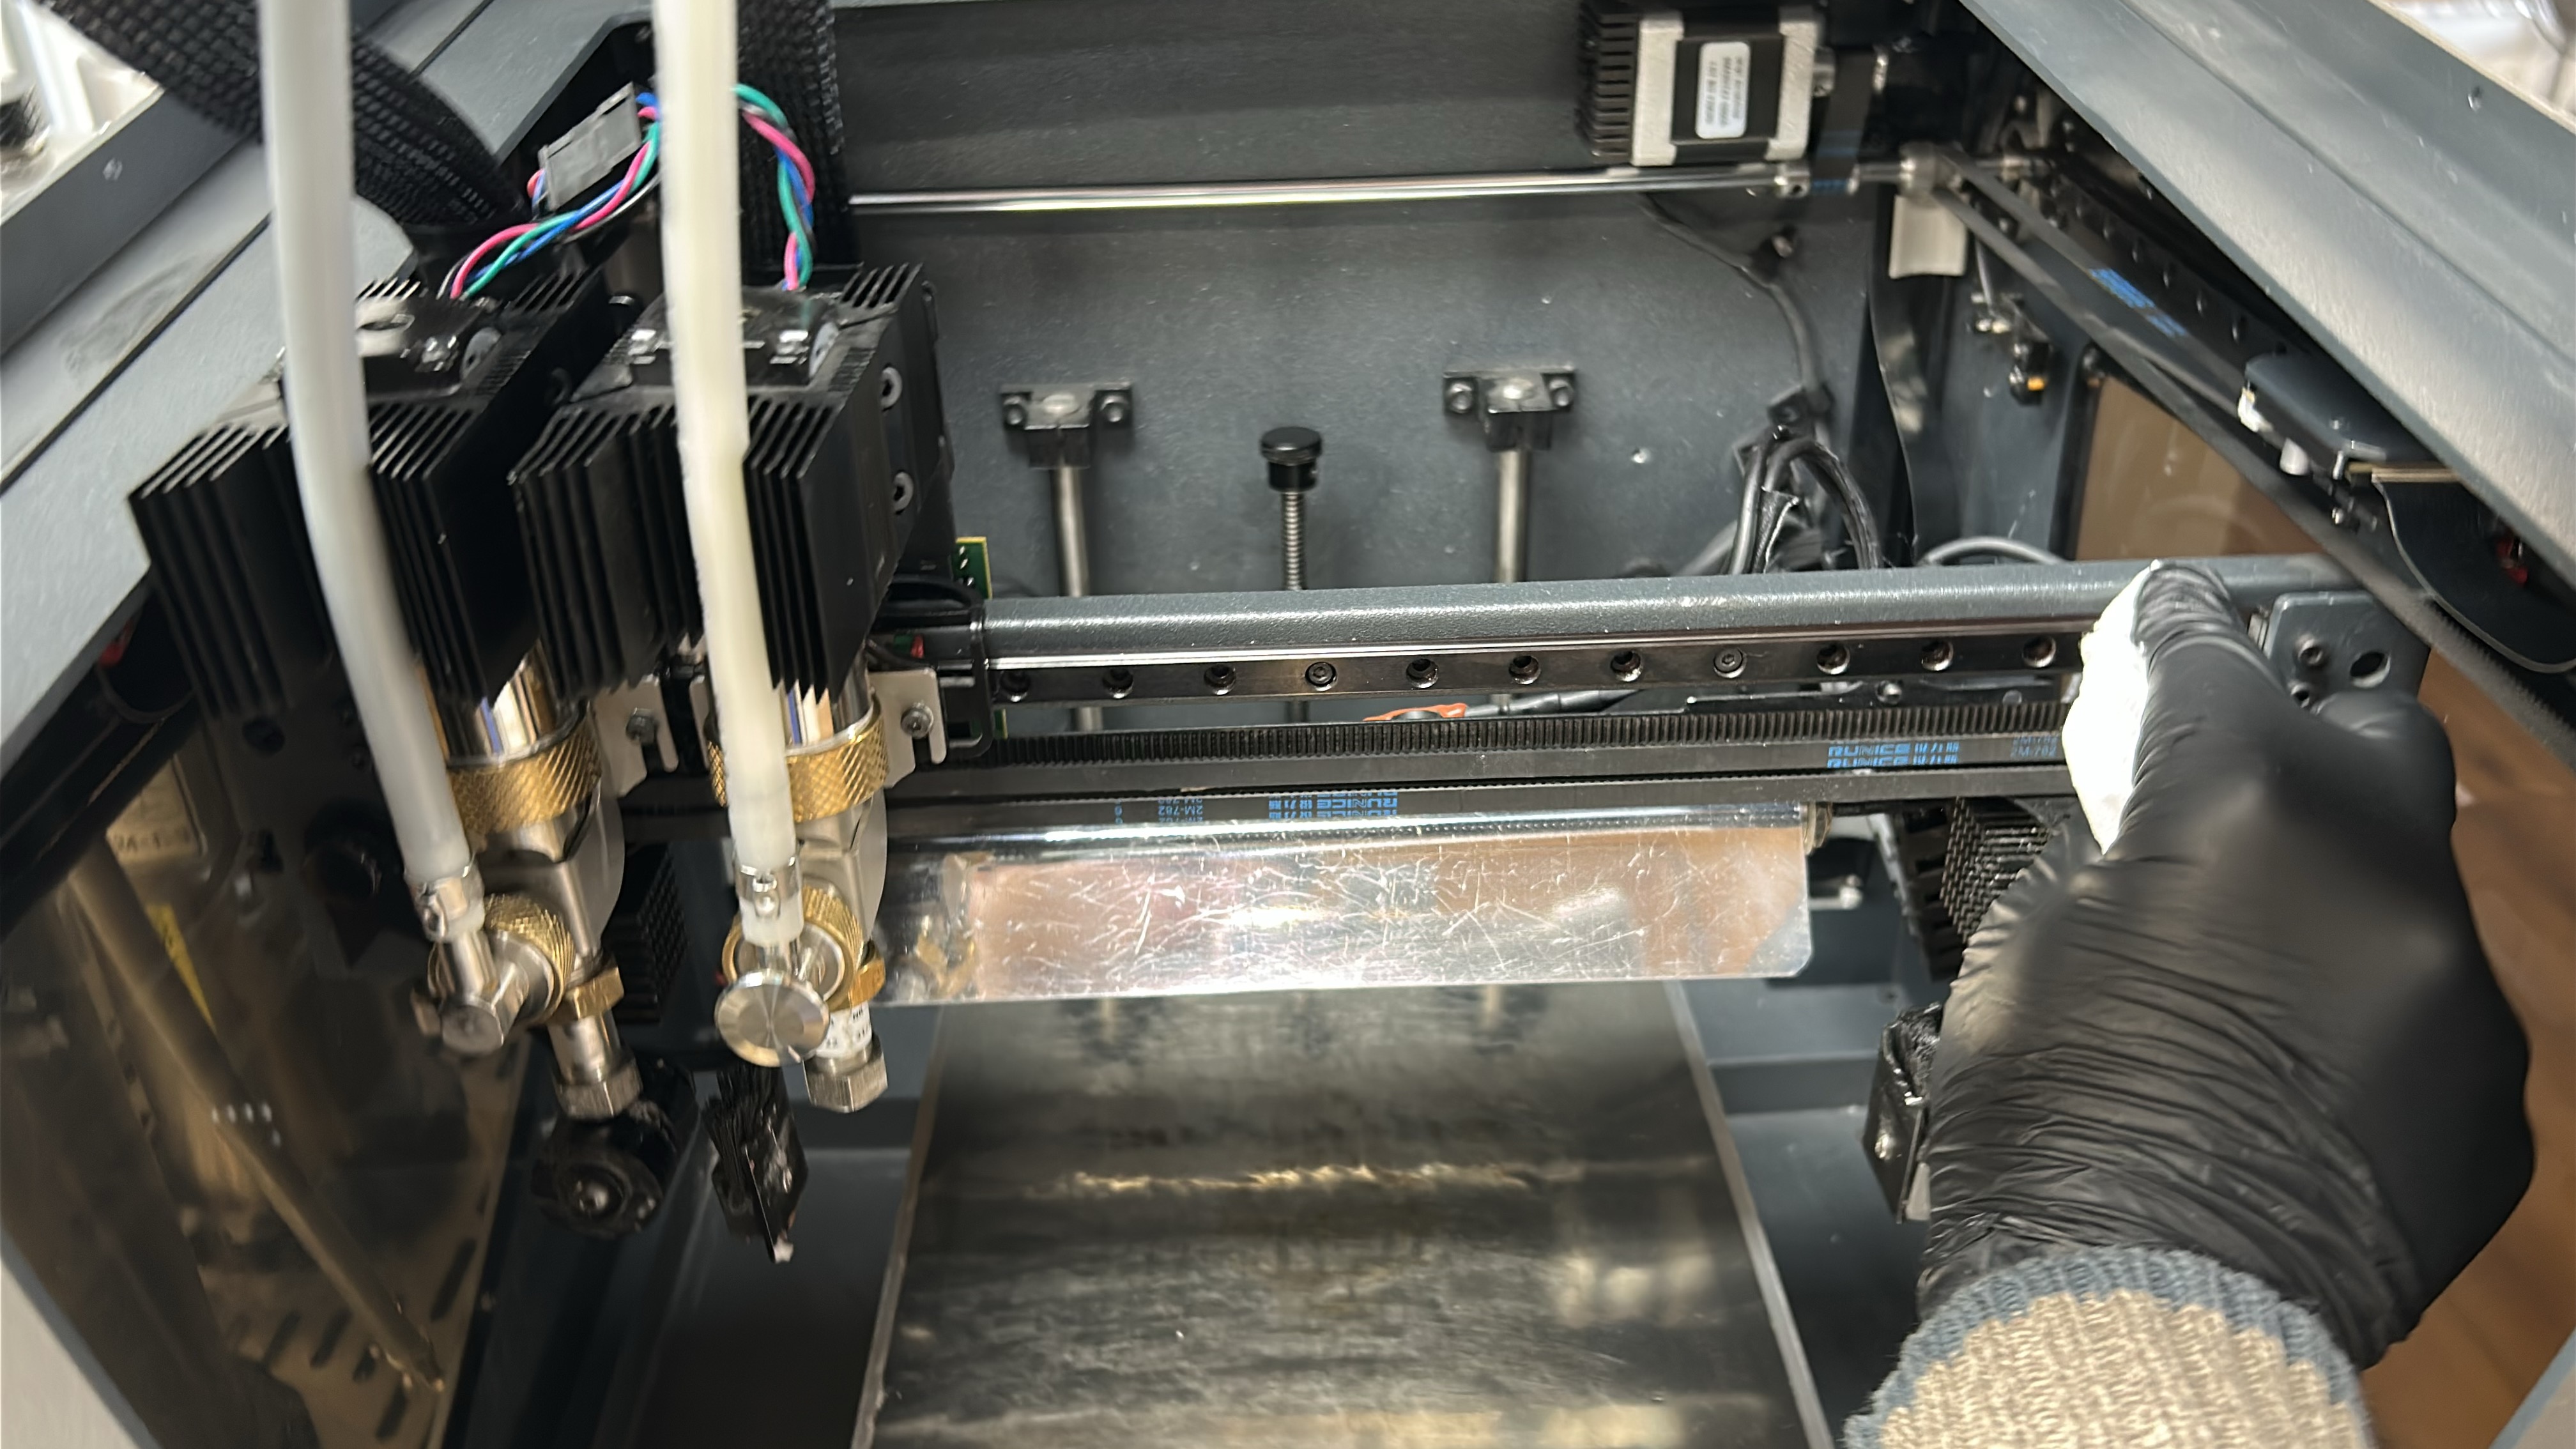
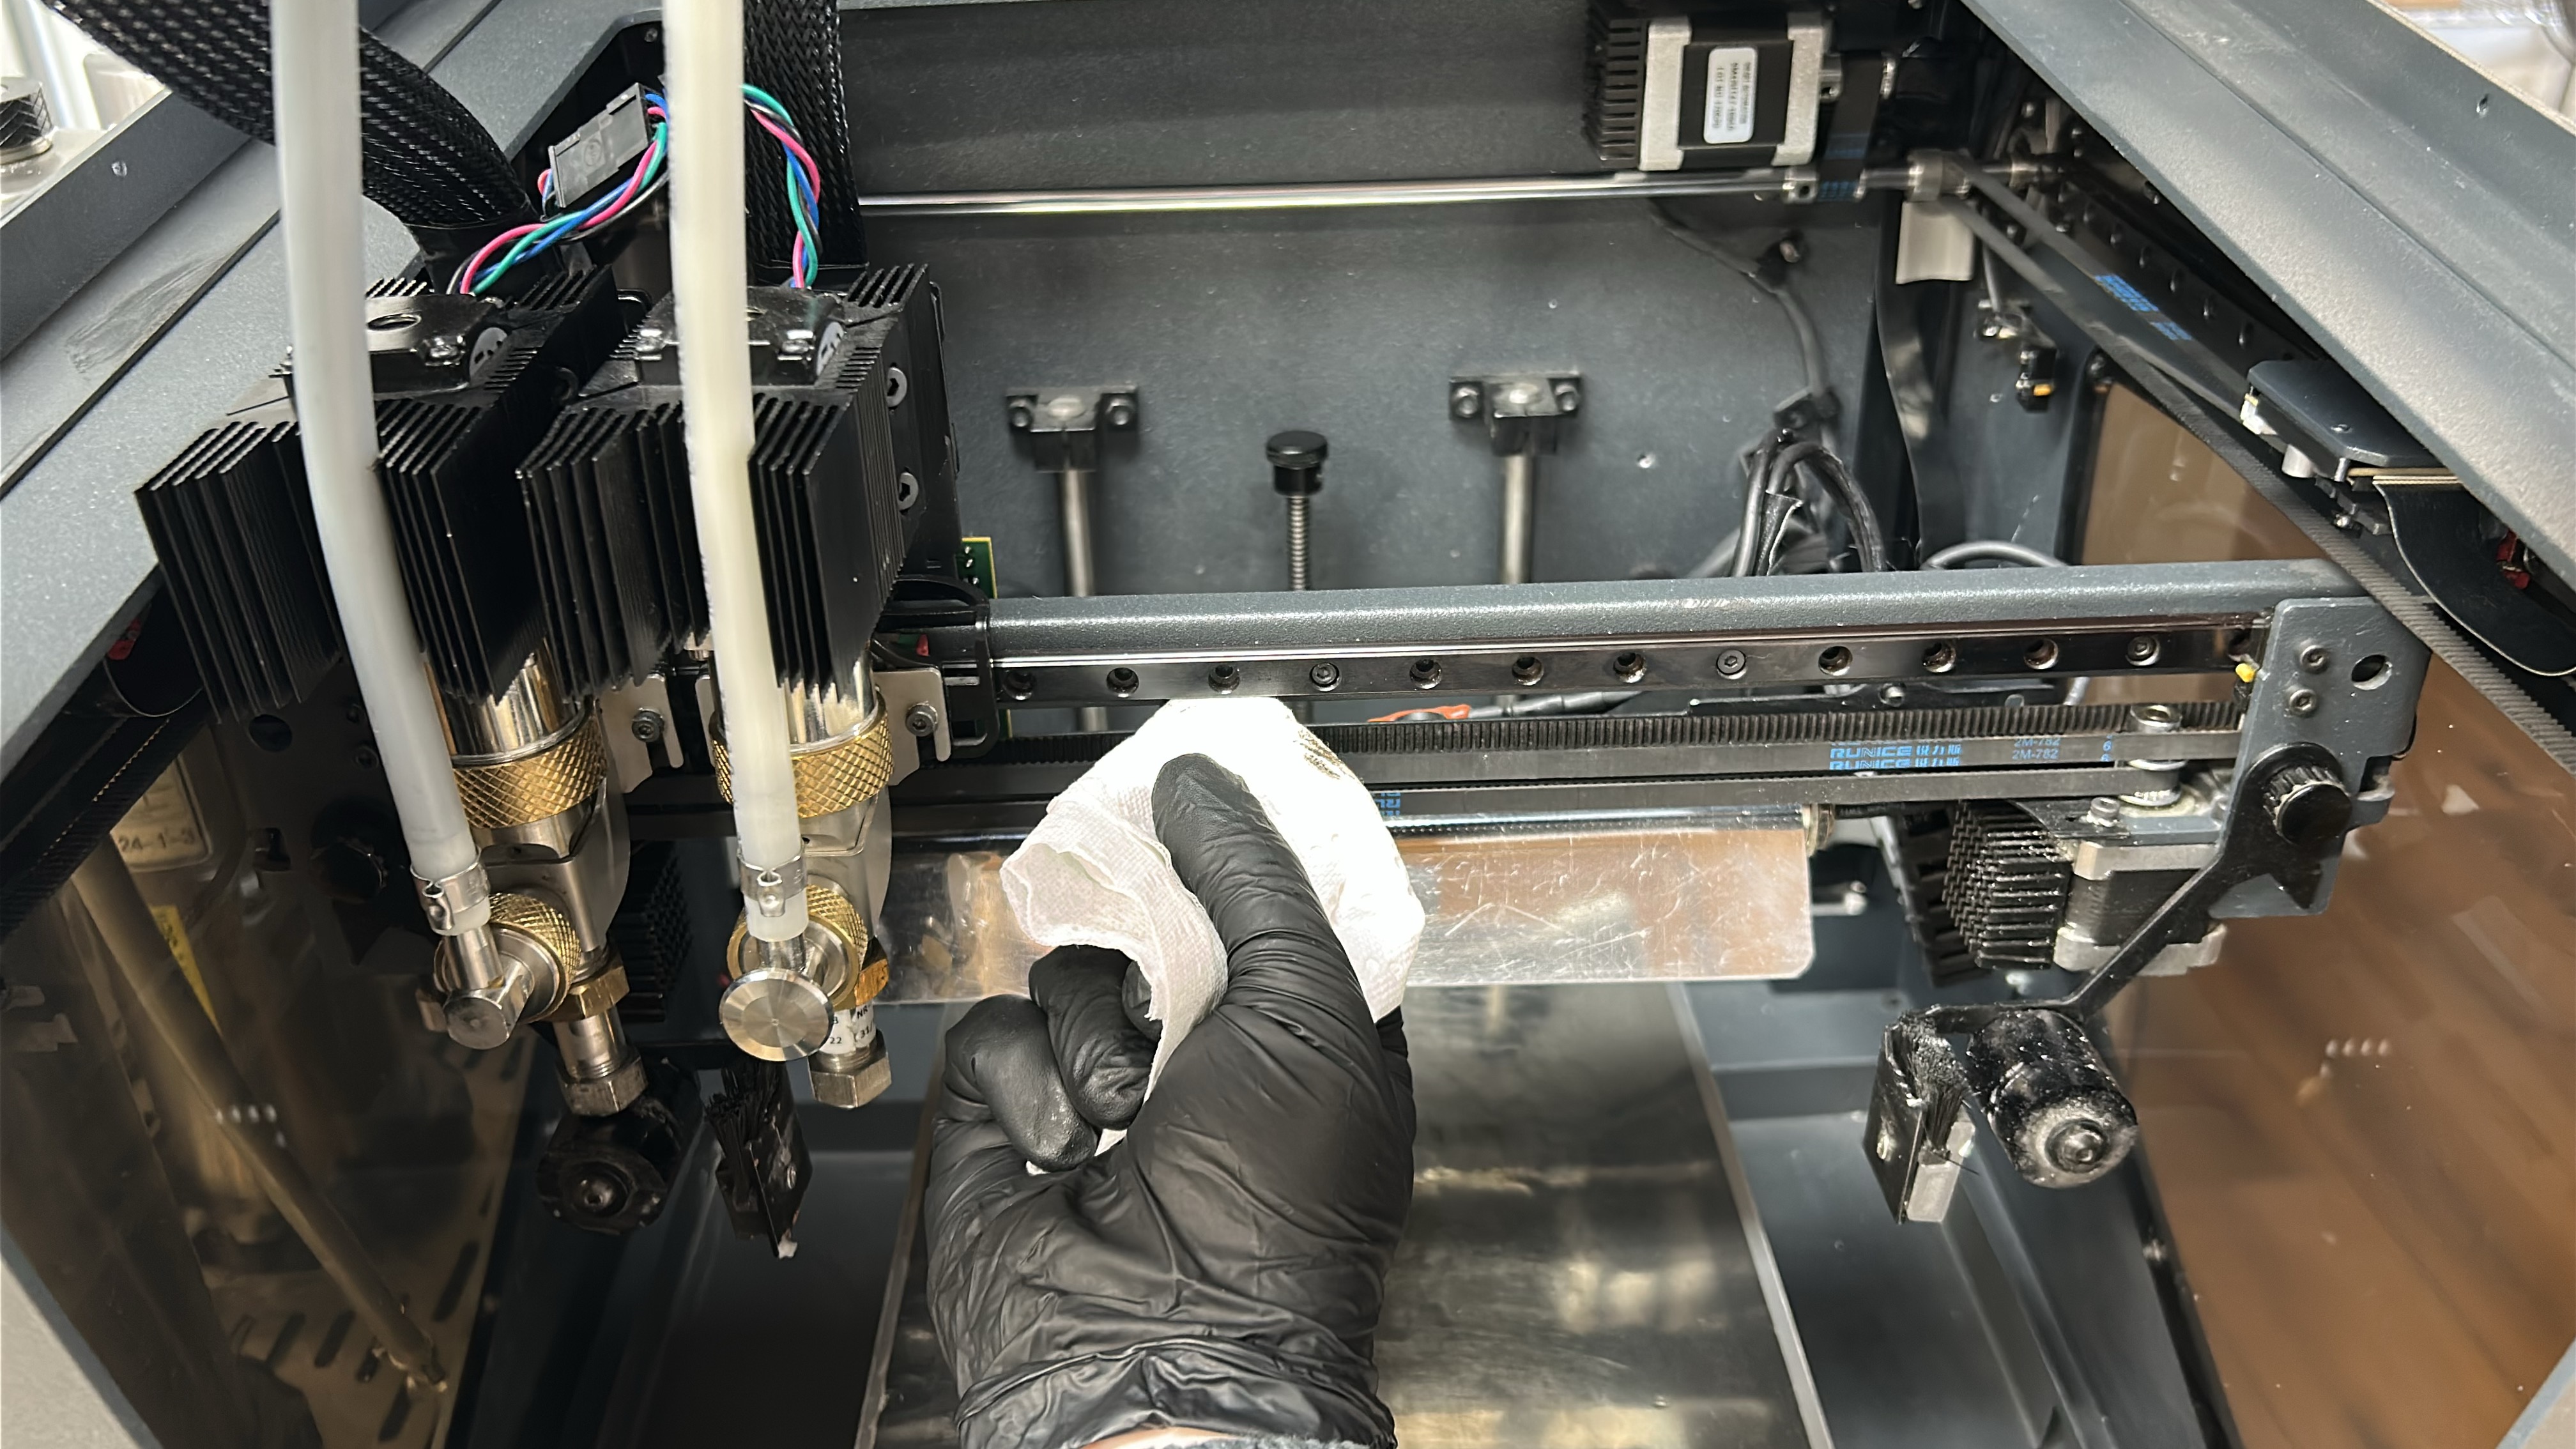
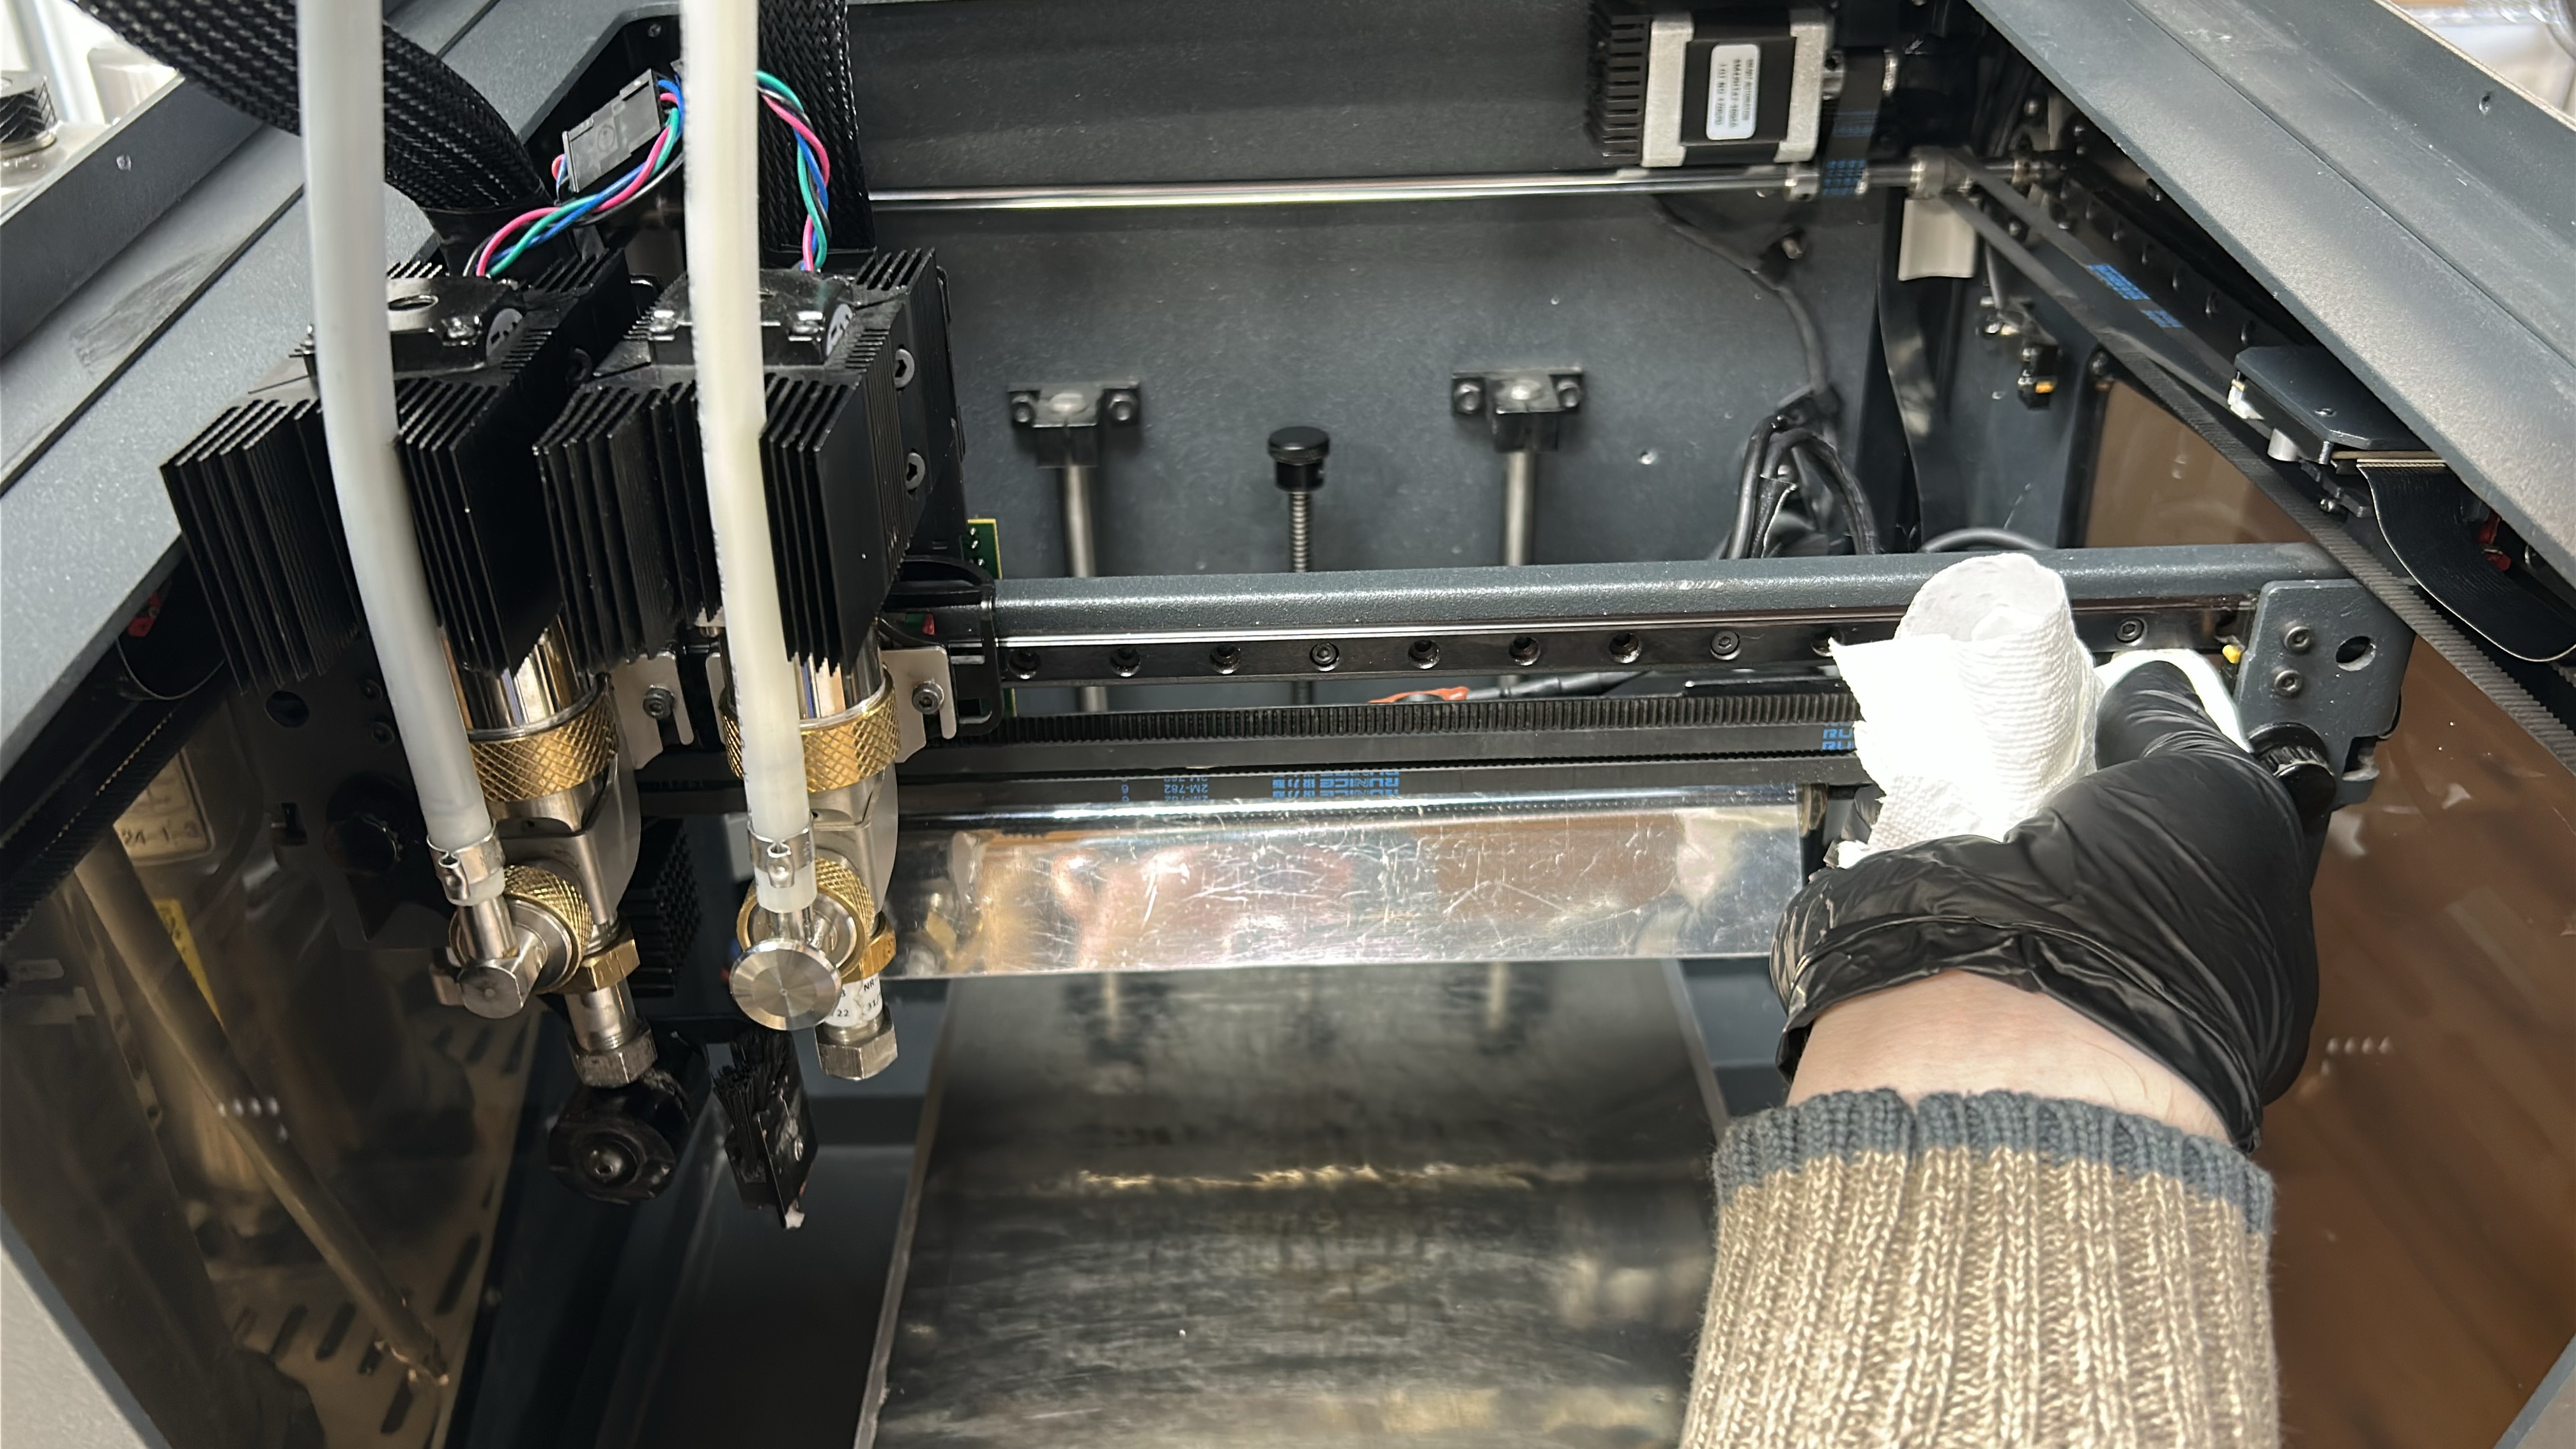
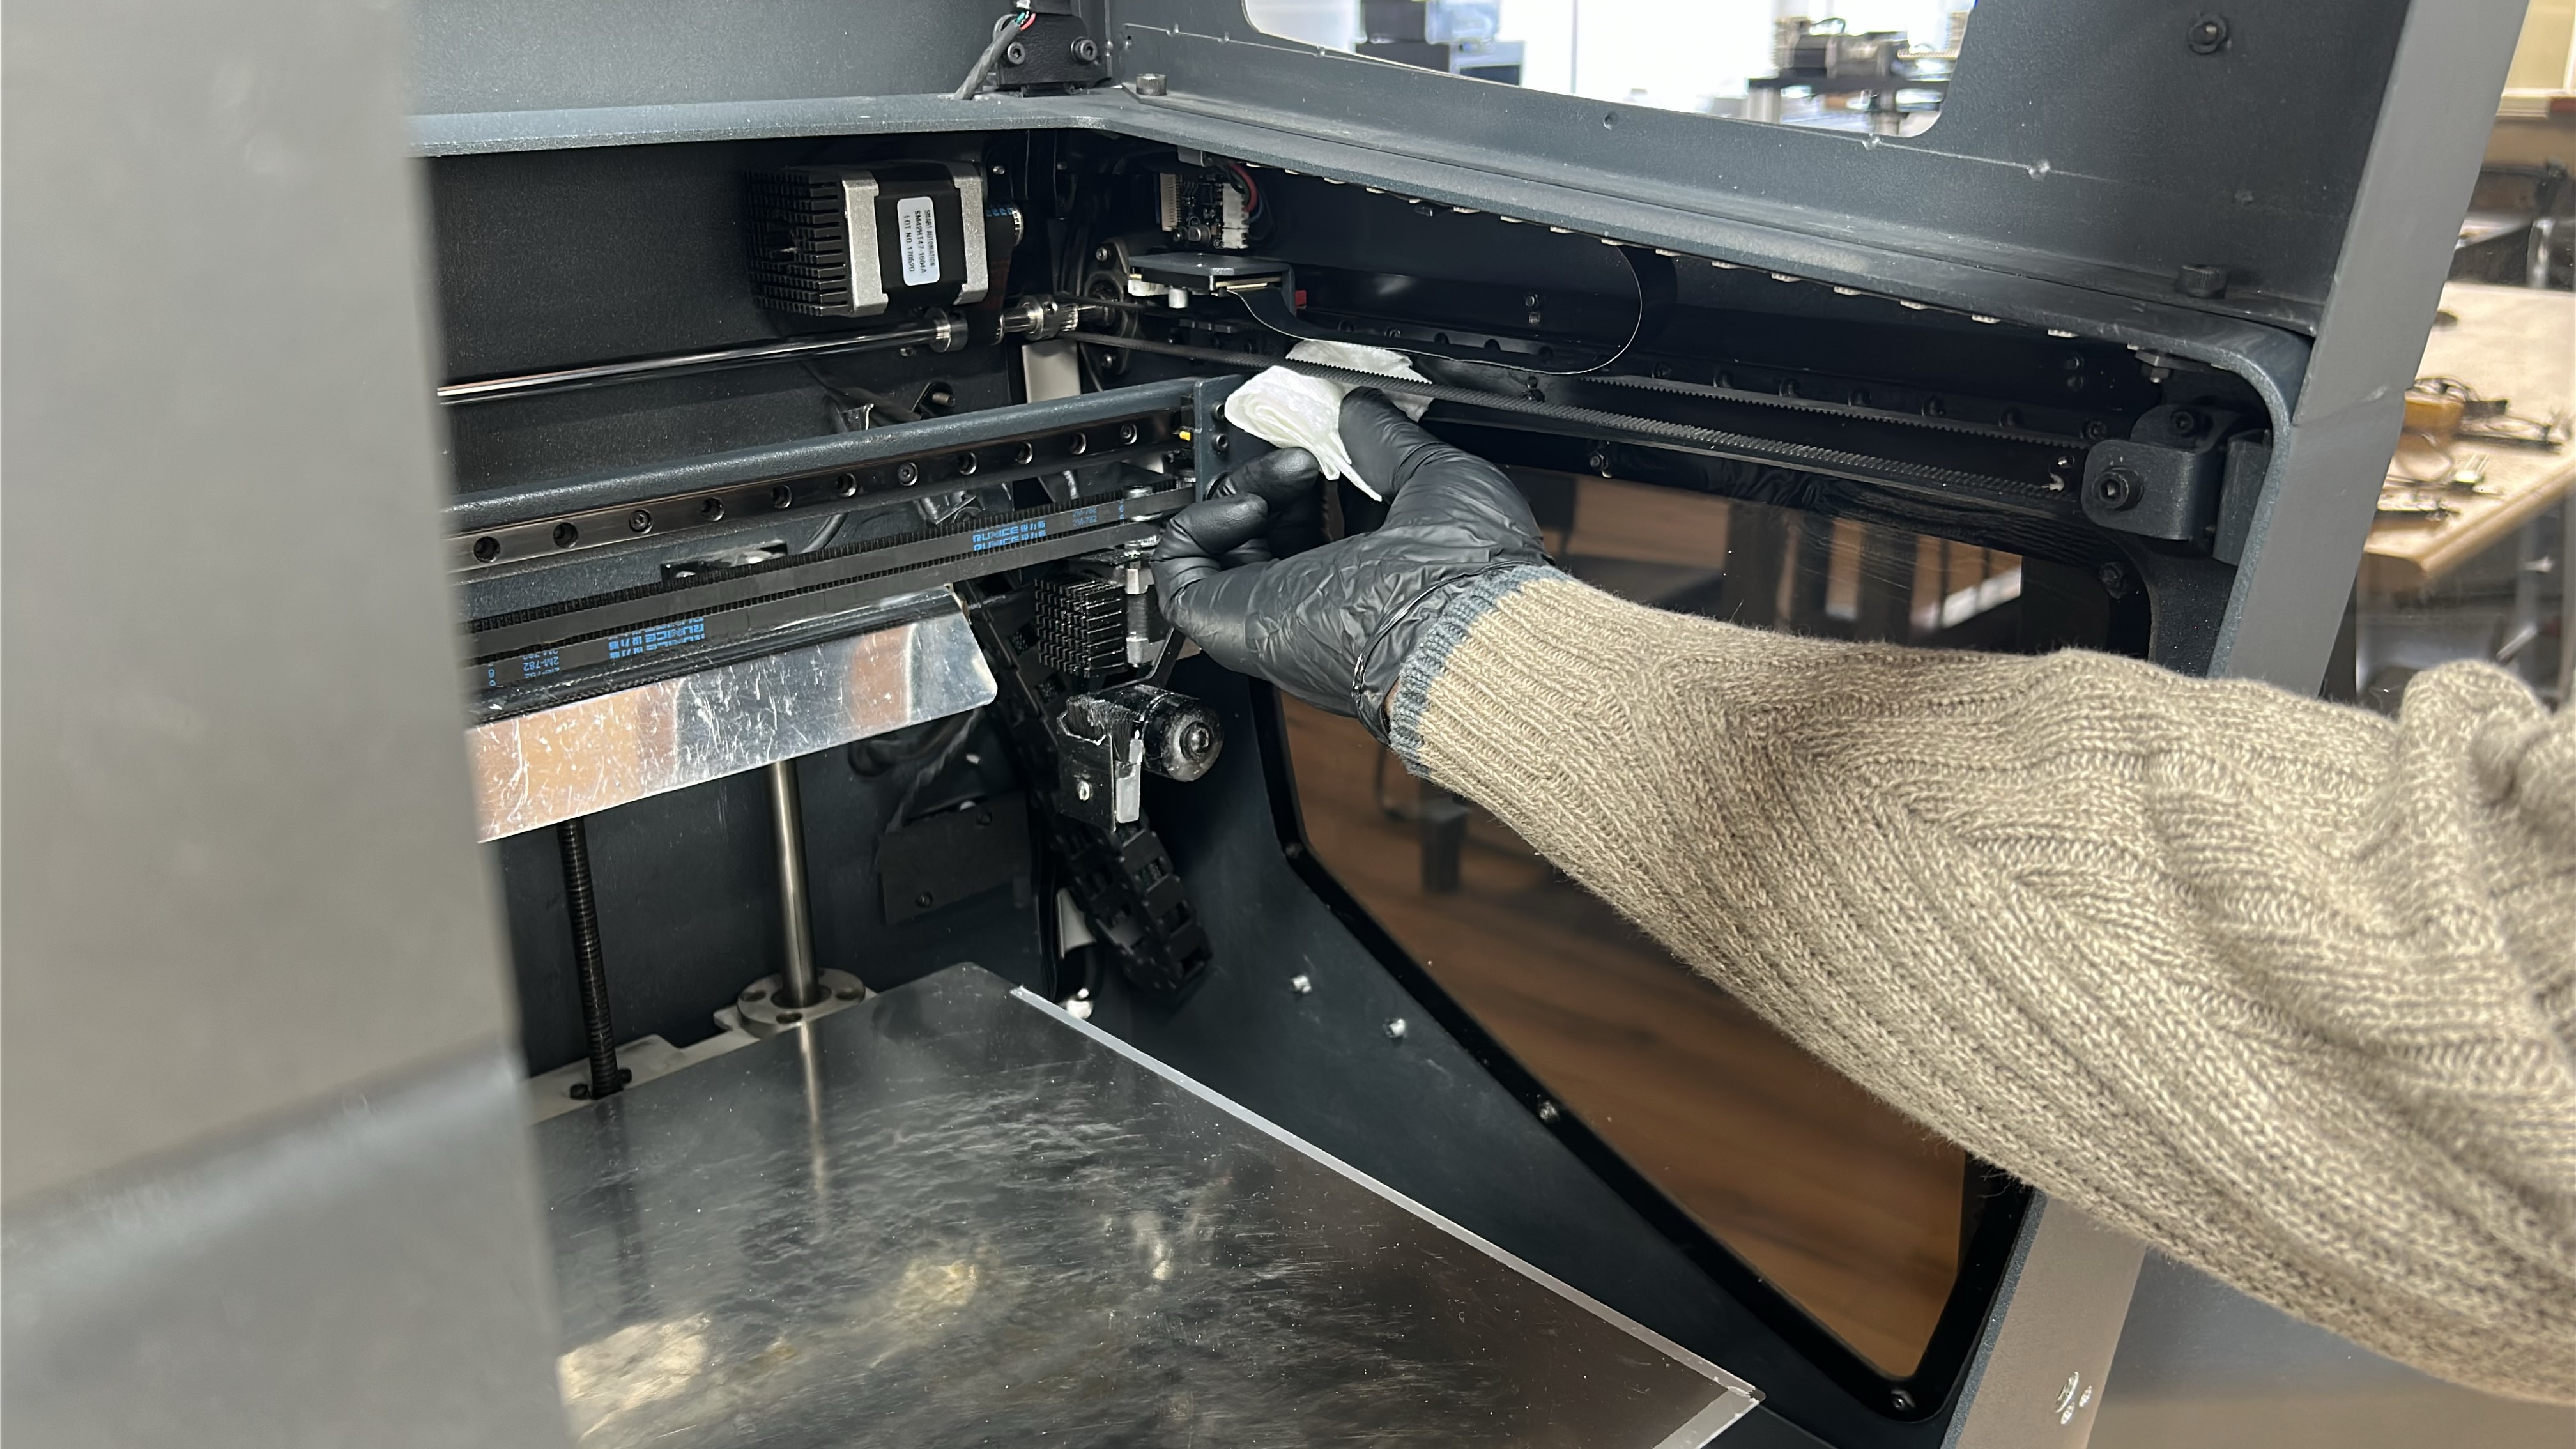
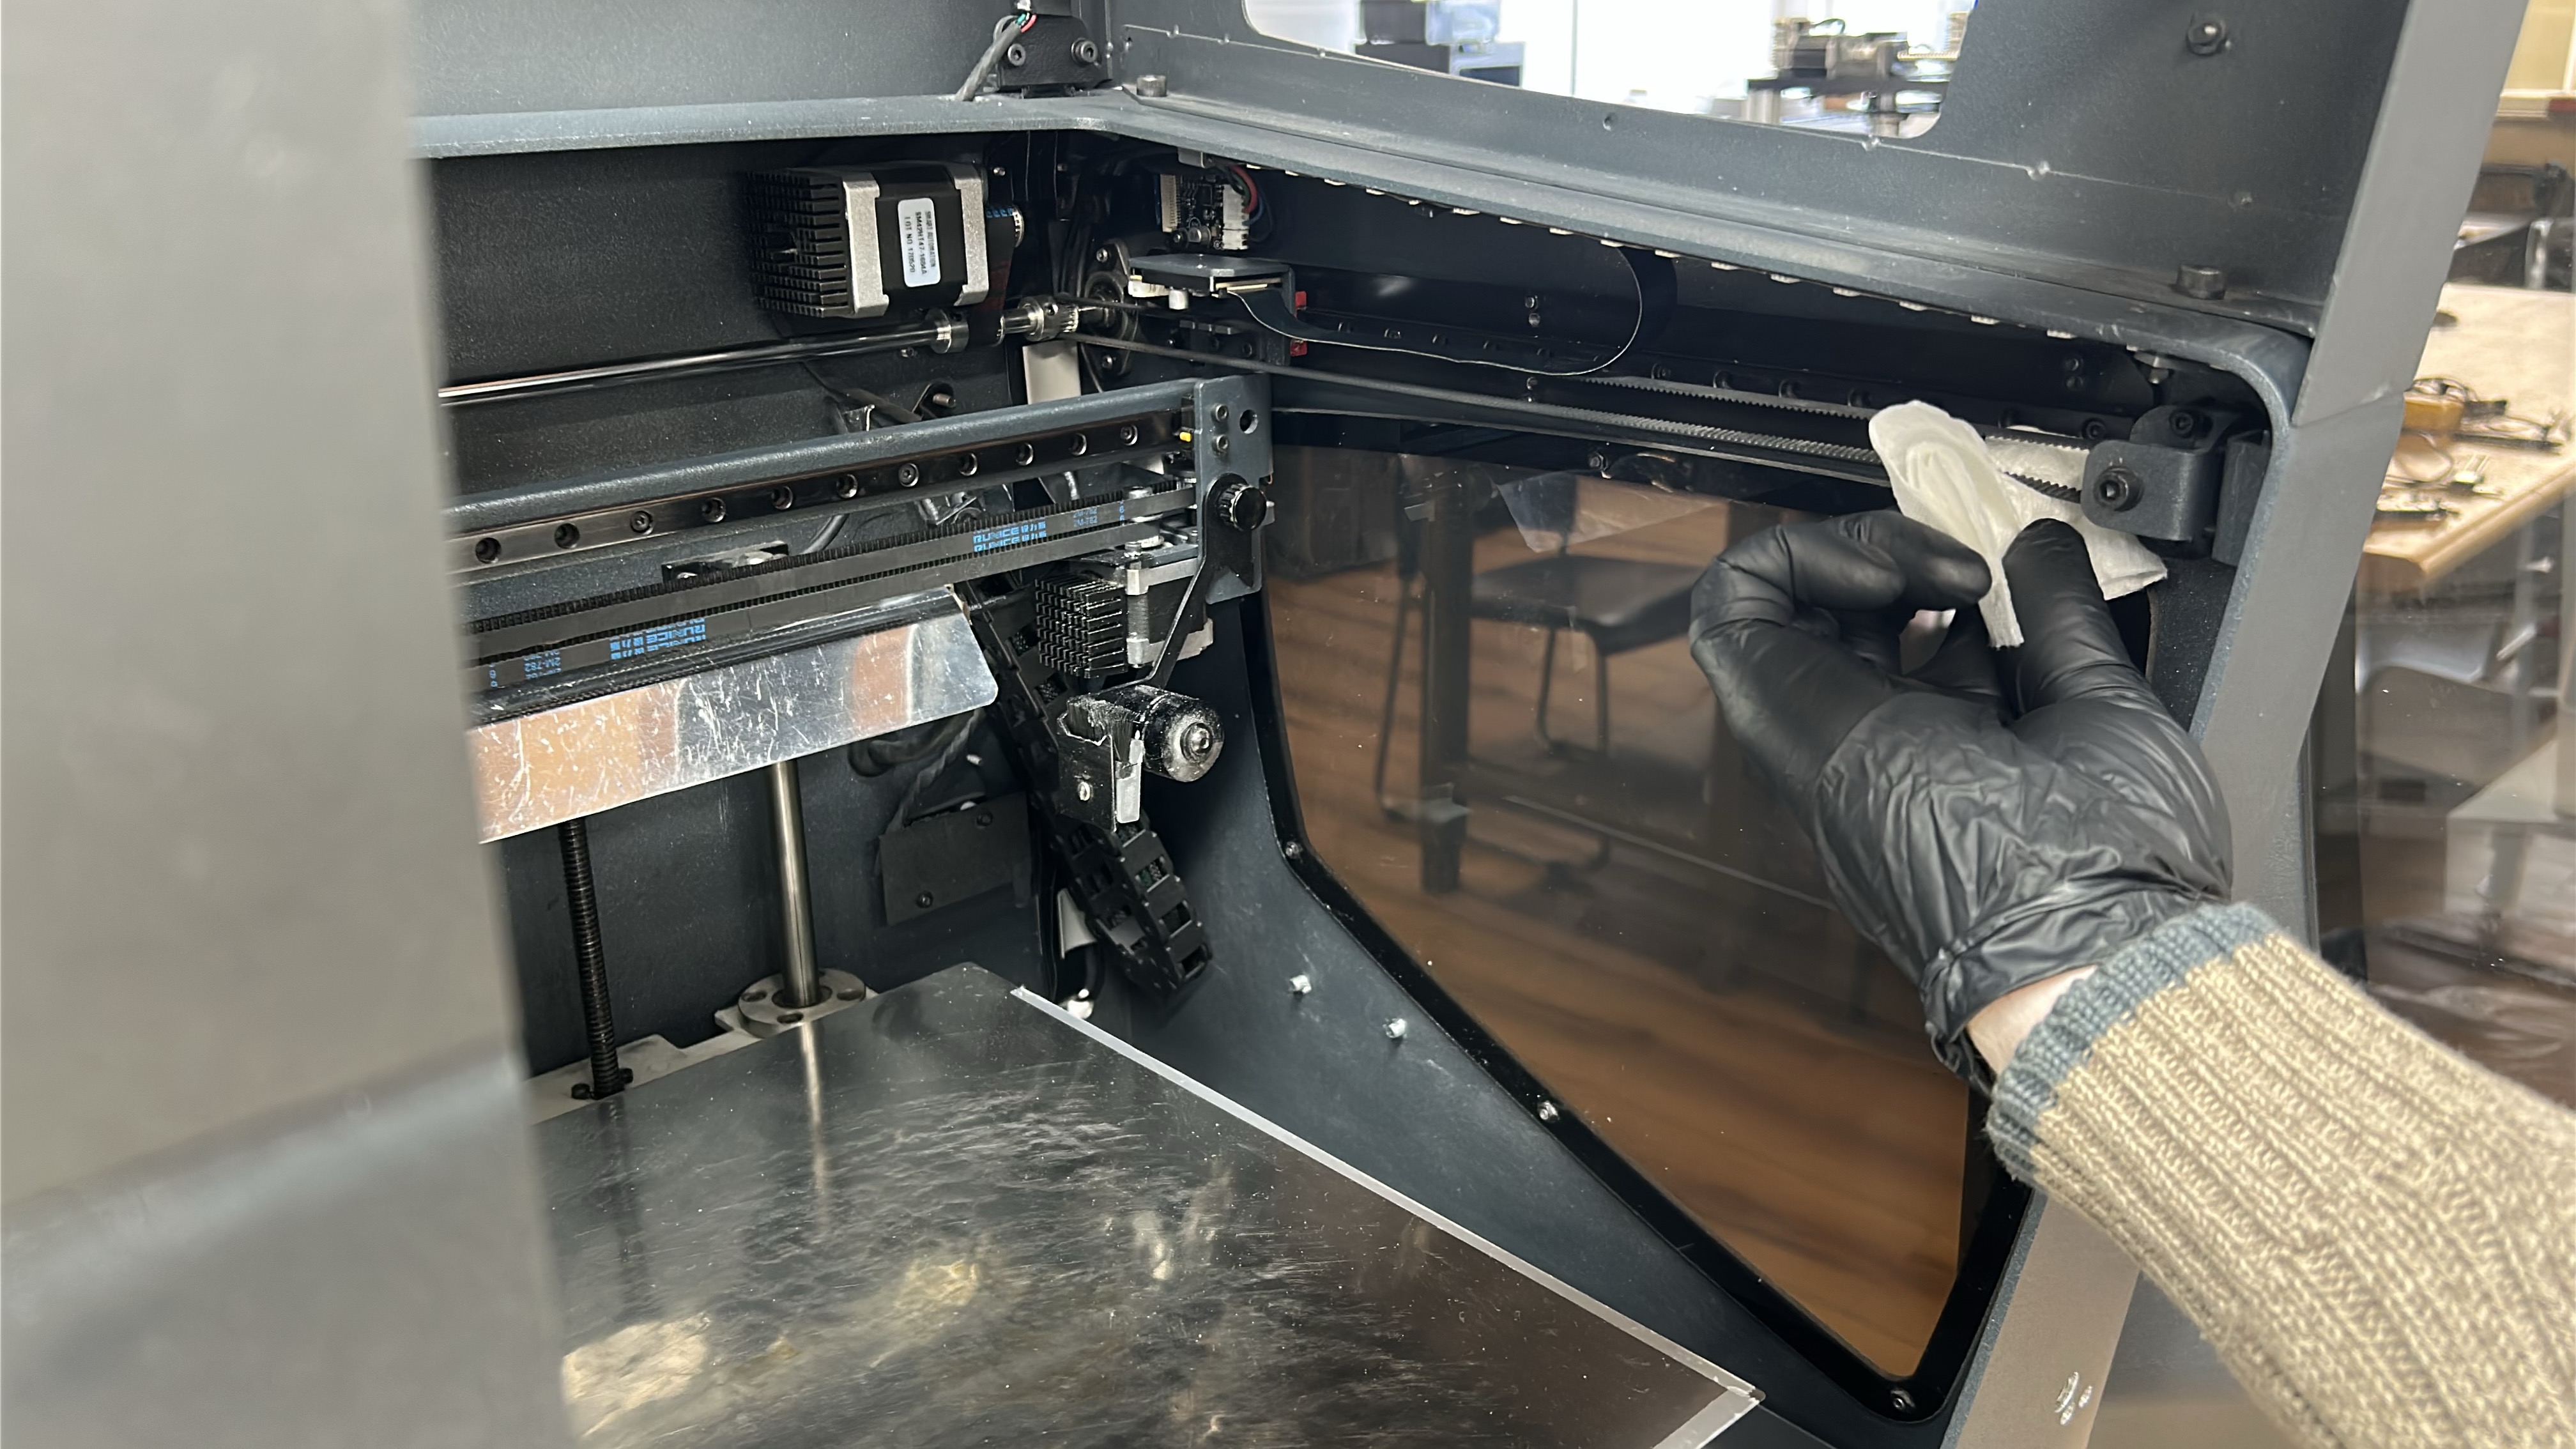
2. Move the printheads to one side of the X-axis, using an absorbent paper towel or cloth remove any dirt or dust build up from the X-axis linear guide. Start wiping from the middle of the guide rail and moving to the open end. Move the printheads to the opposing side of the X-axis linear guide and repeat the process wiping in the opposite direction.
|
|
 |
 |
 |
 |
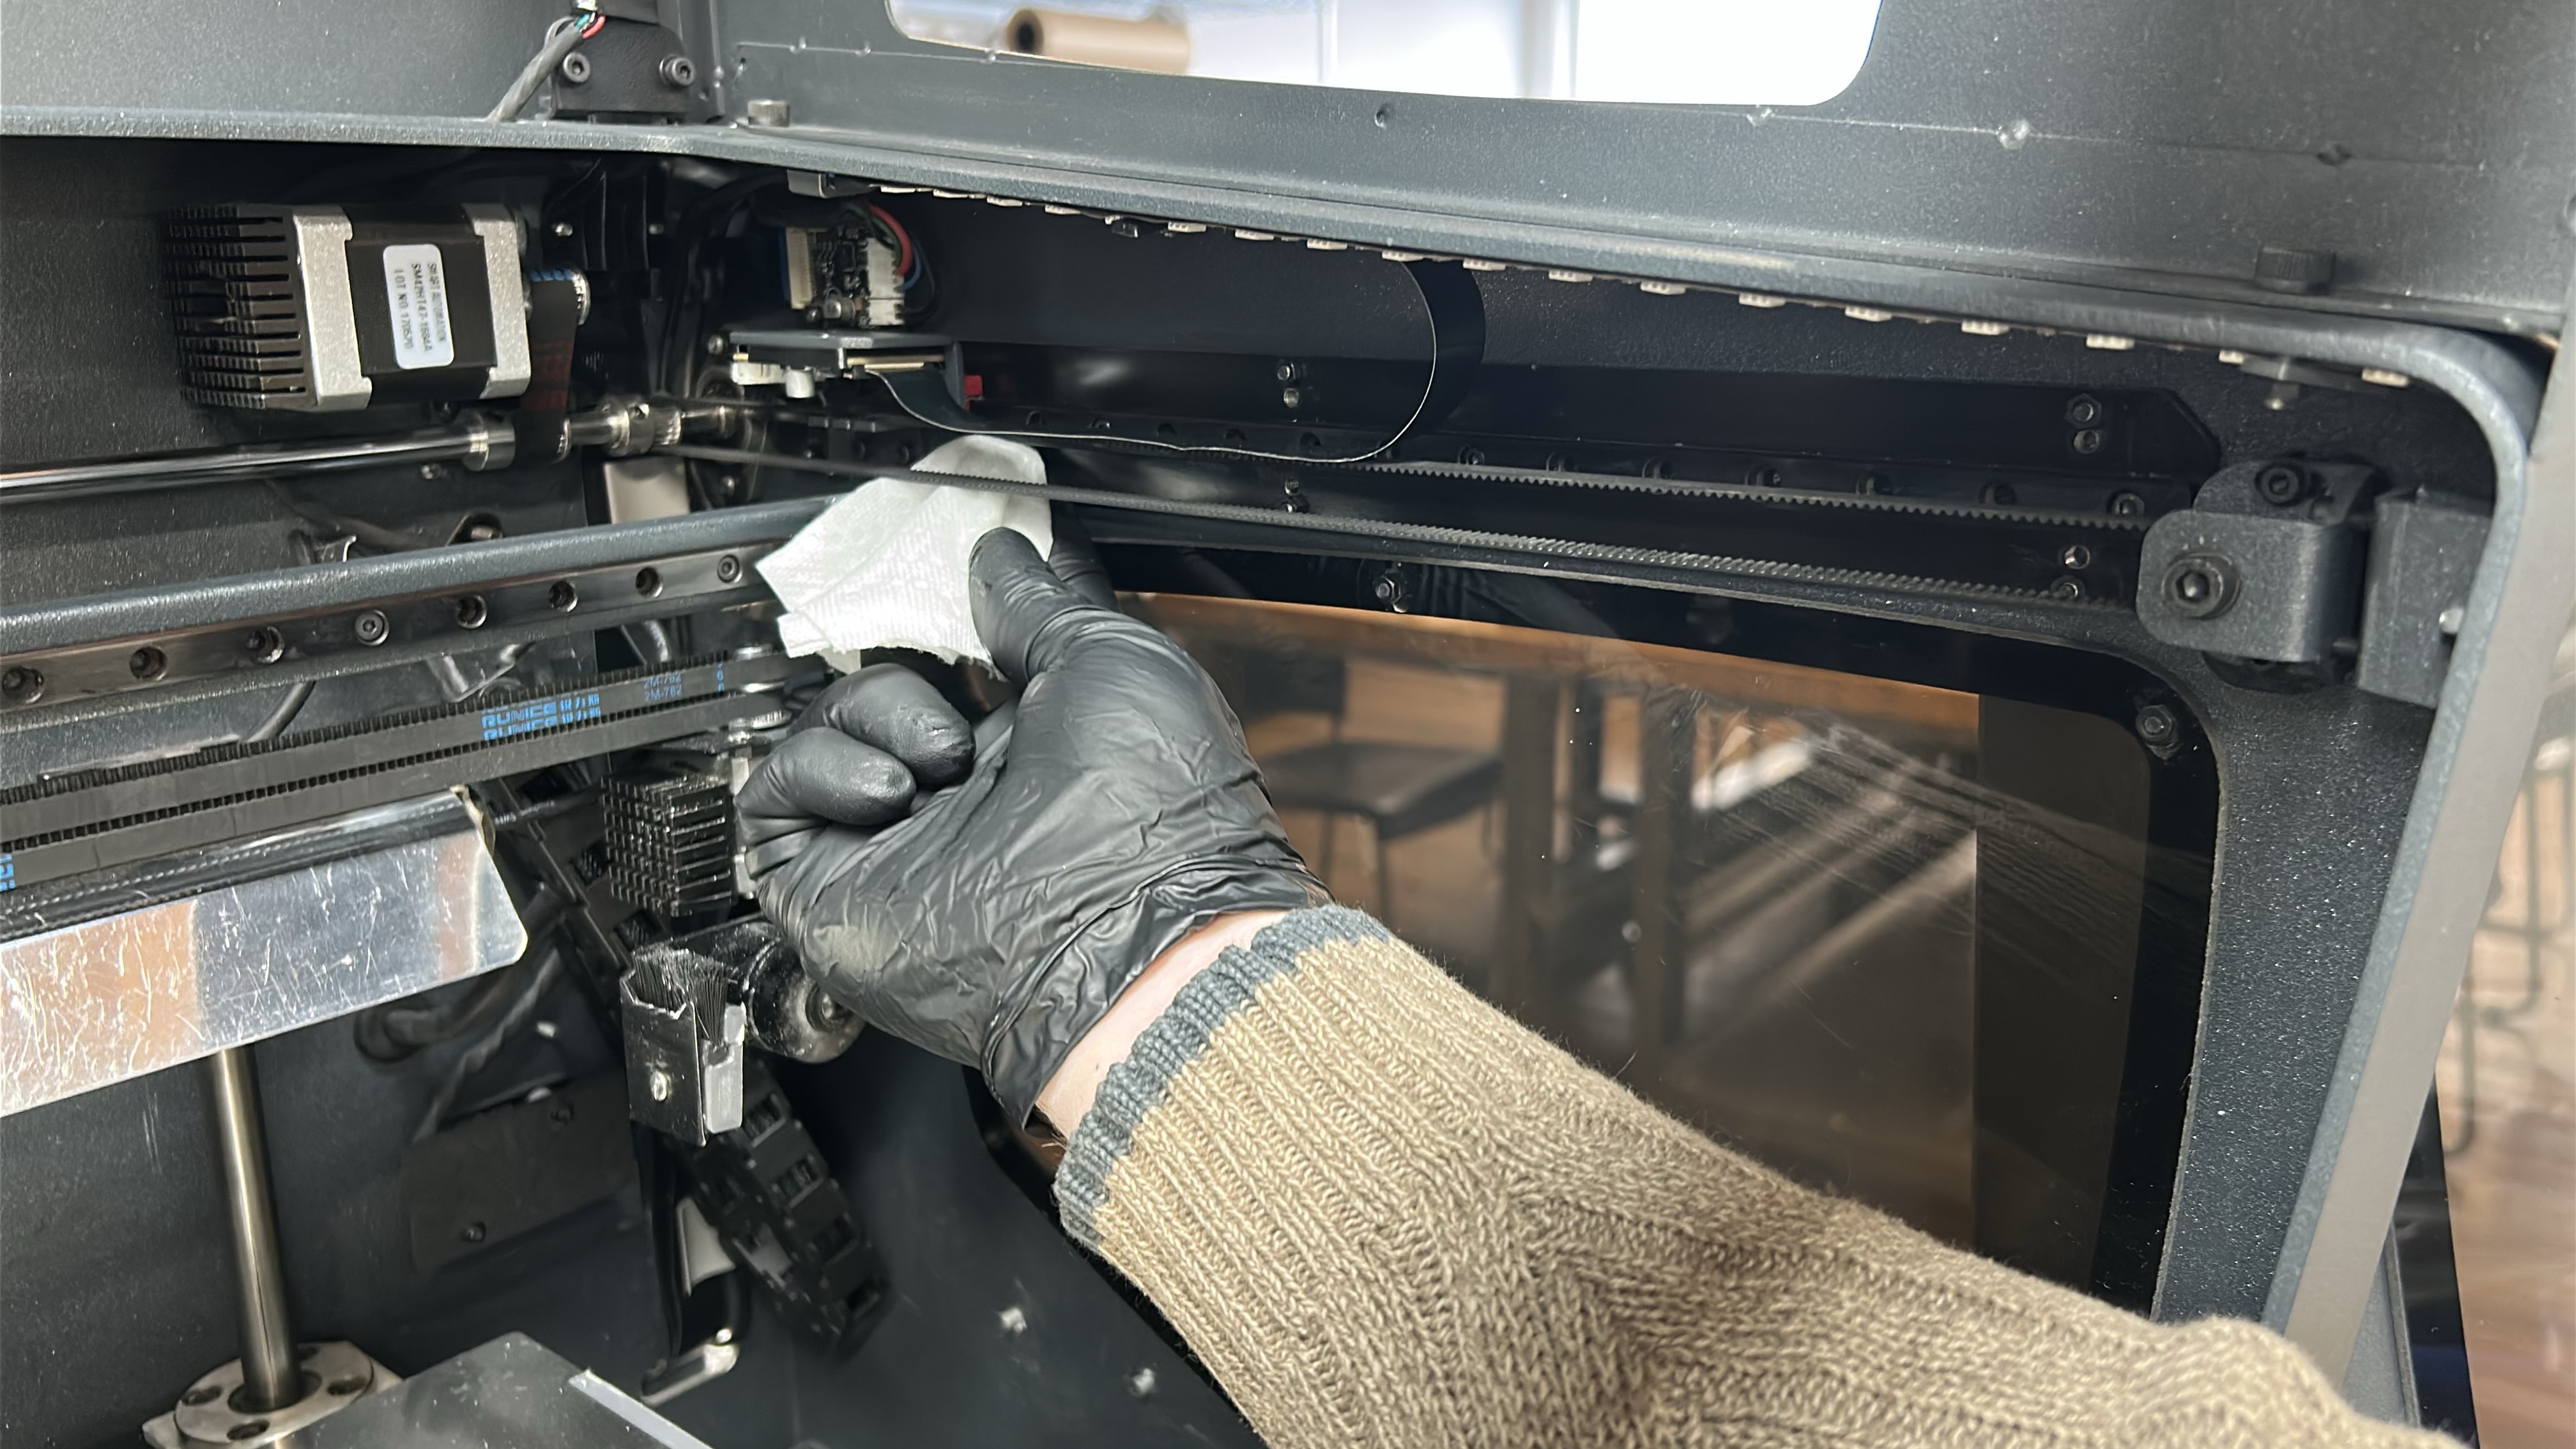
3. With a paper towel or cloth moistened with a solvent (isopropanol) wipe the X-axis linear guide, starting from the middle and moving outwards. Move the printheads to the opposite side and repeat the process on the other end of the linear guide.
 |
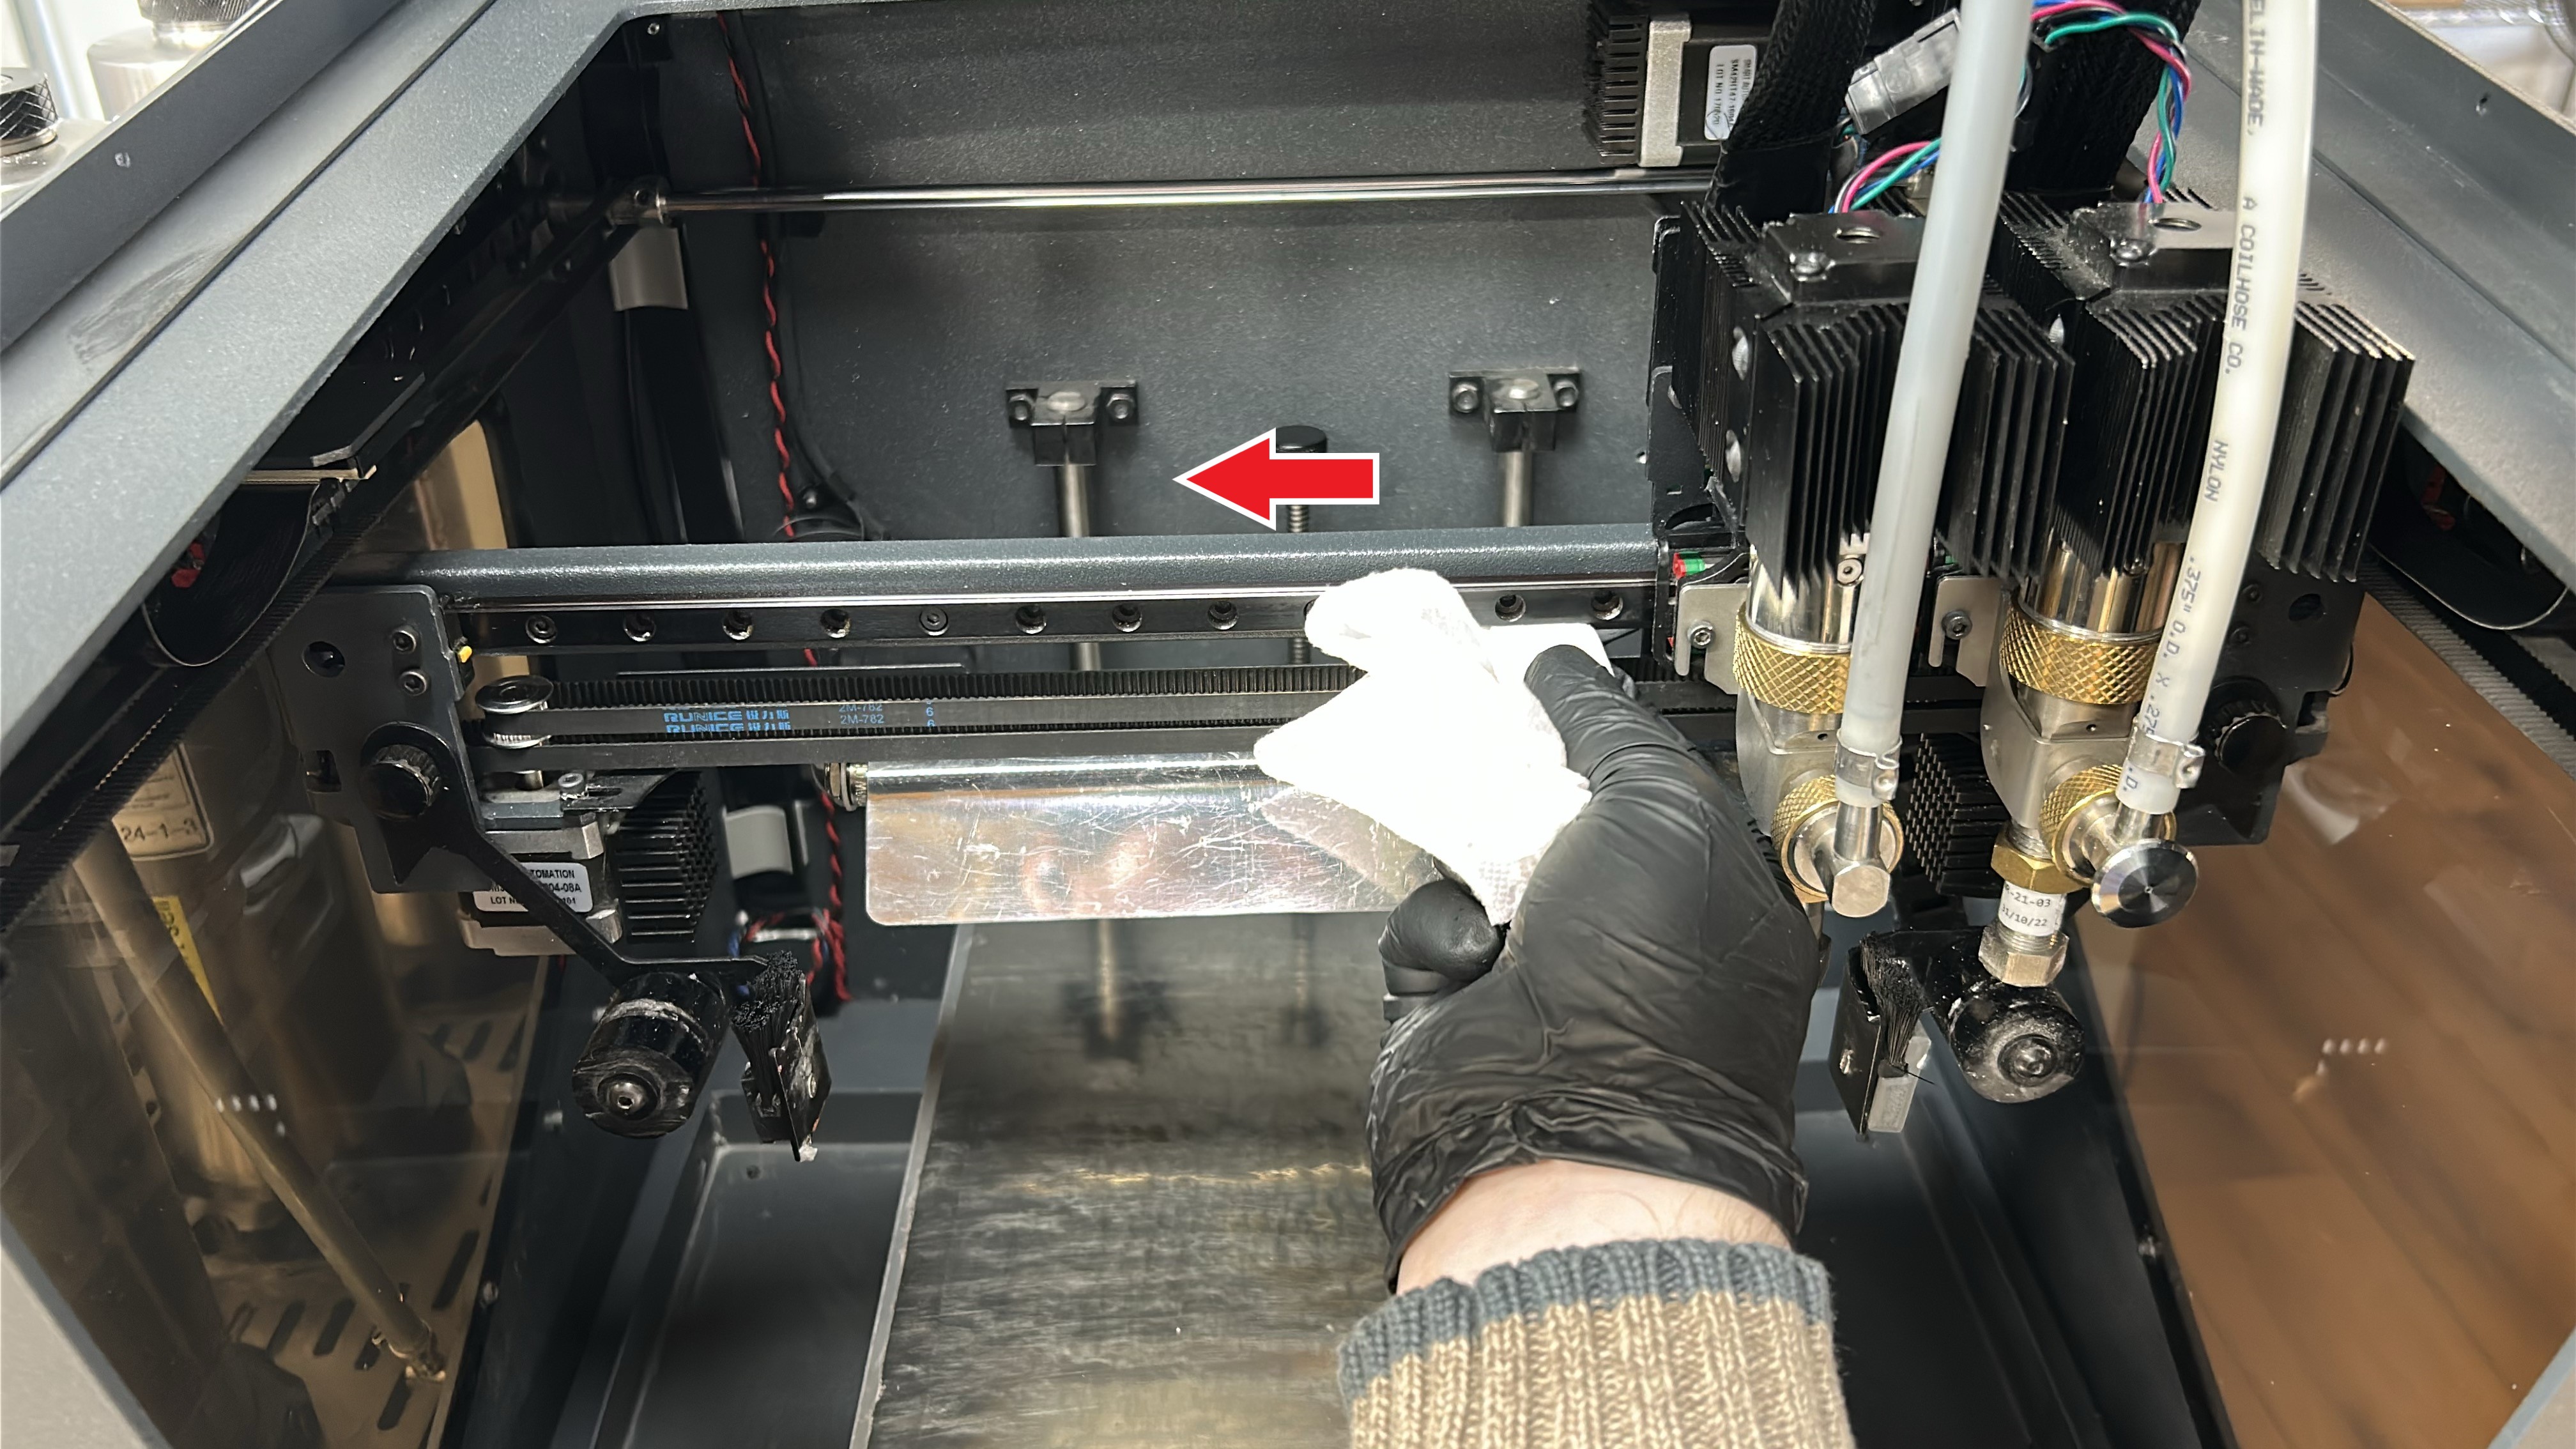 |
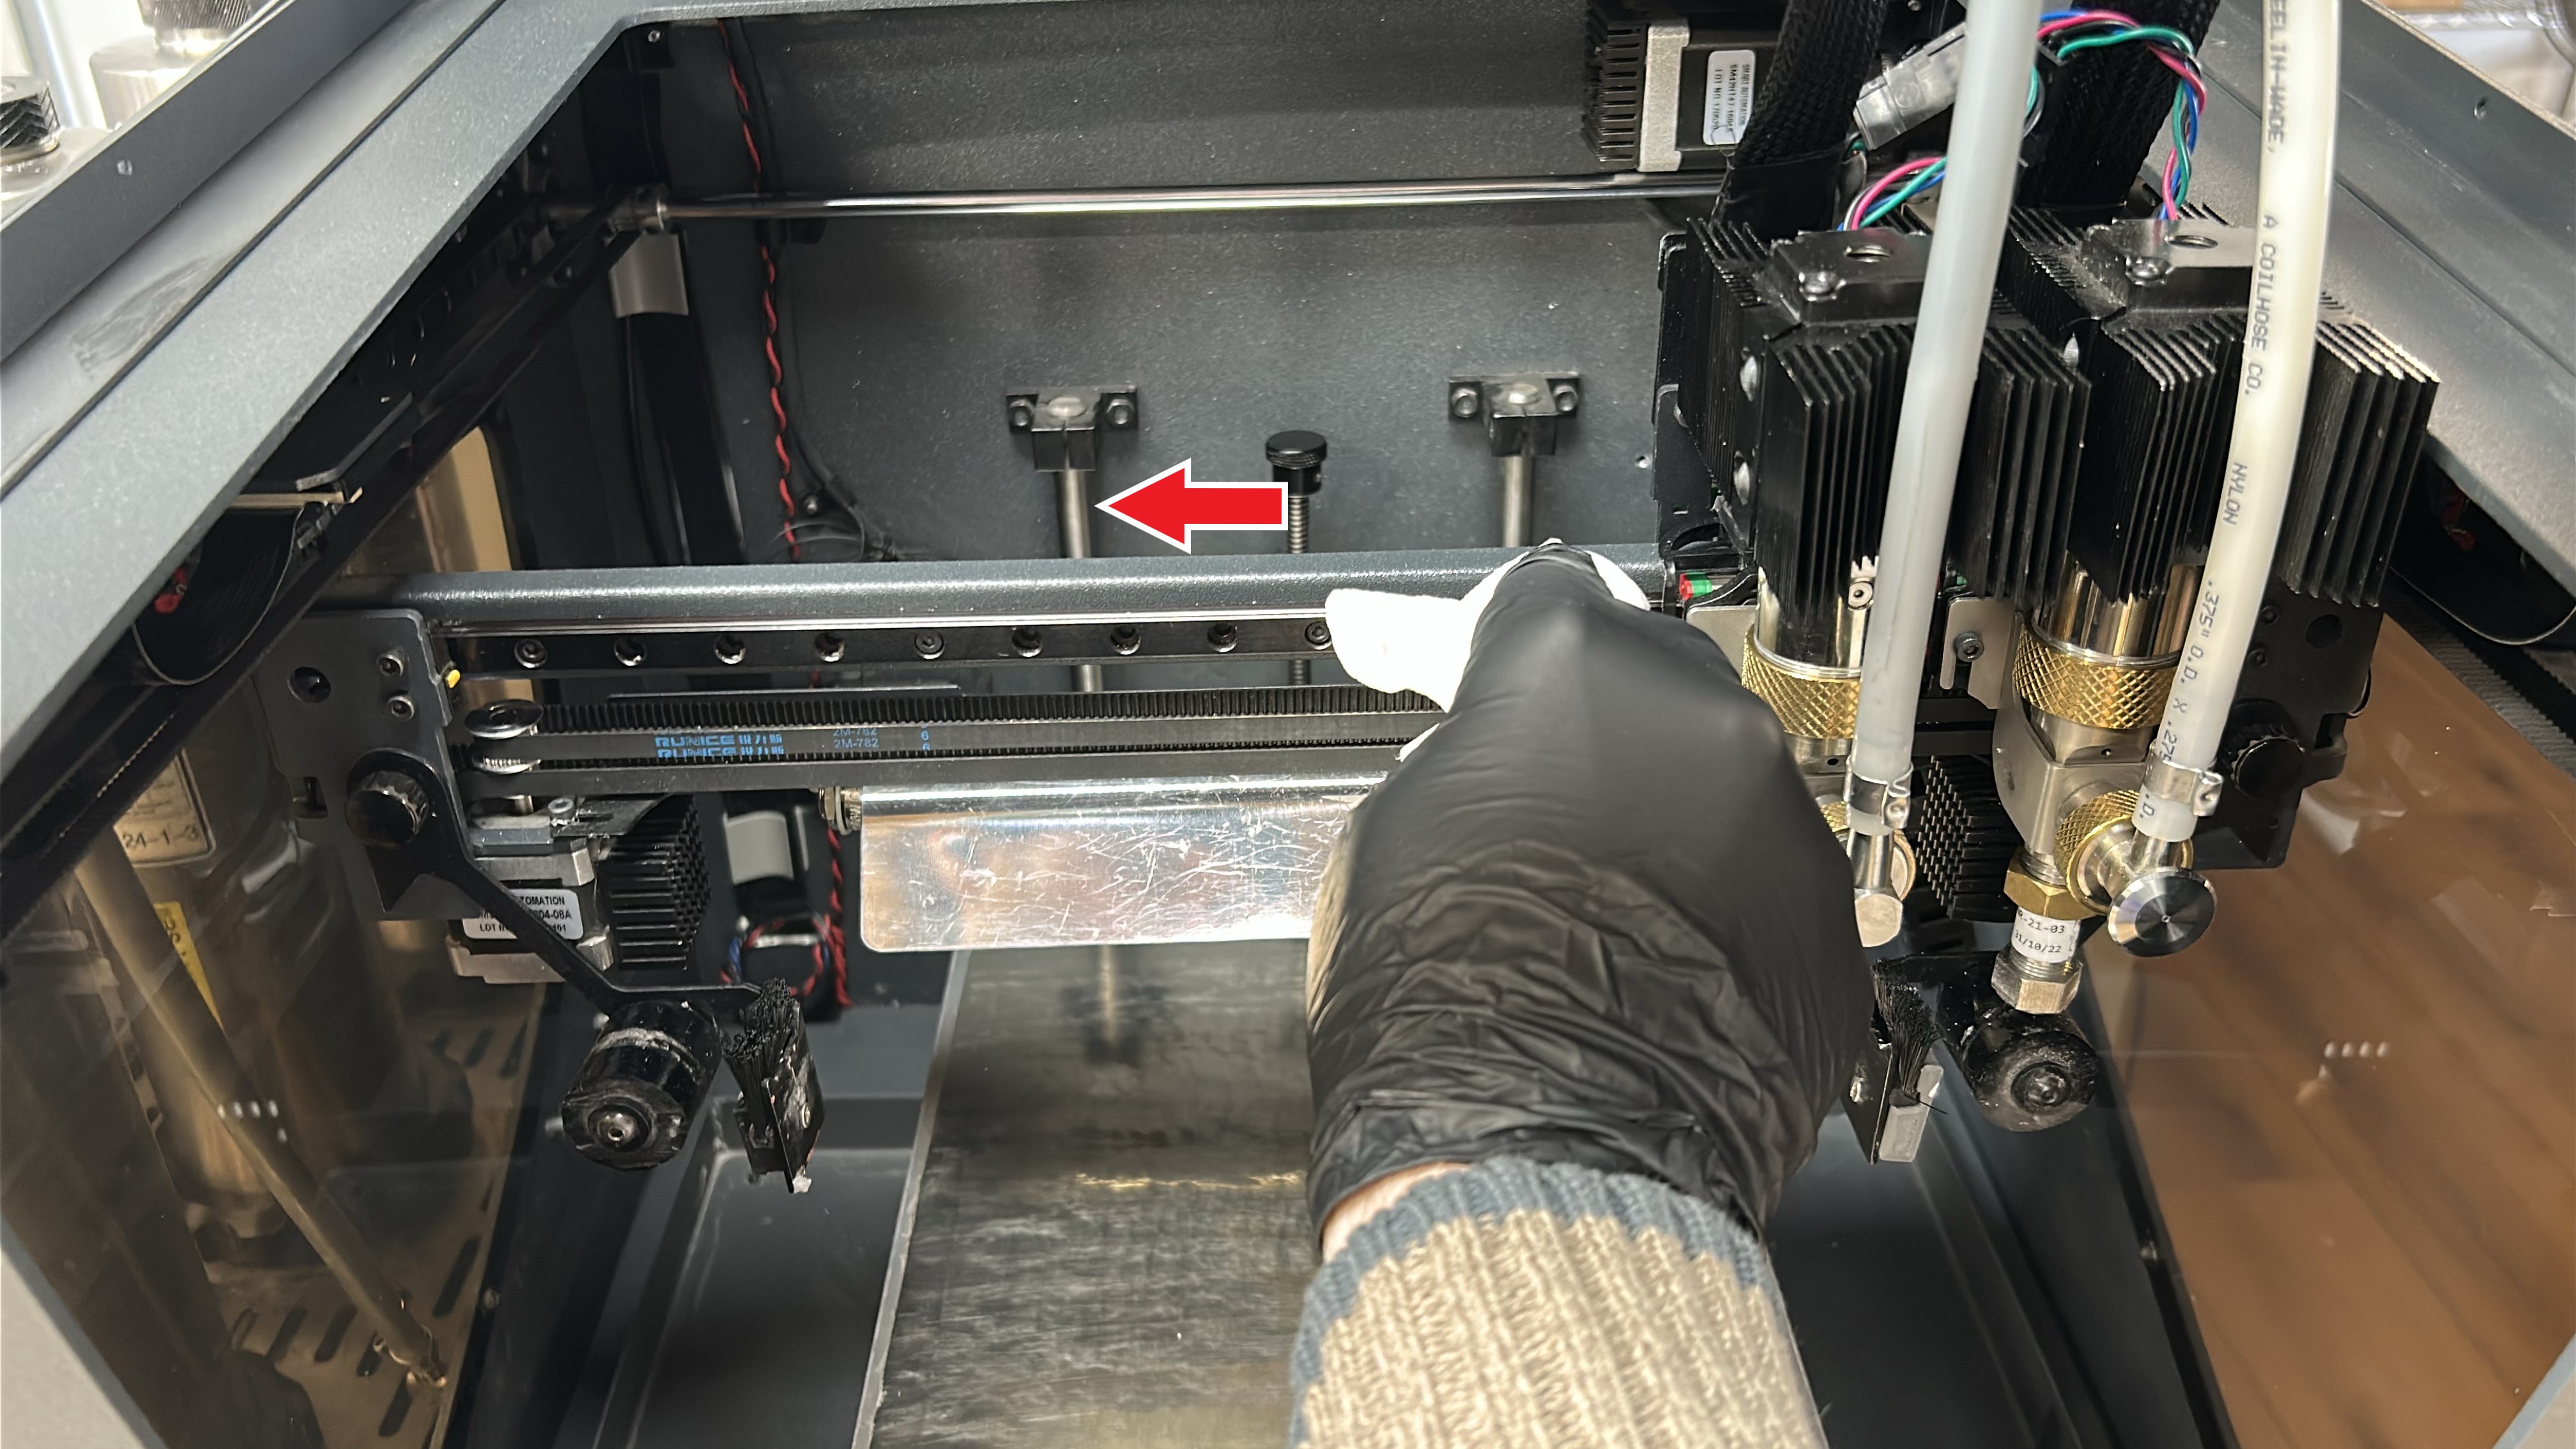
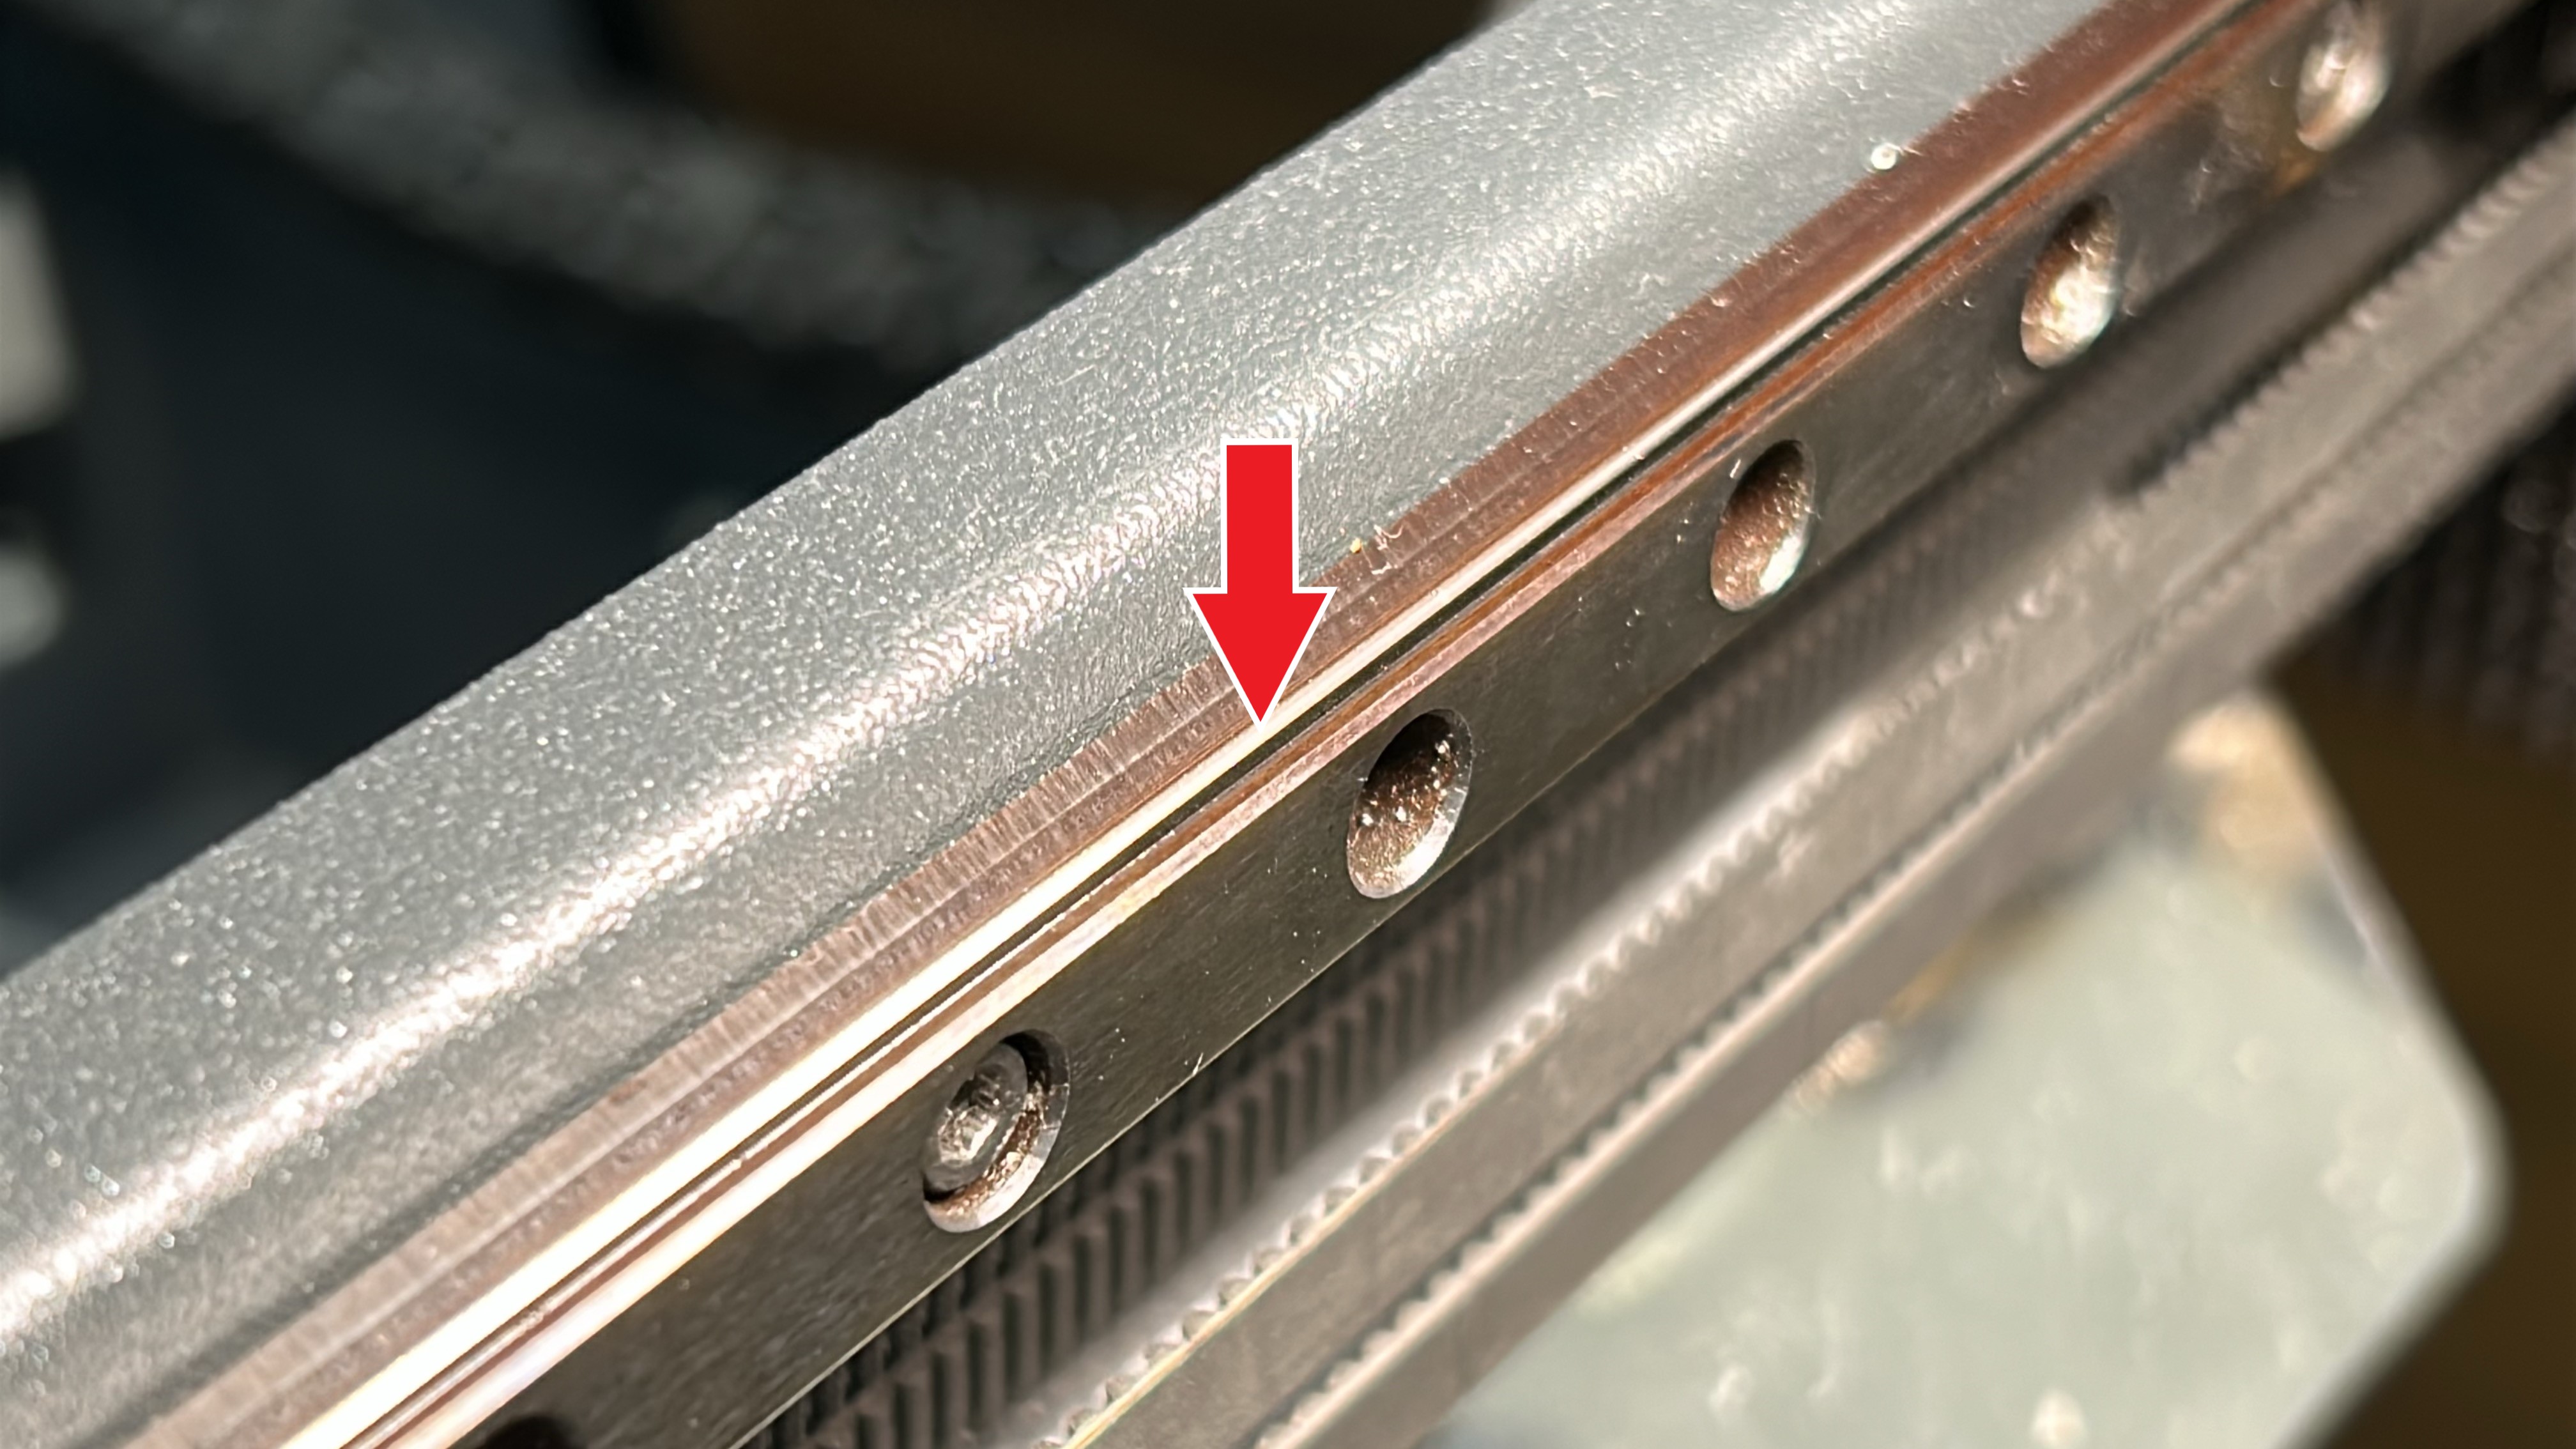
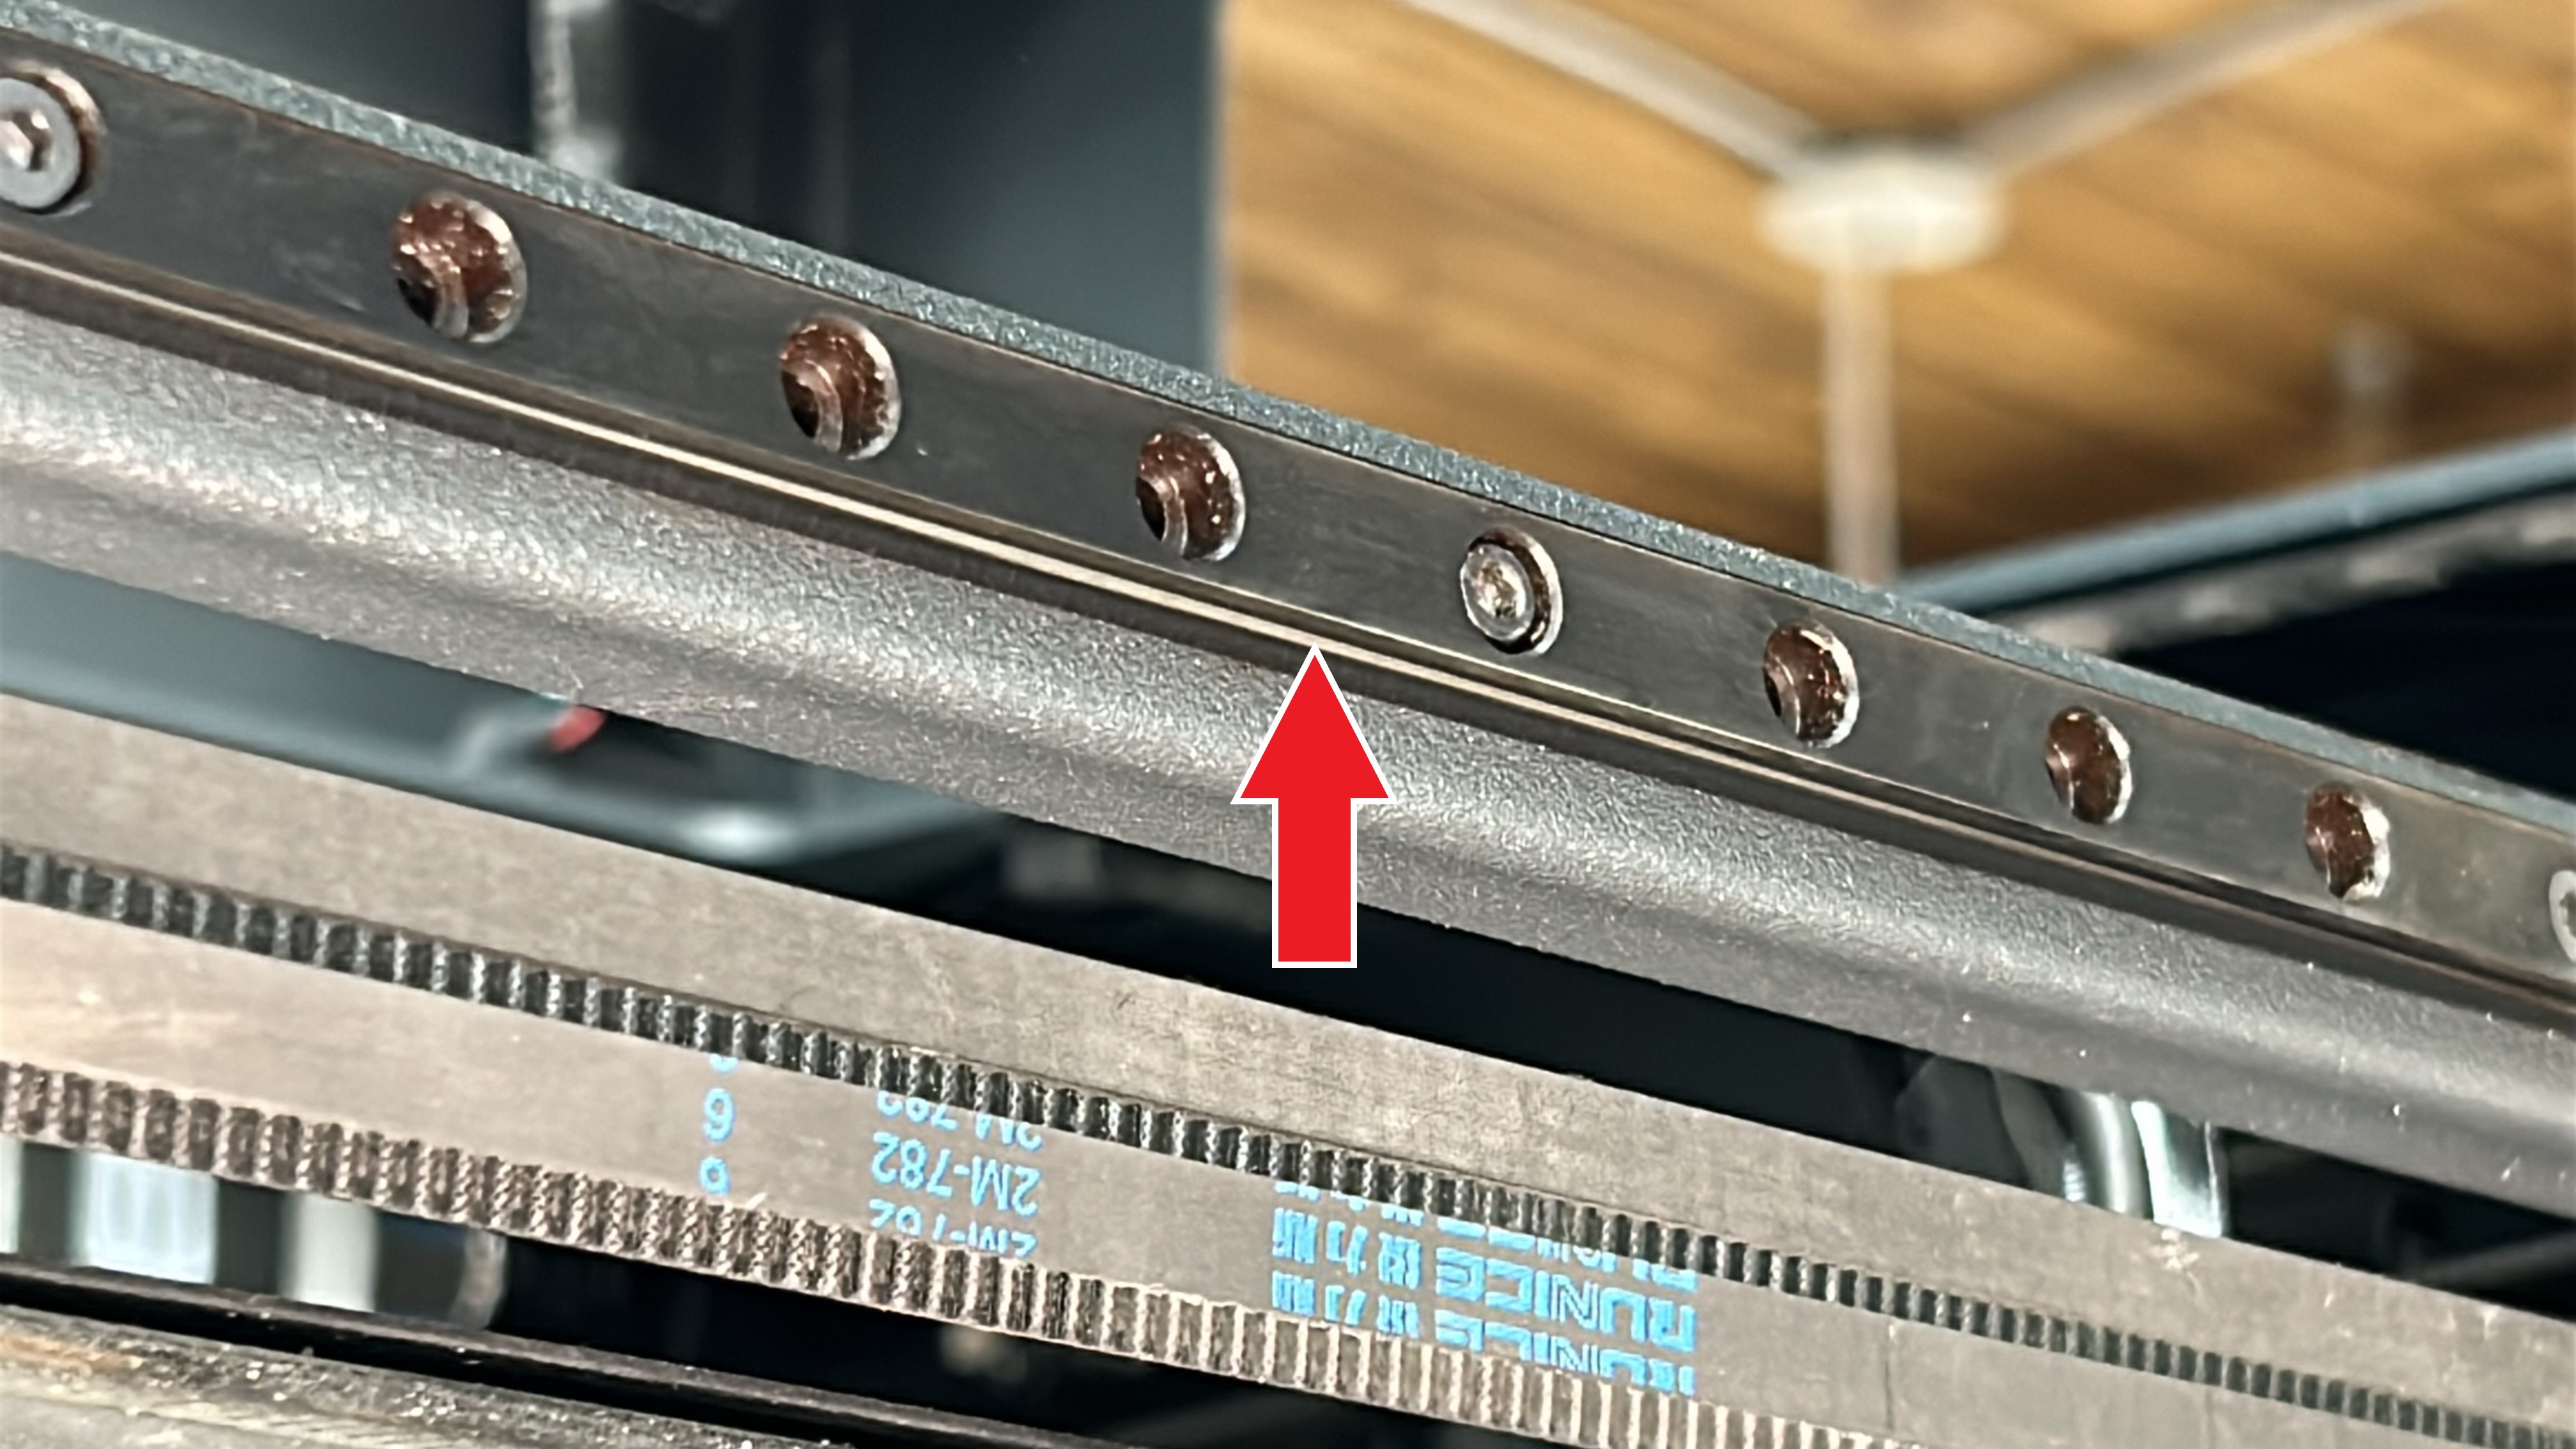
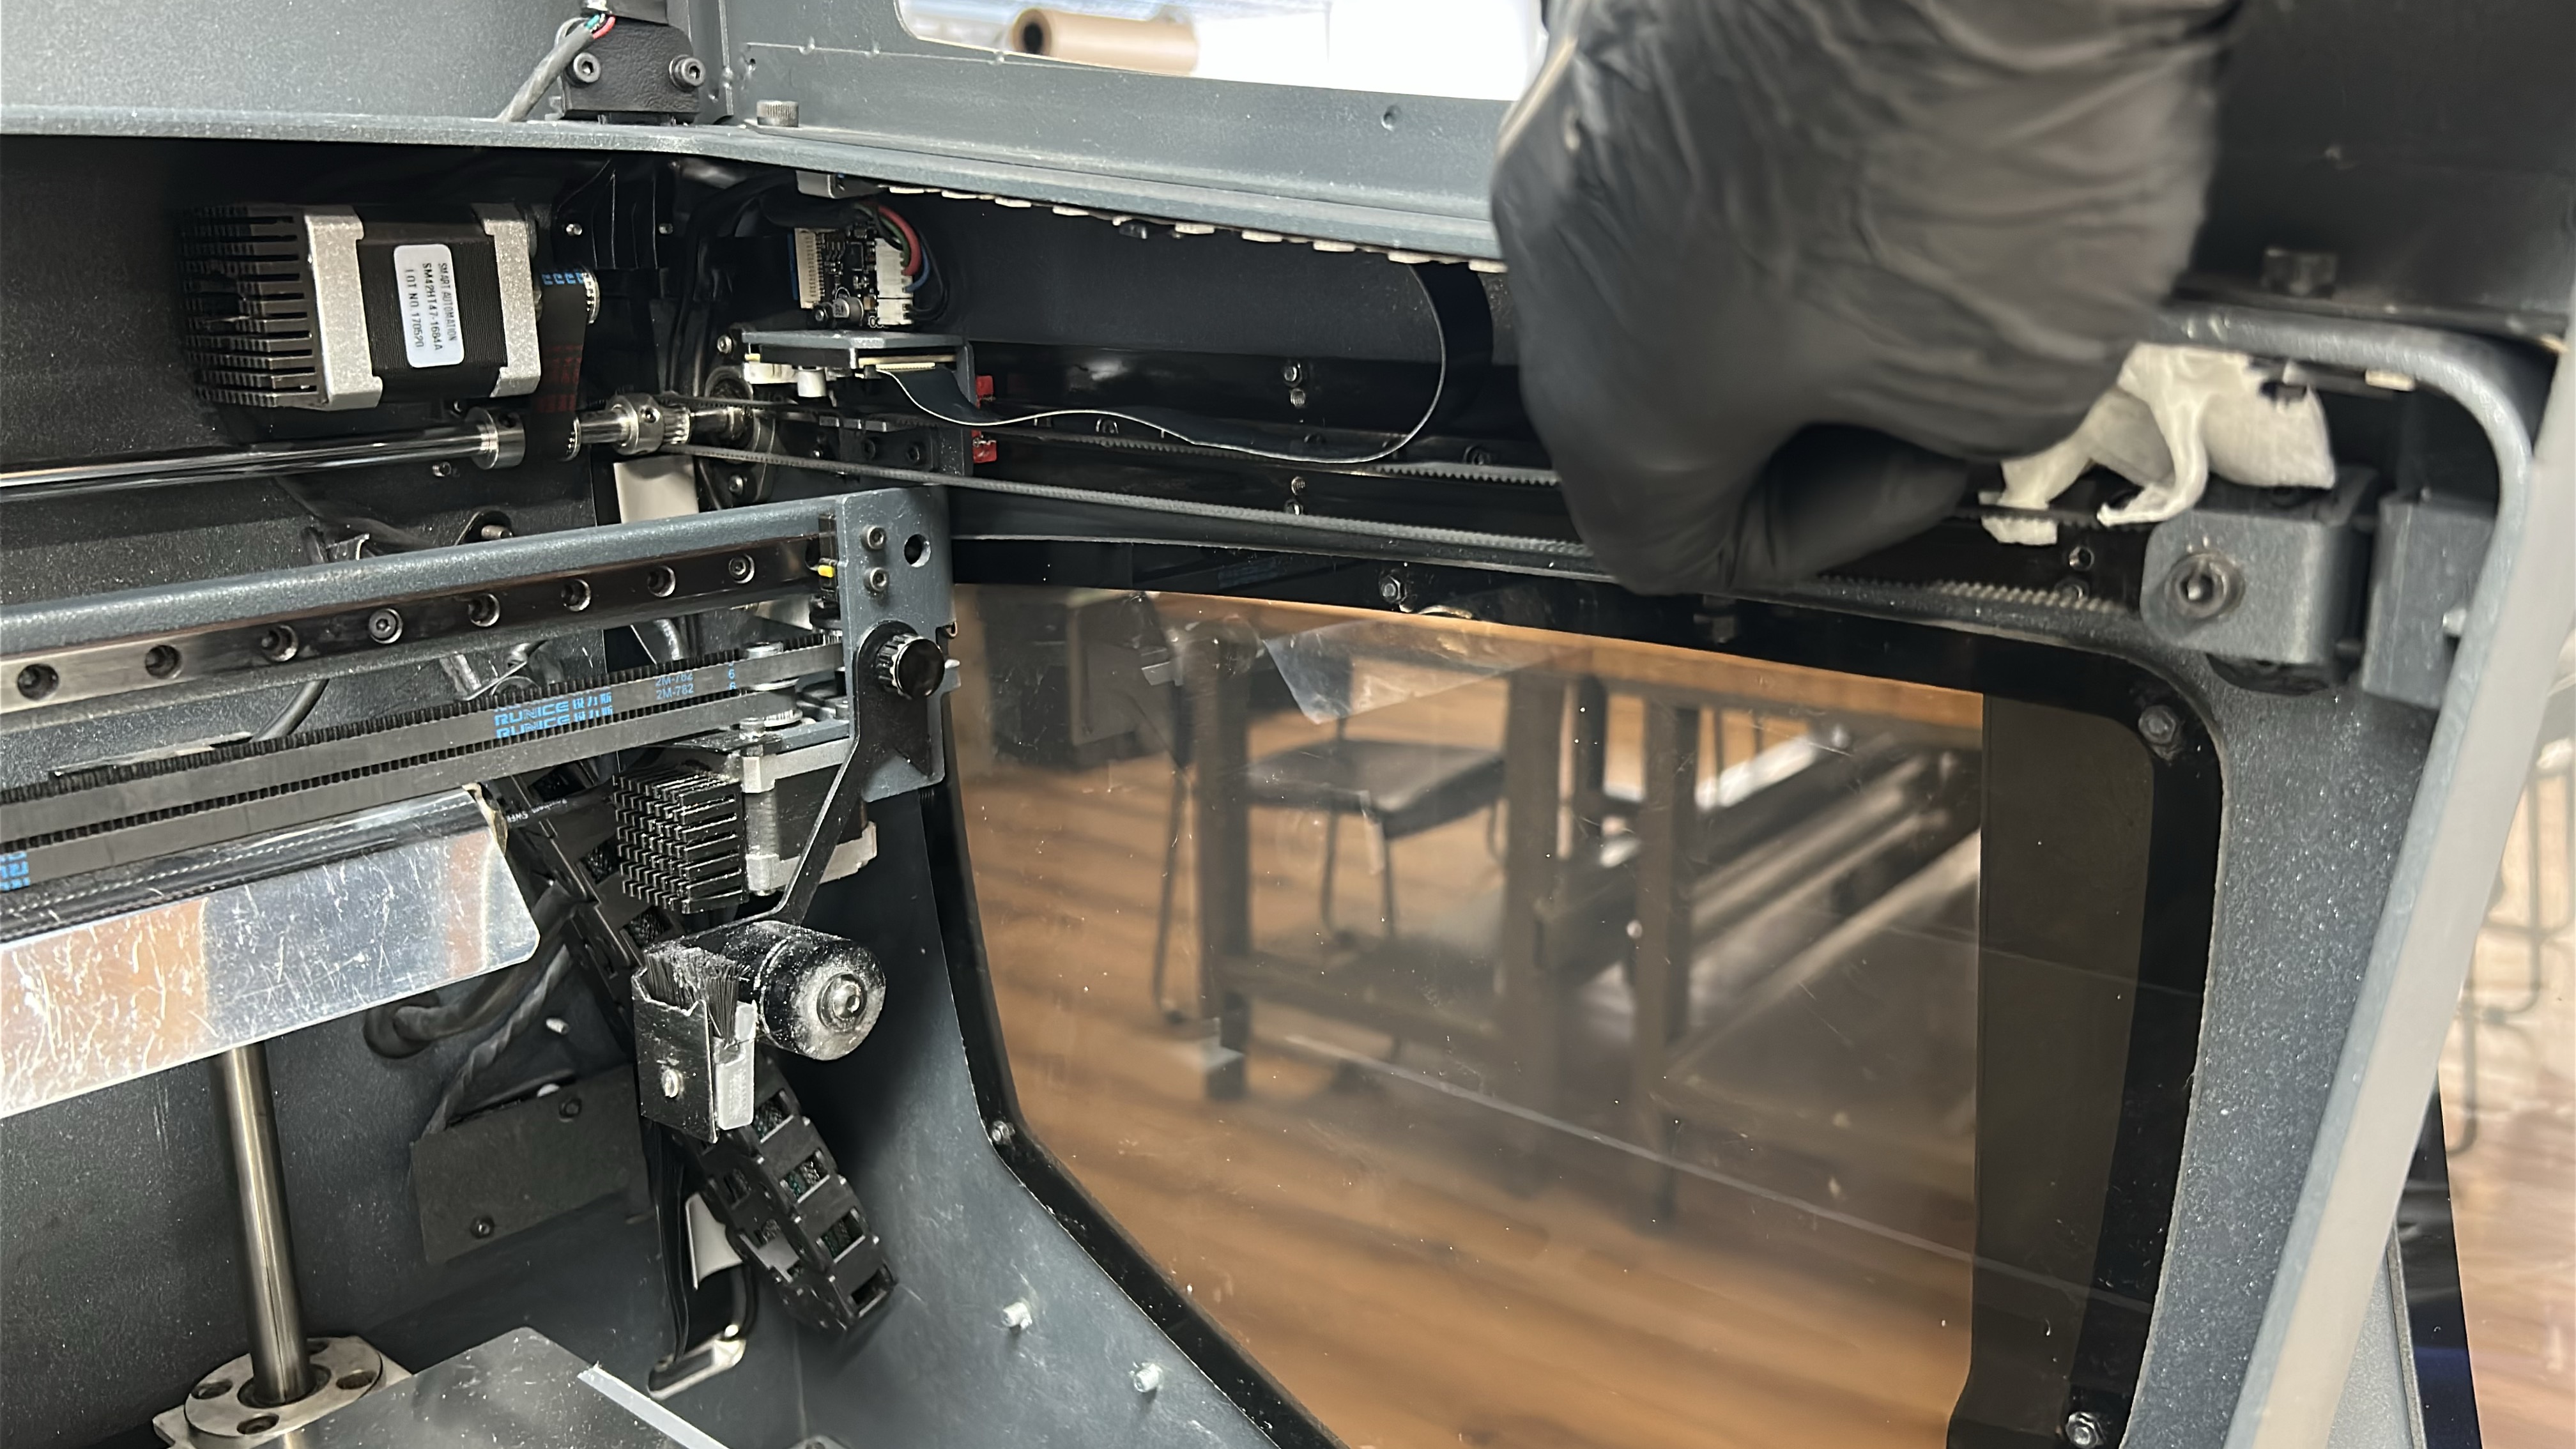
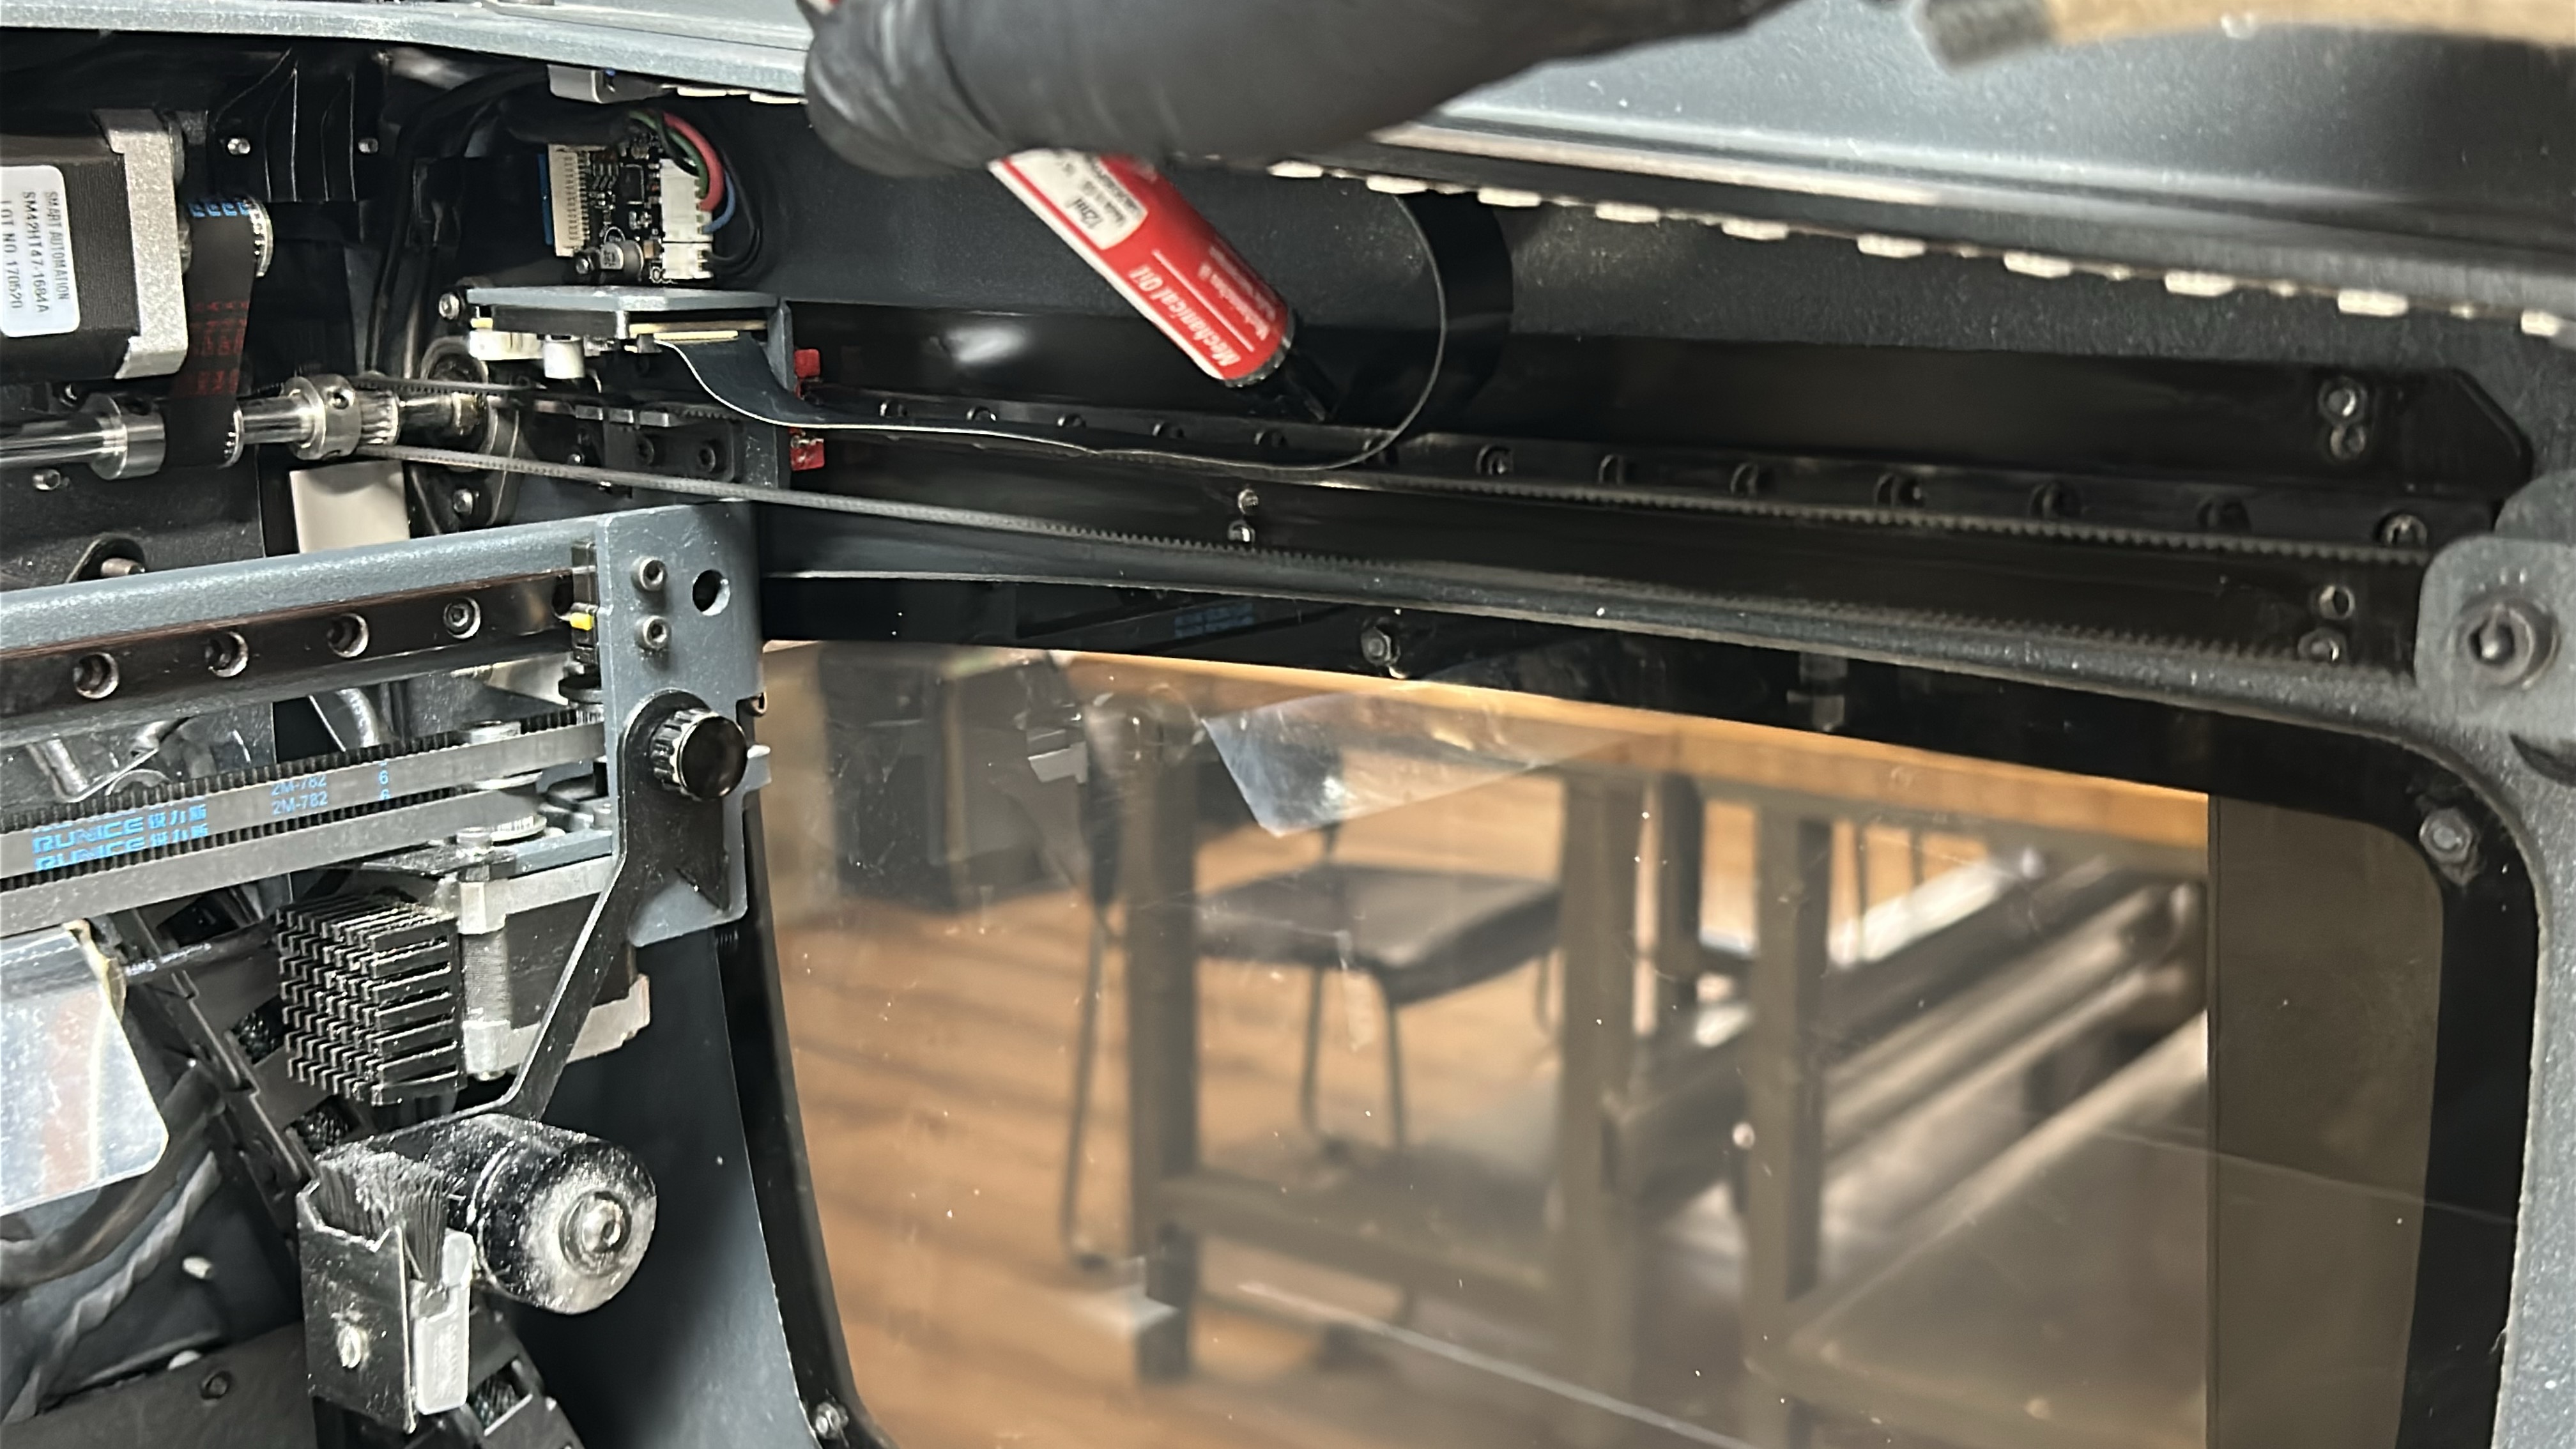
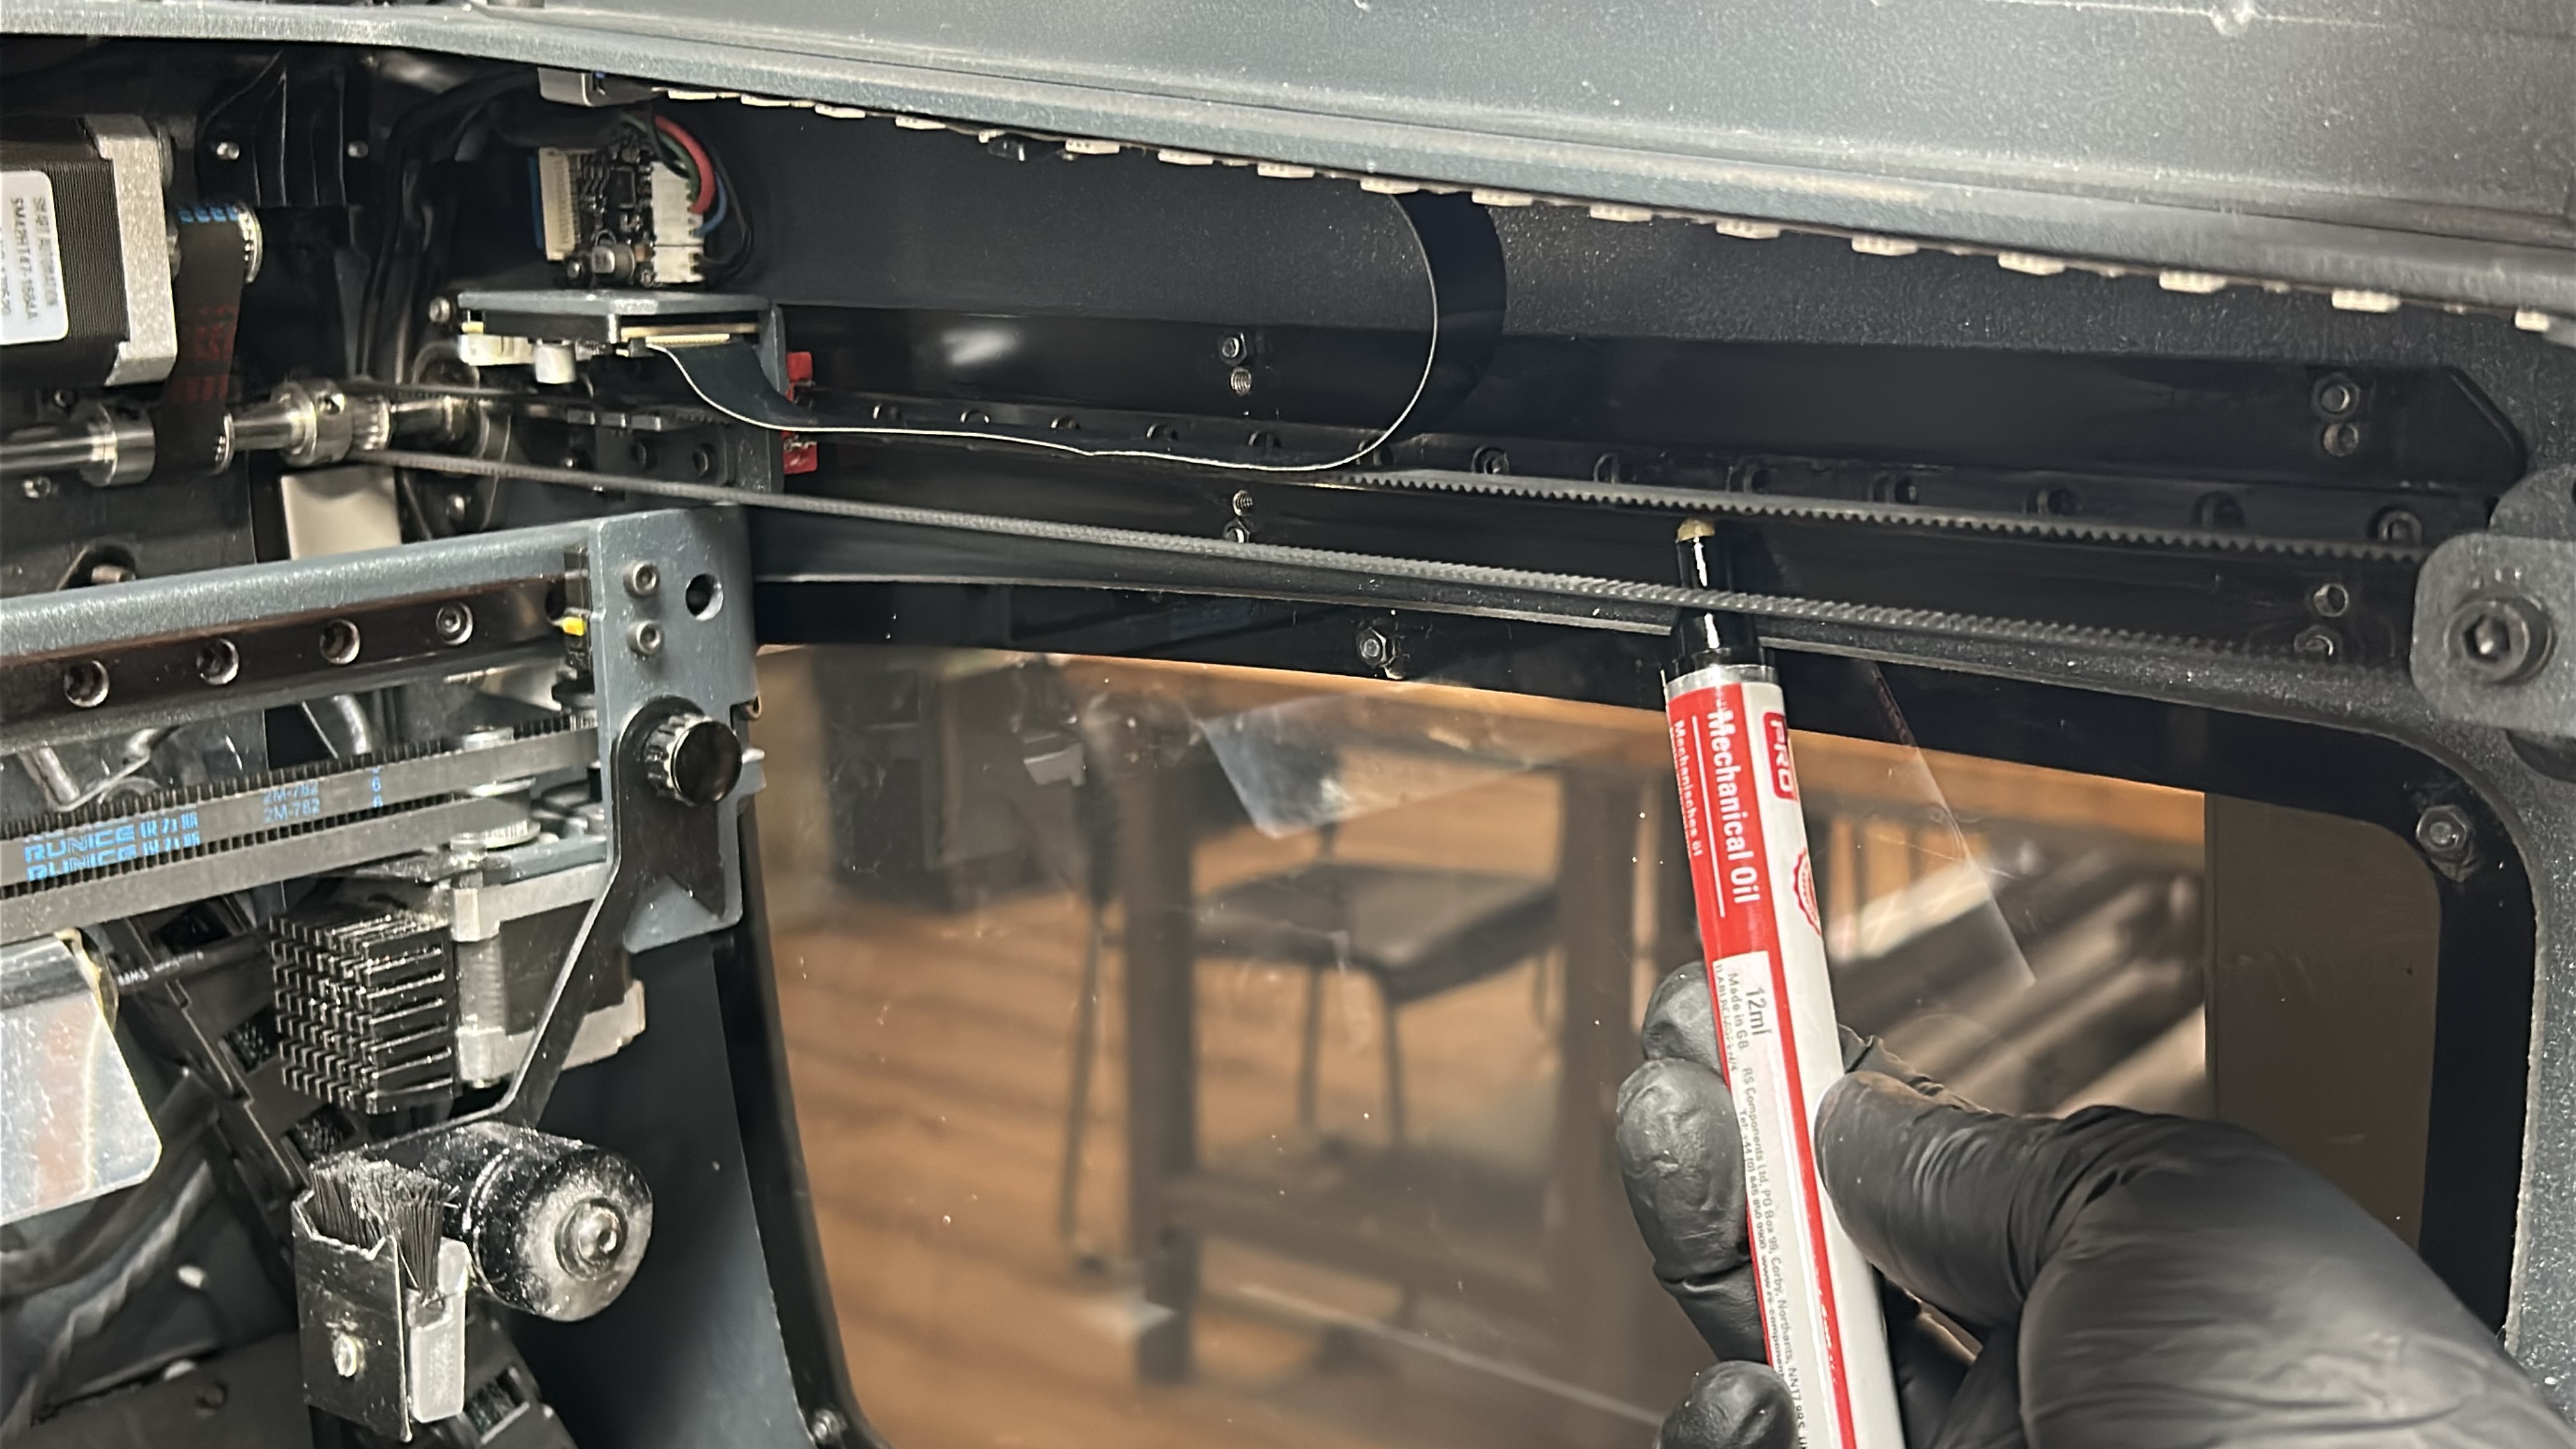
4. Use the machine oil to apply a thin coat of lubricant to the X-axis linear guide, applying with emphasis on the superior and inferior faces of the linear guides as imaged below. Move the printheads to the opposing side of the linear guide and repeat this process.
|
|
 |
 |
¶ Cleaning and Lubricating the Y-Axis
5. Start by moving the printing gantry to its parked position and powering off the printer, move the printheads to one side so that one of the Y-axis linear guides is easily accessible. Using an absorbent paper towel or cloth wipe the linear guide on the superior and inferior faces to remove any dirt or dust.
 |
 |
 |
 |
6. Using a paper towel or cloth moistened with a solvent (isopropanol) wipe down the Y-axis linear guides, start near the linear bearing and wipe away from it. Ensure linear guides are dry before moving to the next step.
 |
 |
 |
 |
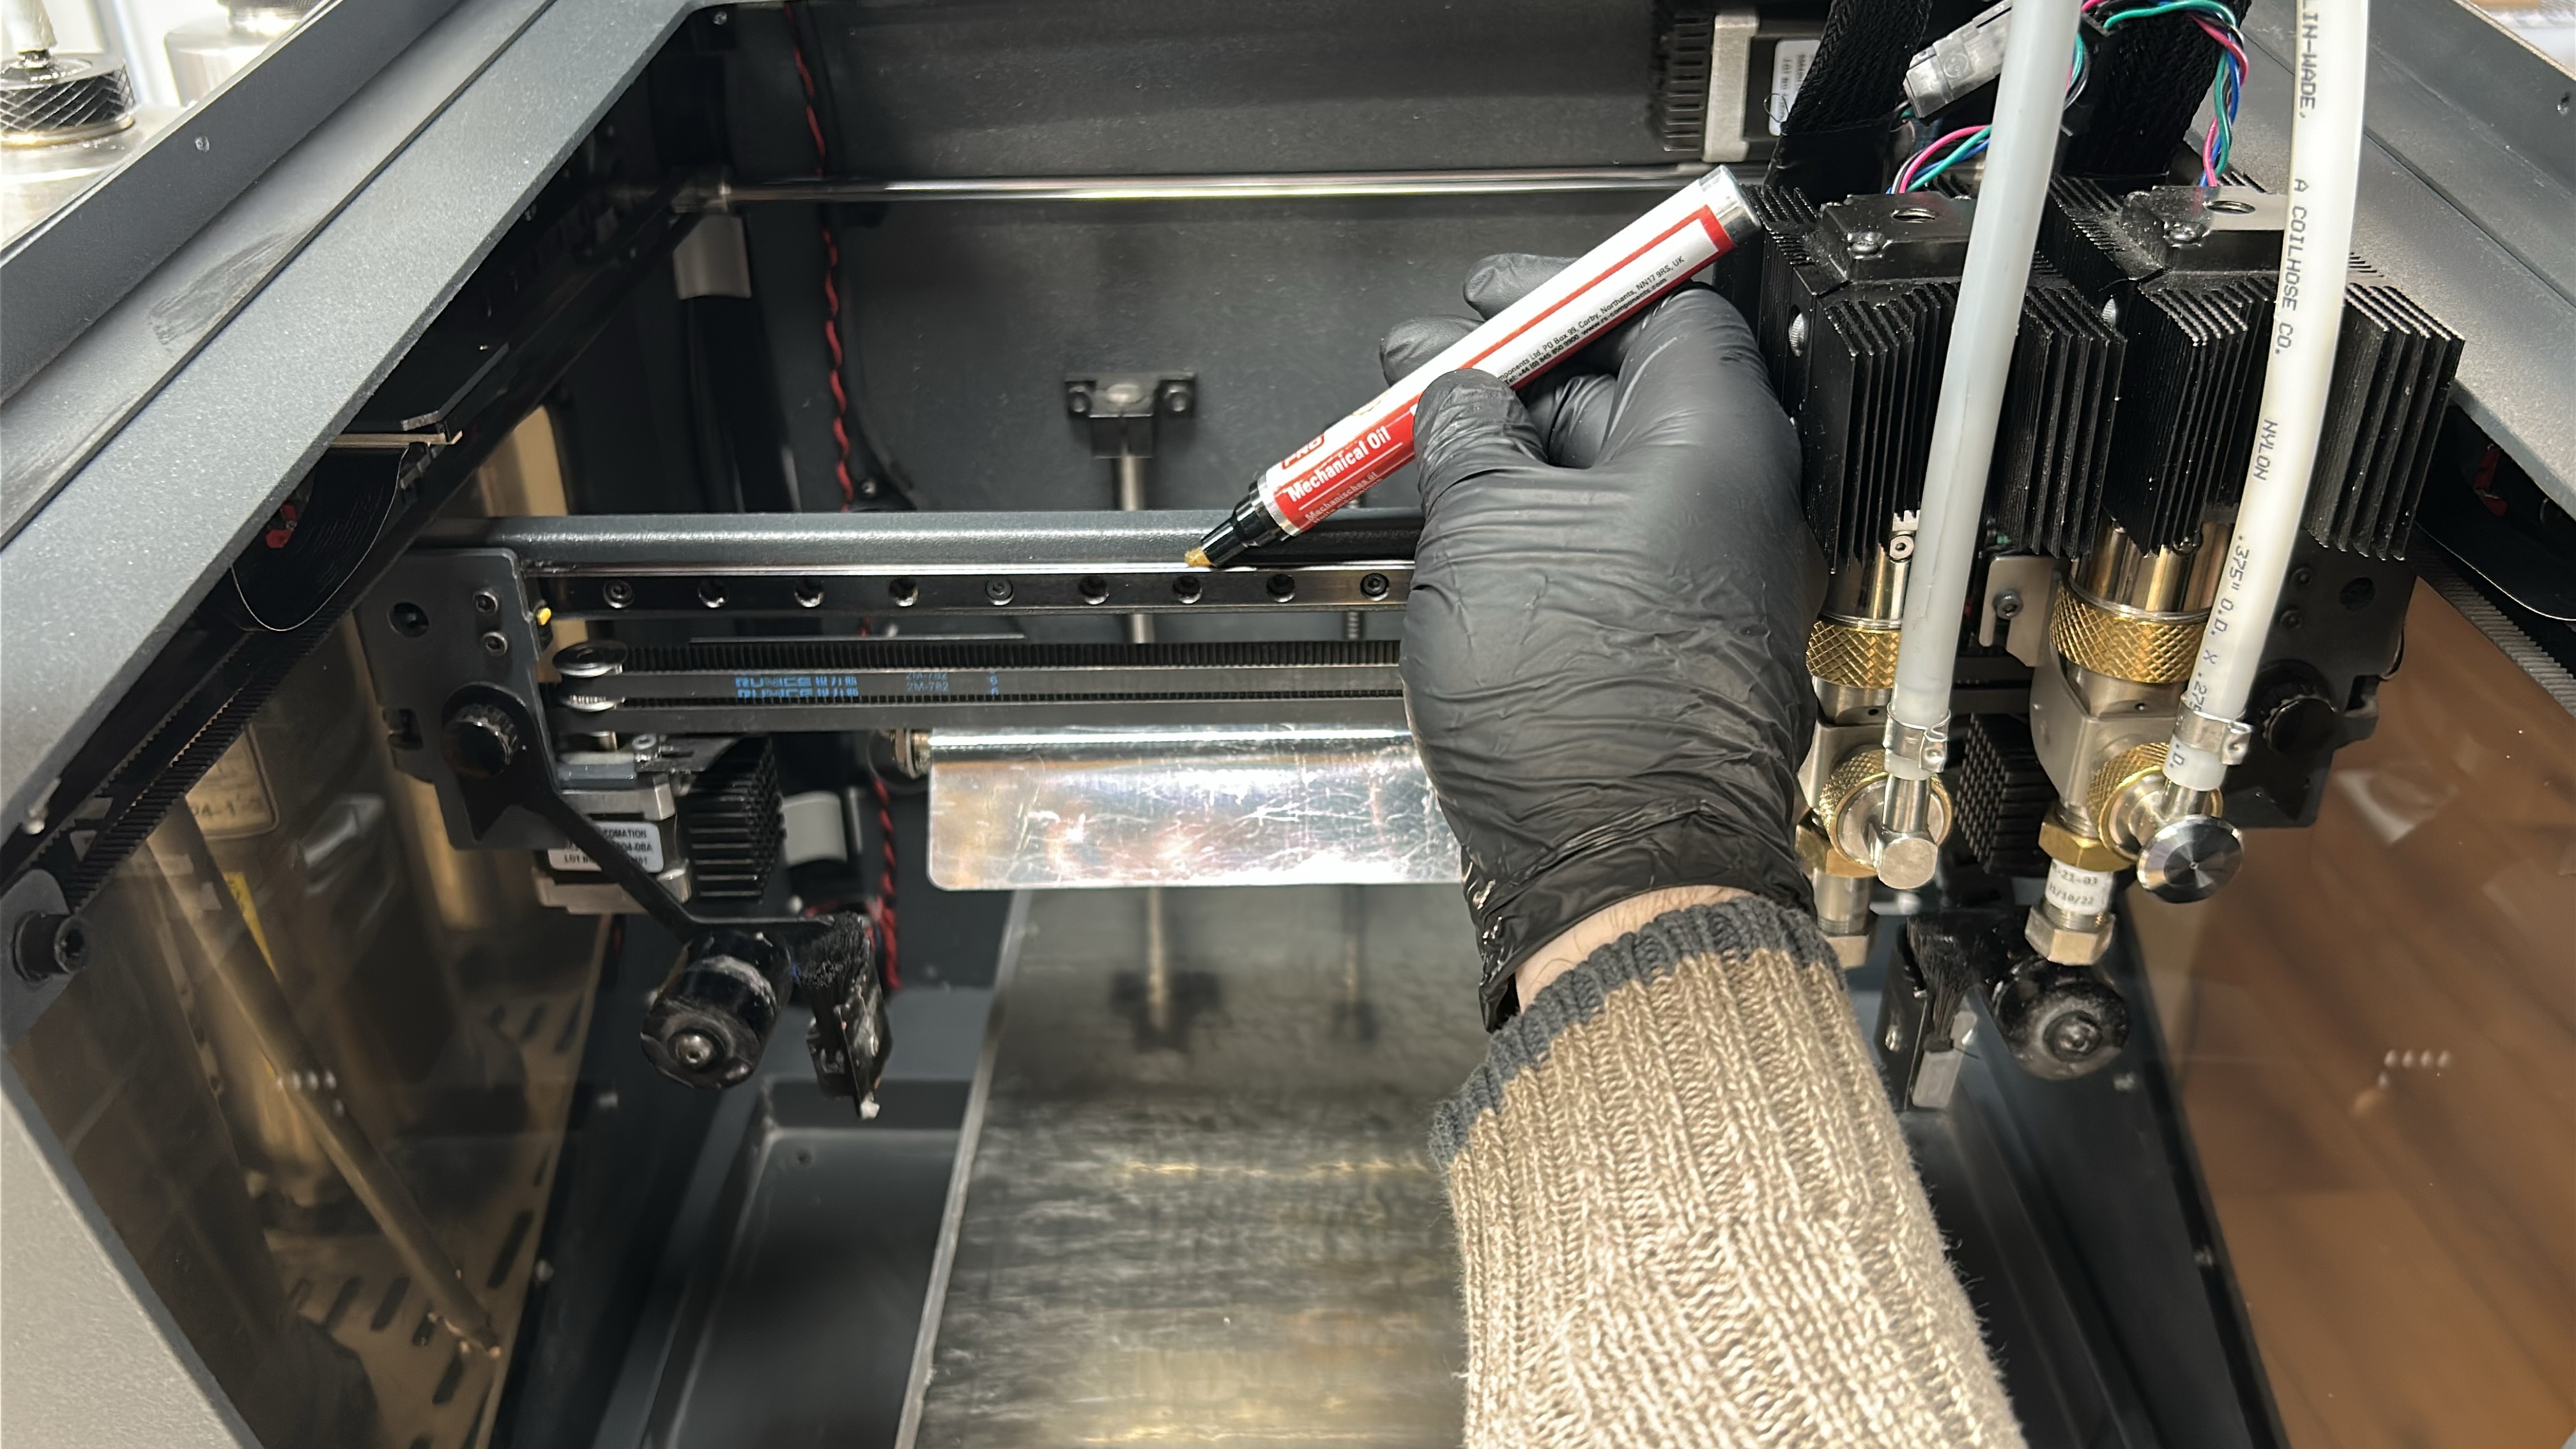
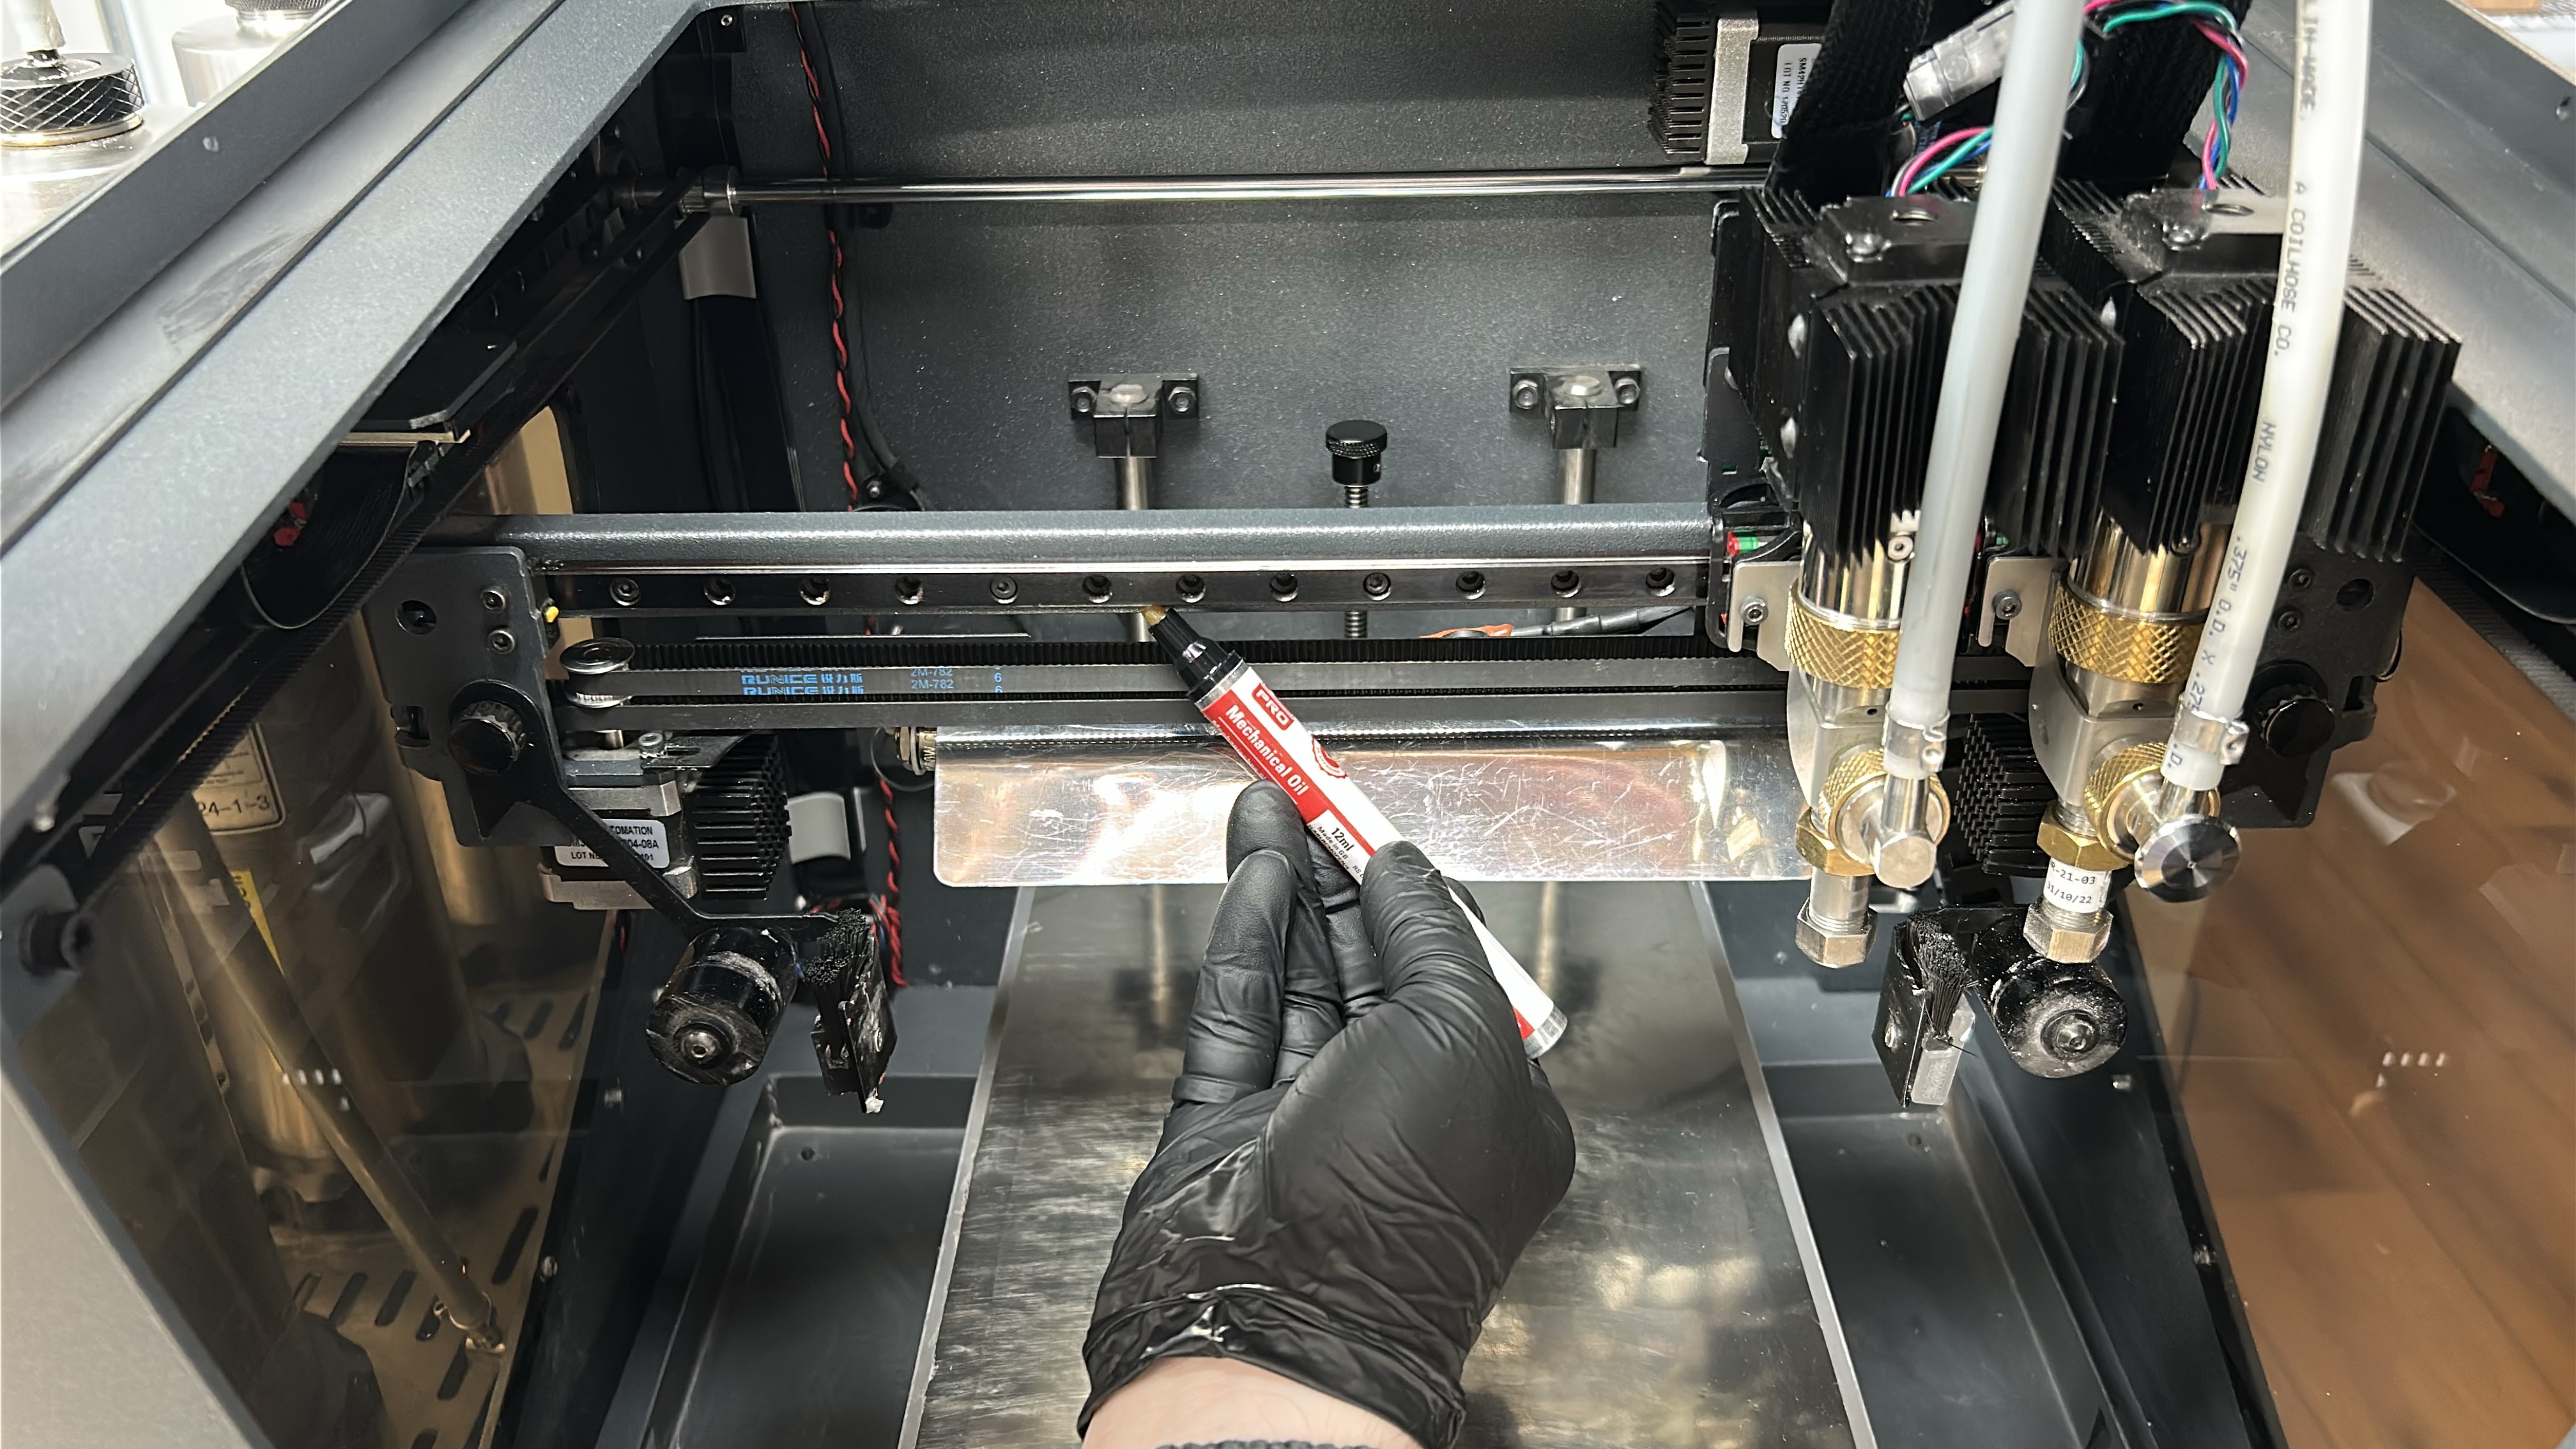
7. Apply a coat of machine oil along the linear guide with special emphasis on the superior and inferior faces being careful not to drip.
 |
 |
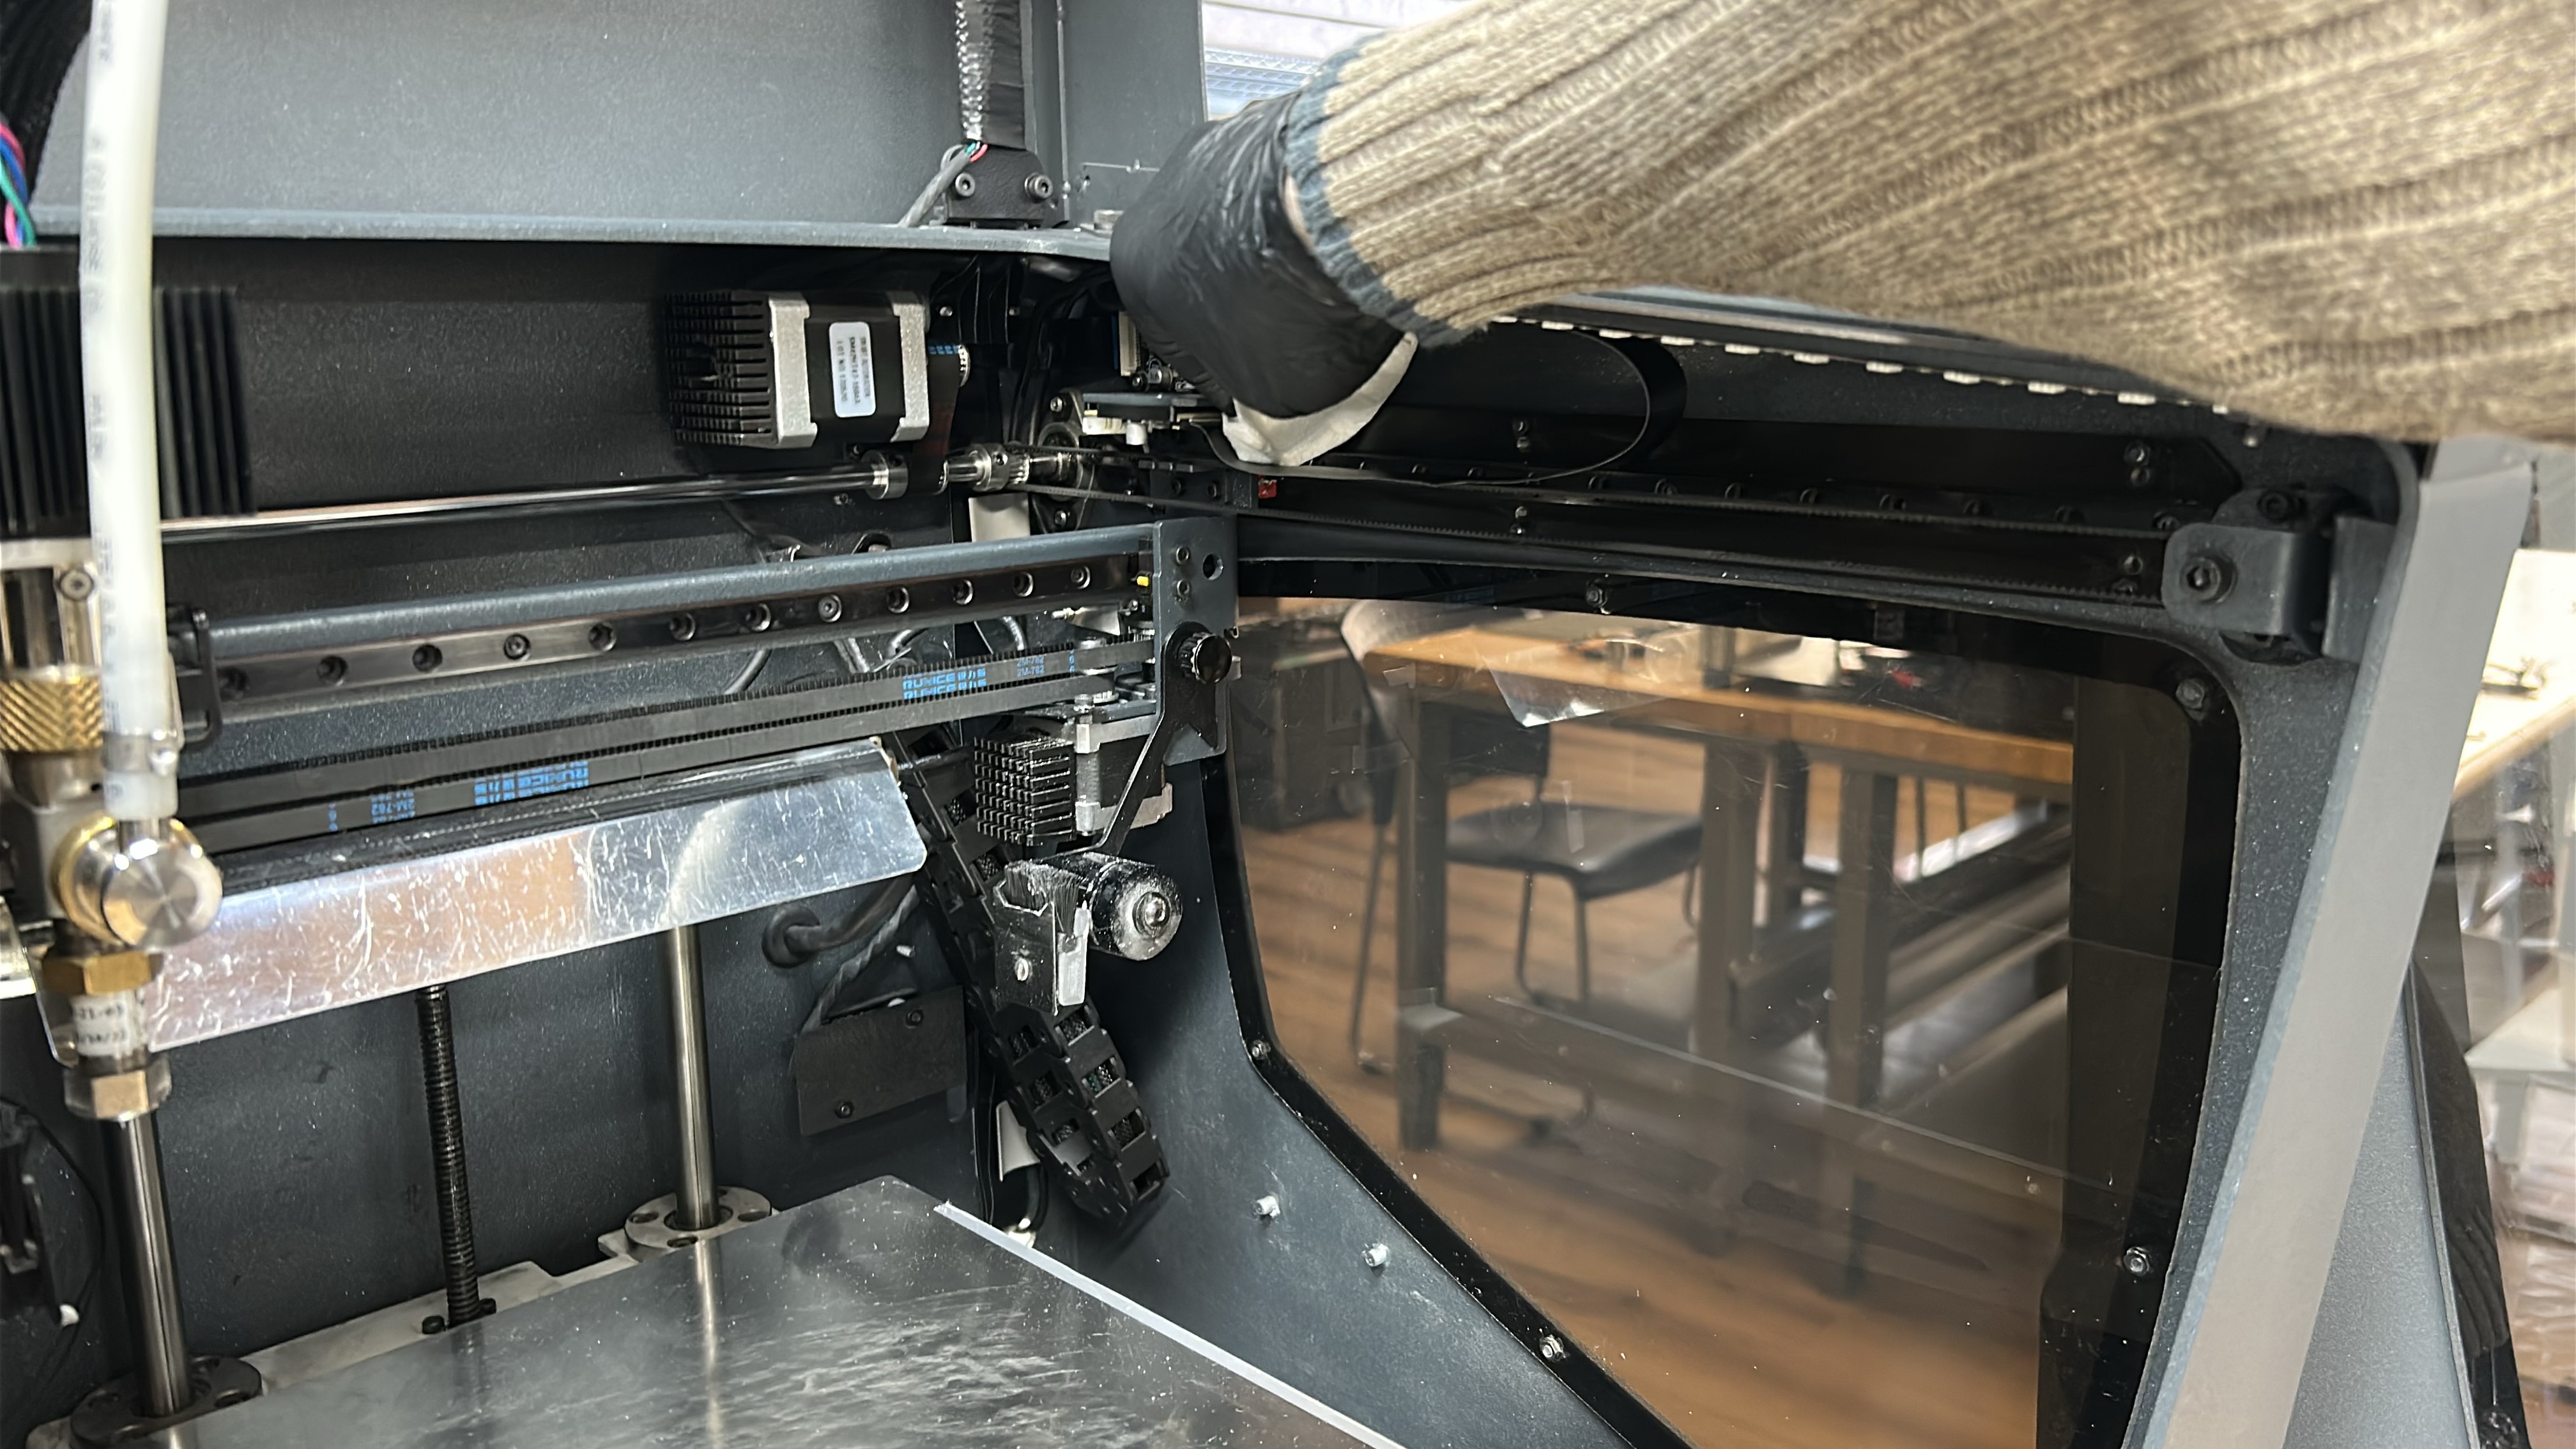
8. Move both printheads to the other side of the printing gantry and repeat steps 5 - 7 on the other Y-axis linear guide.
¶ Cleaning and Lubricating the Z-Axis
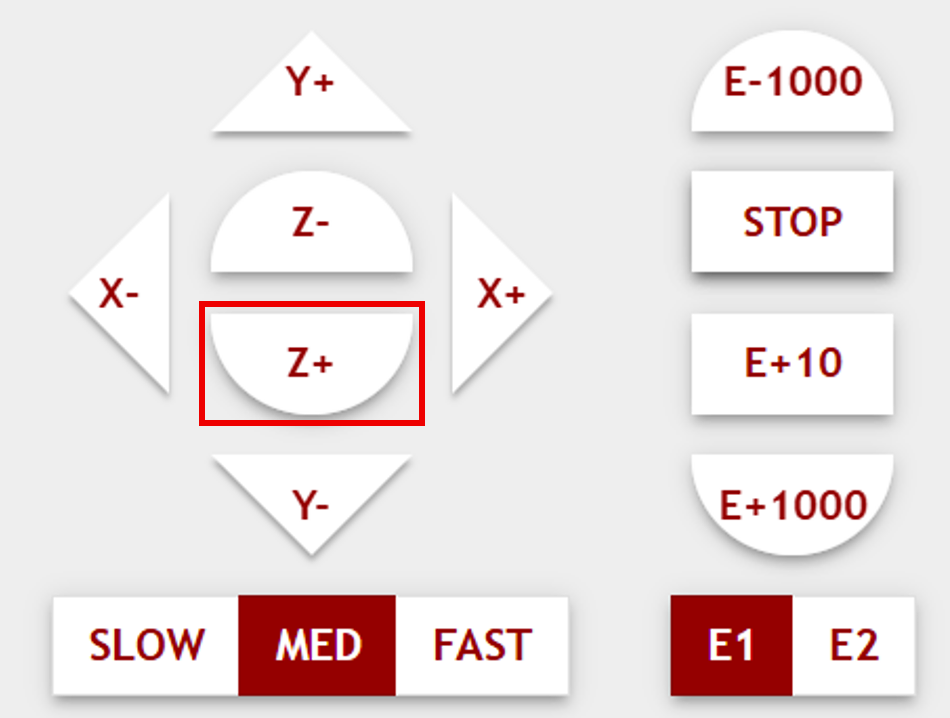
9. In the host software, home the machine, then lower the printing platform (Z+) to its lowest position. After that power off the machine by flipping the switch on the front of the lower printer cabinet.

|
|
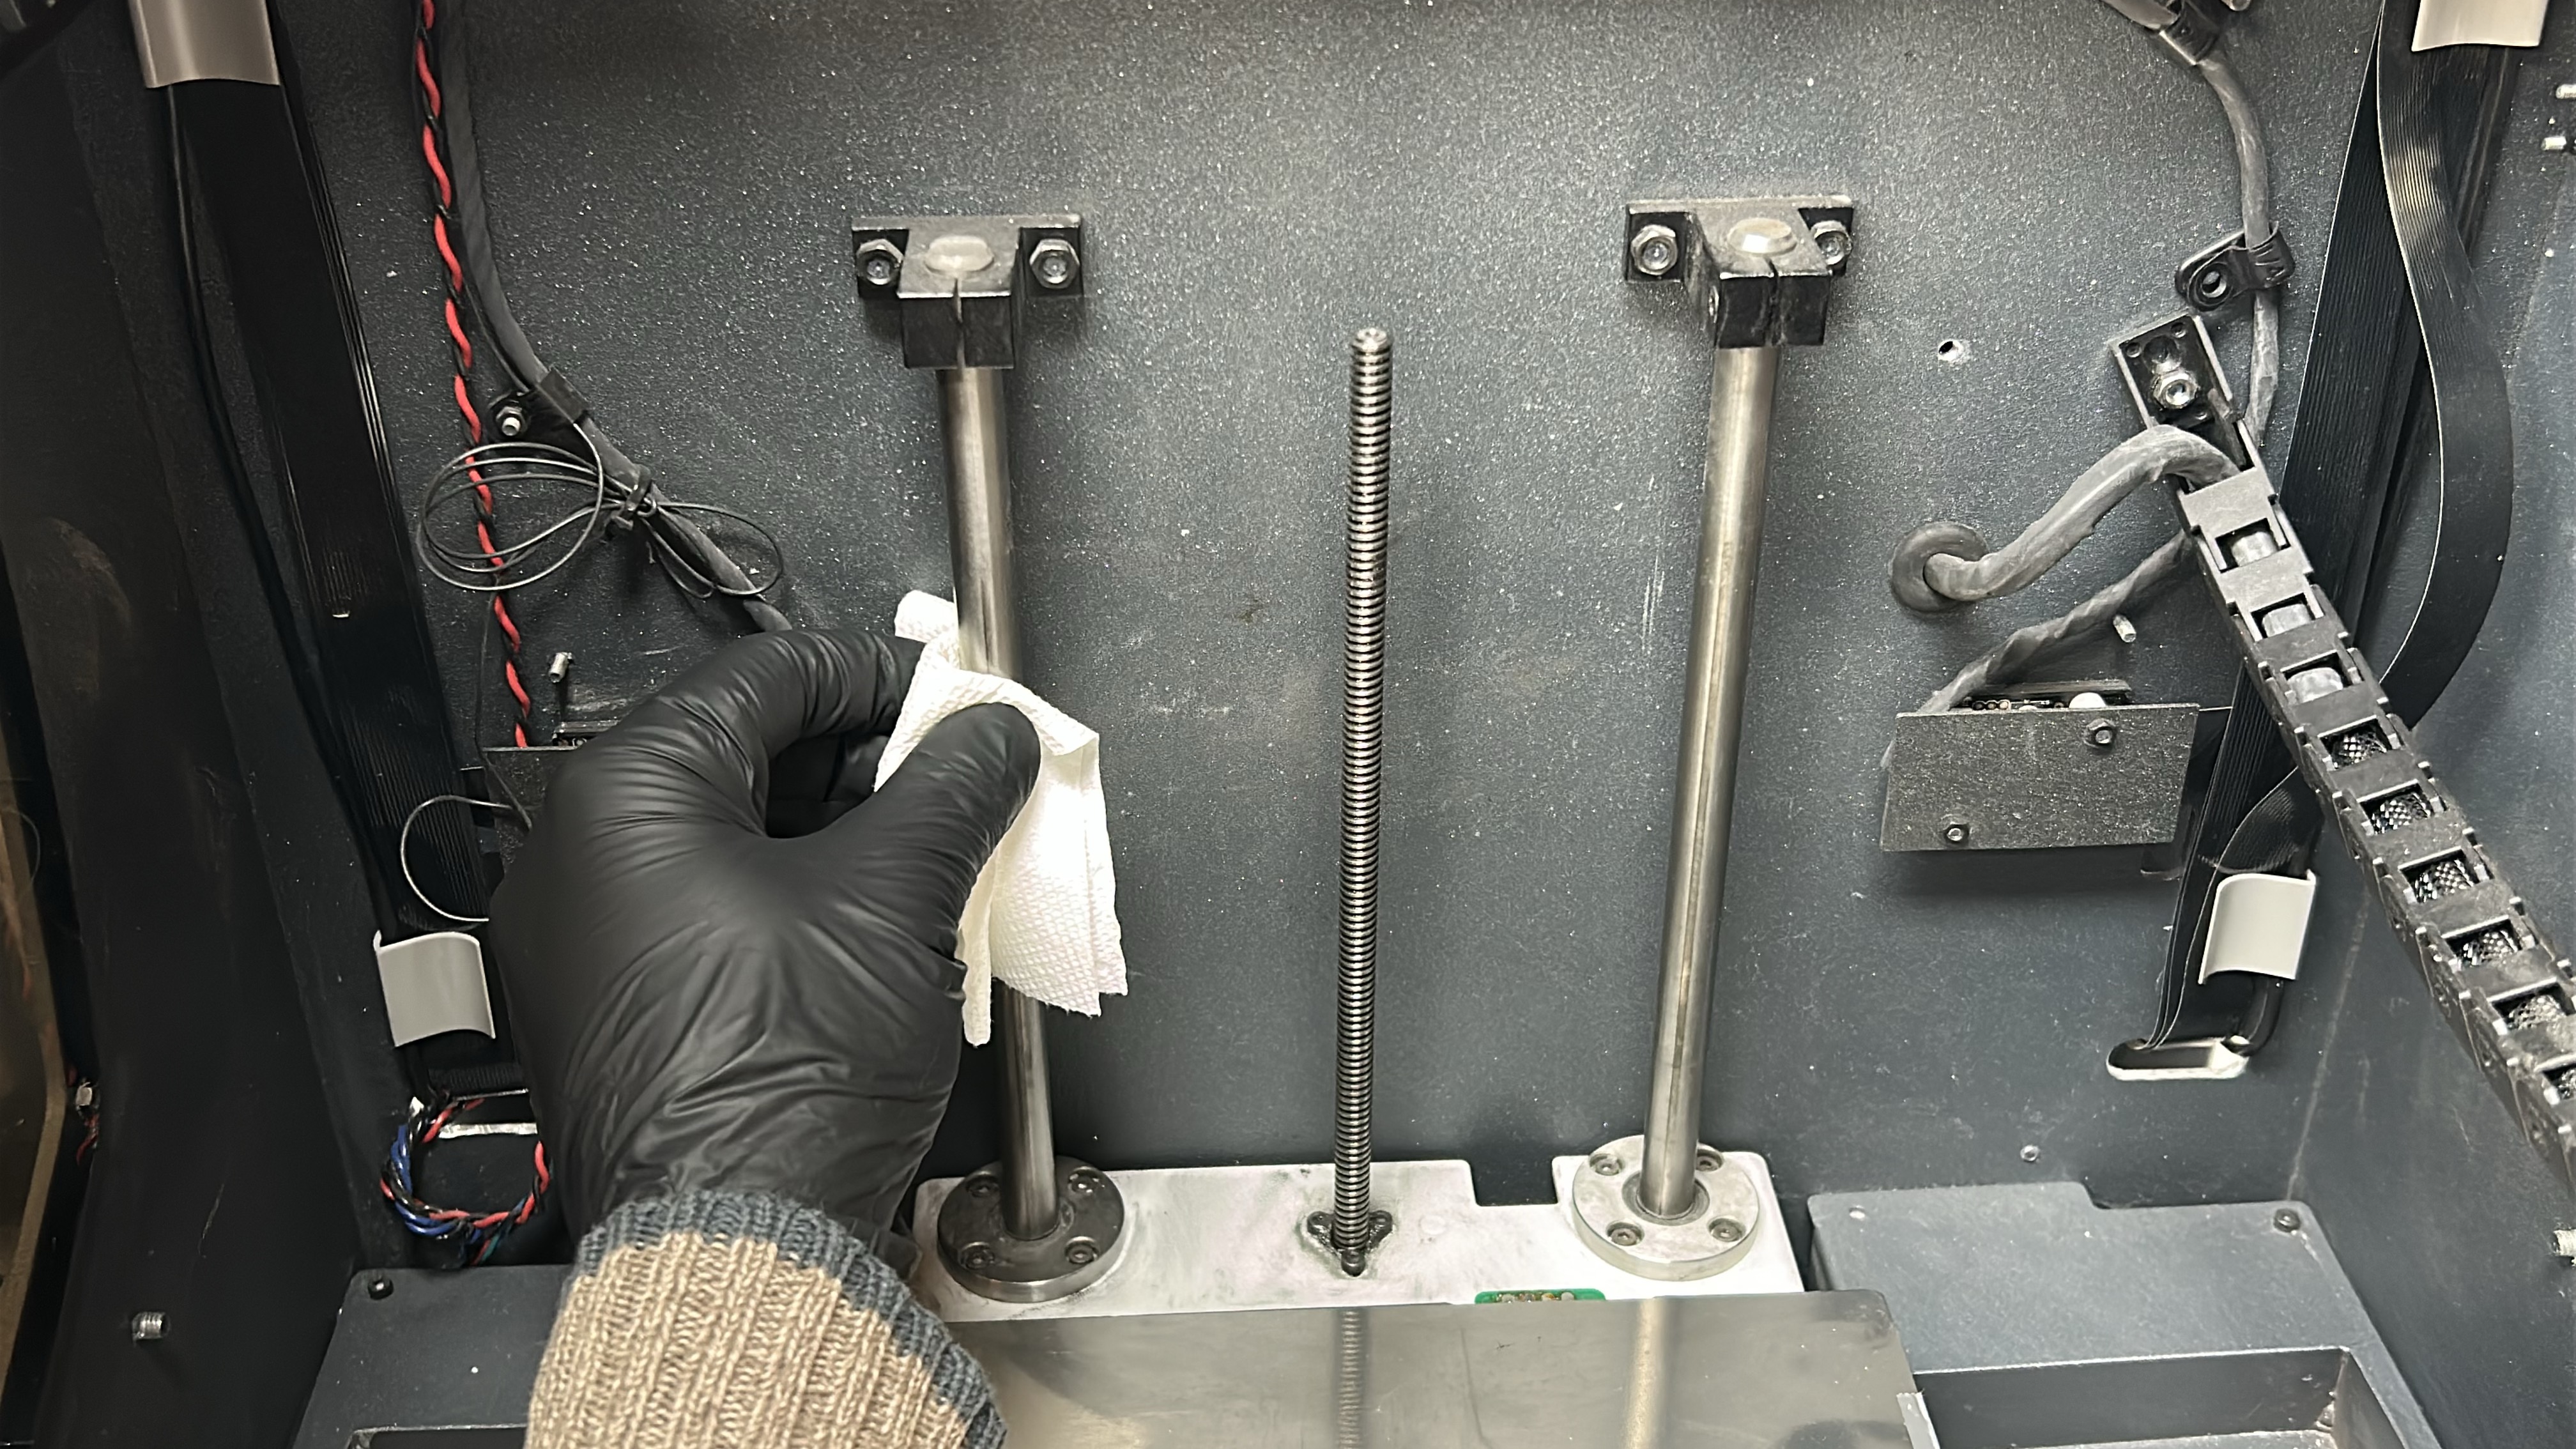
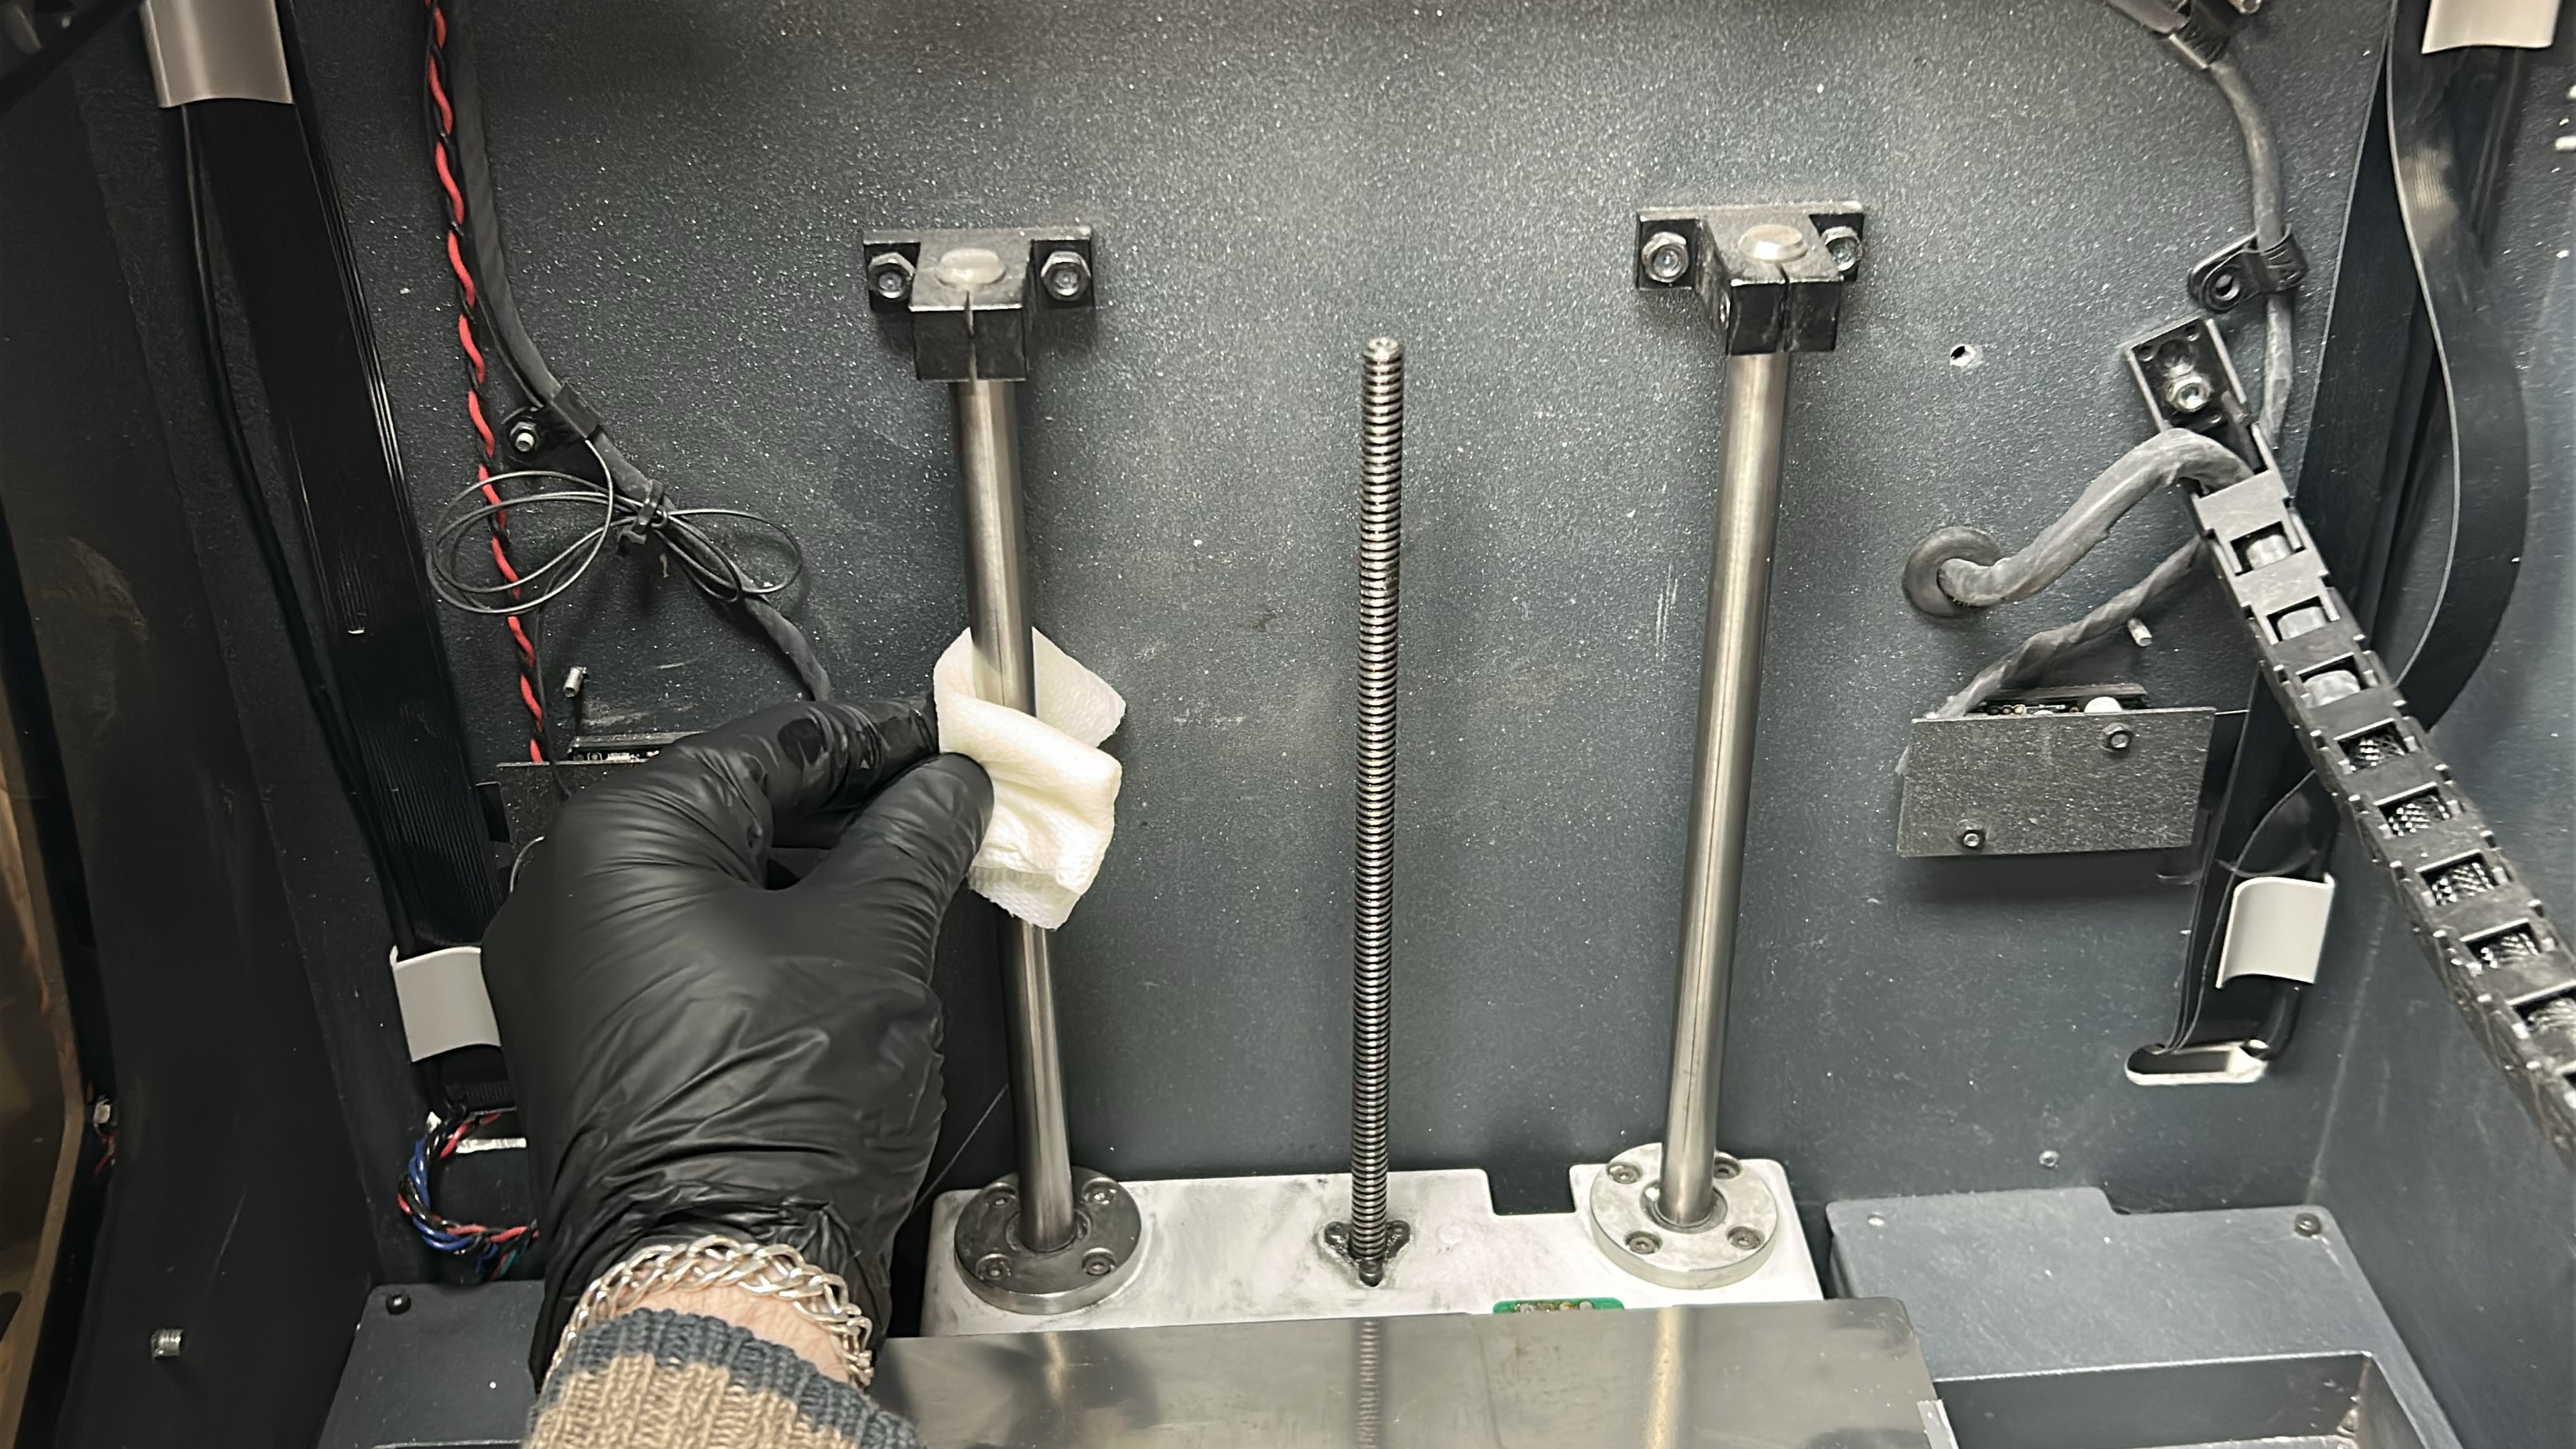
10. With an absorbent paper towel or cloth, remove any trace of dirt or dust on the two Z shaft sidebars. Next, clean the Z-axis sidebars with a paper towel or cloth moistened with a solvent (isopropanol).
|
|
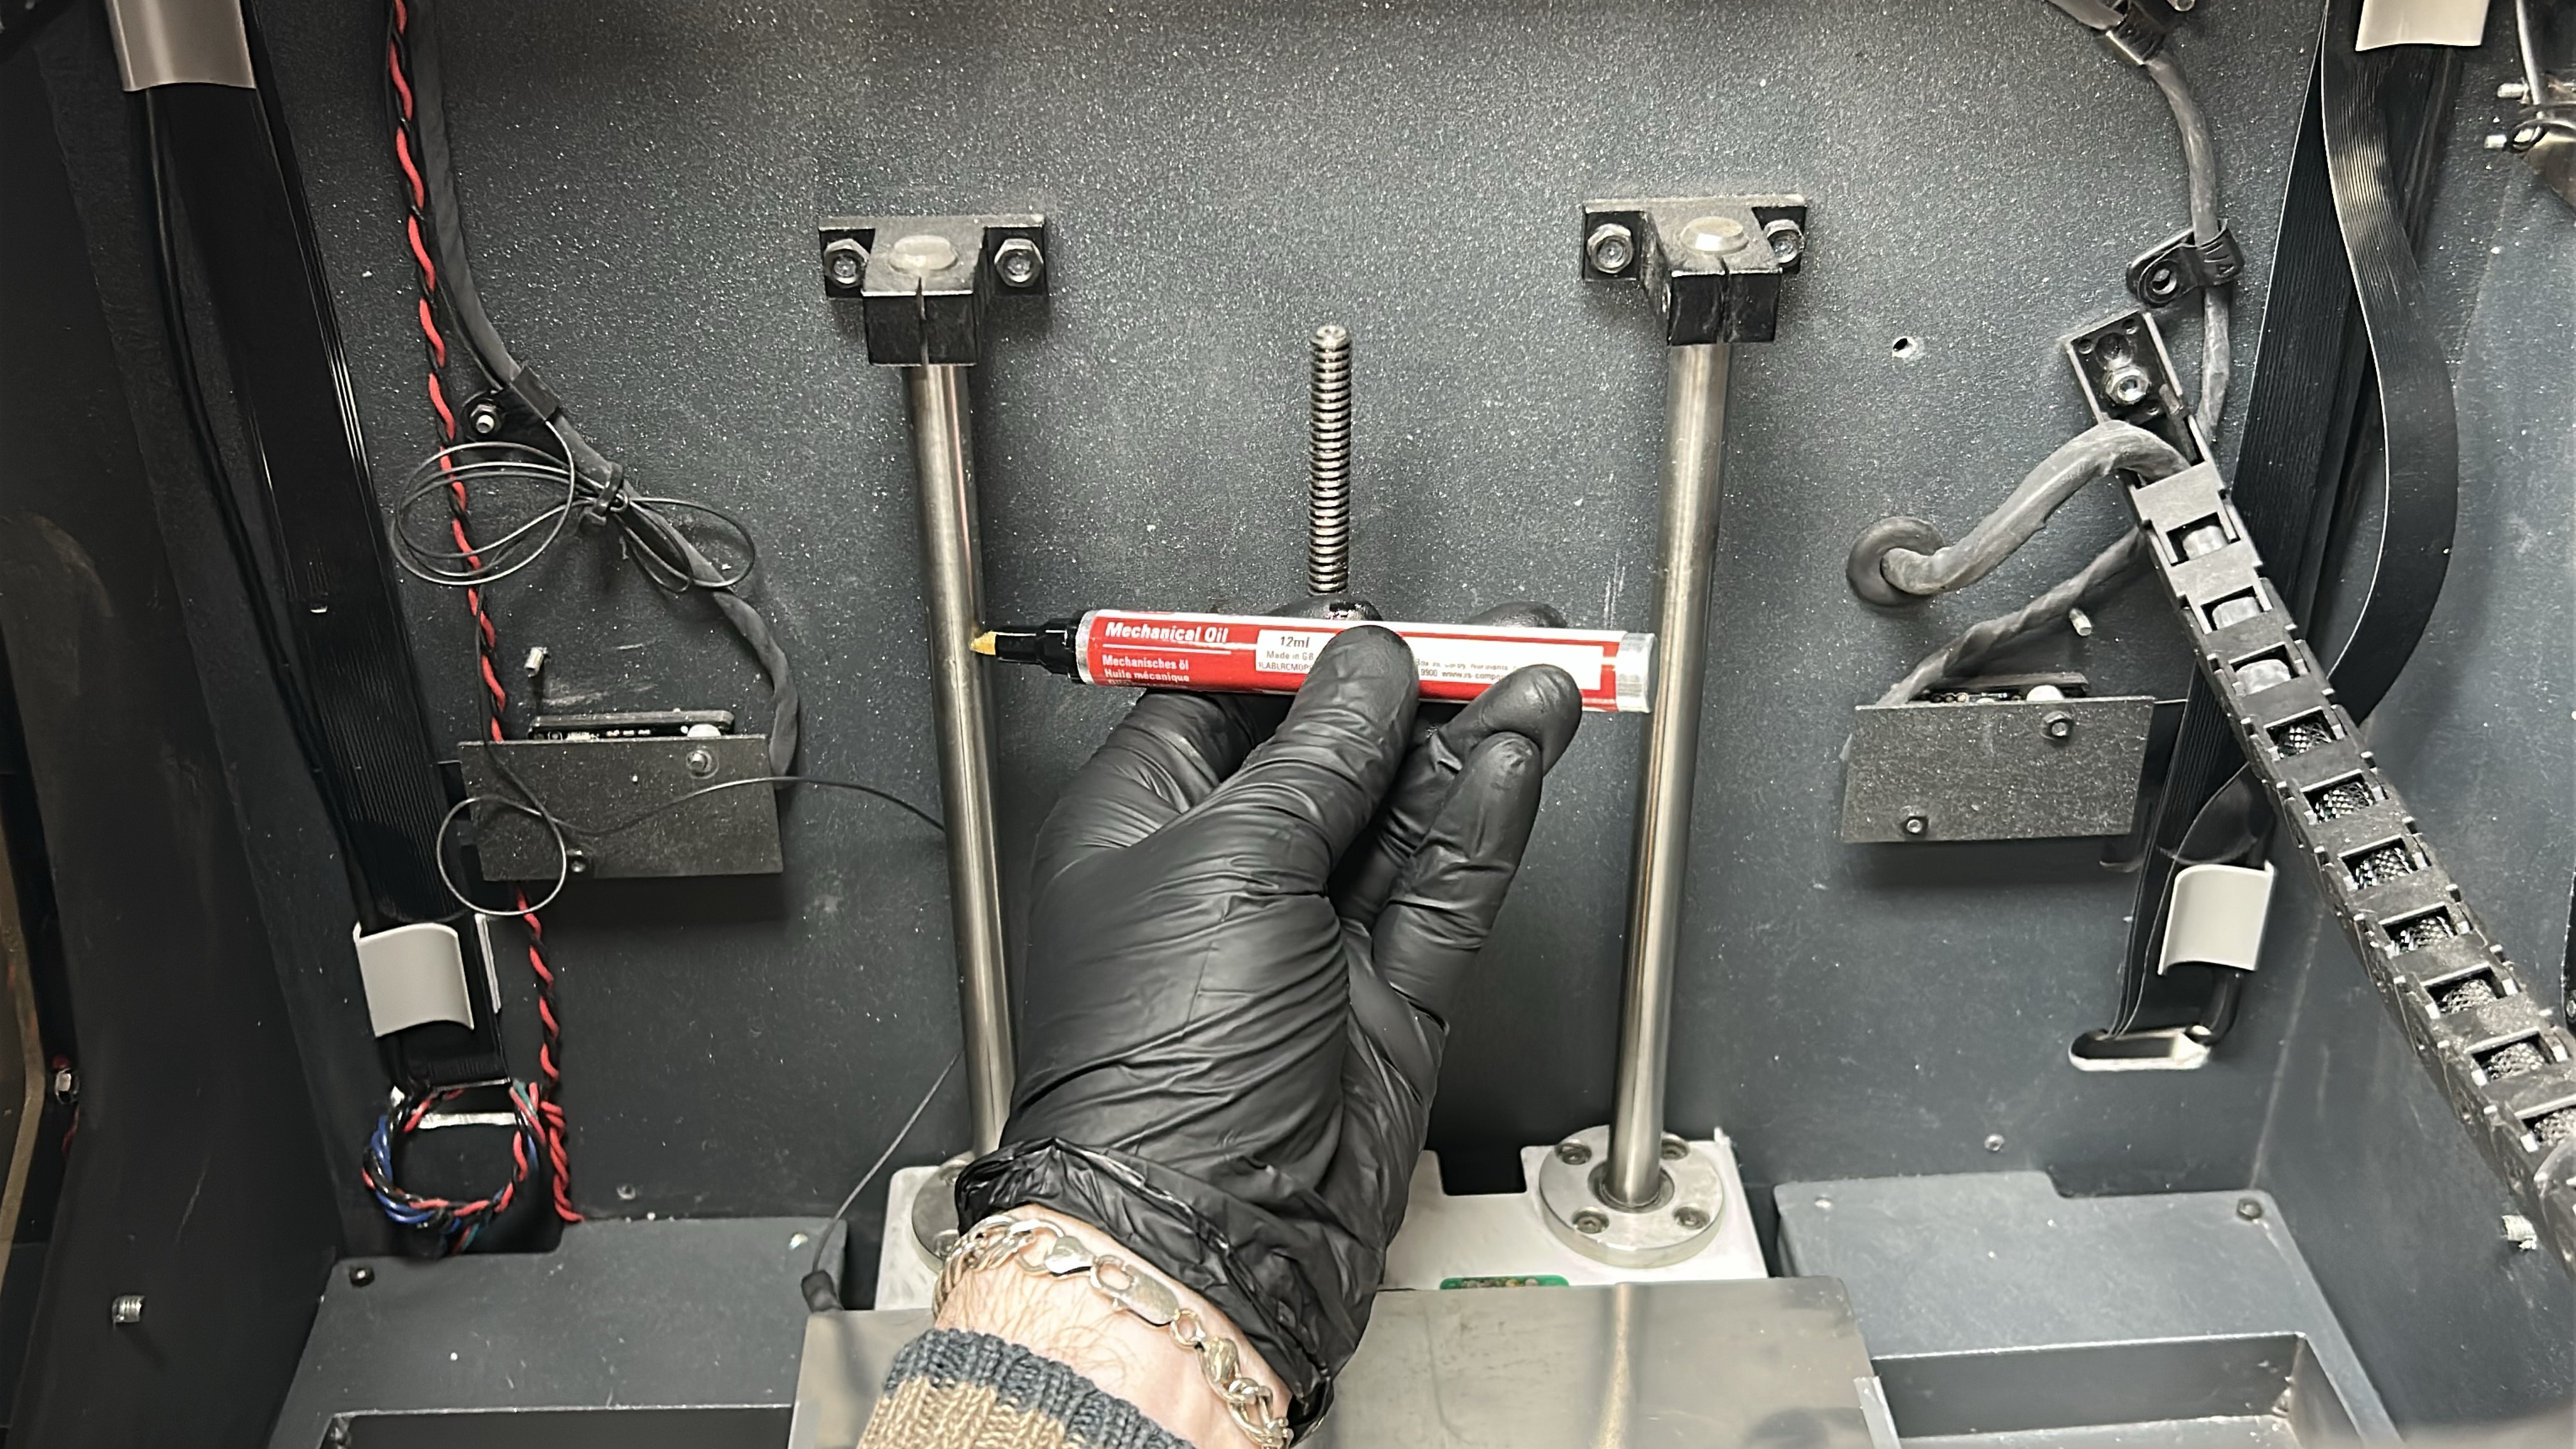
11. Apply the lubricating oil along the Z shaft sidebars ensuring no drips. Clean the Z-axis spindle with an absorbent paper towel or cloth targeting any visible sullied grease. Turn the spindle manually to access the rear.
|
|
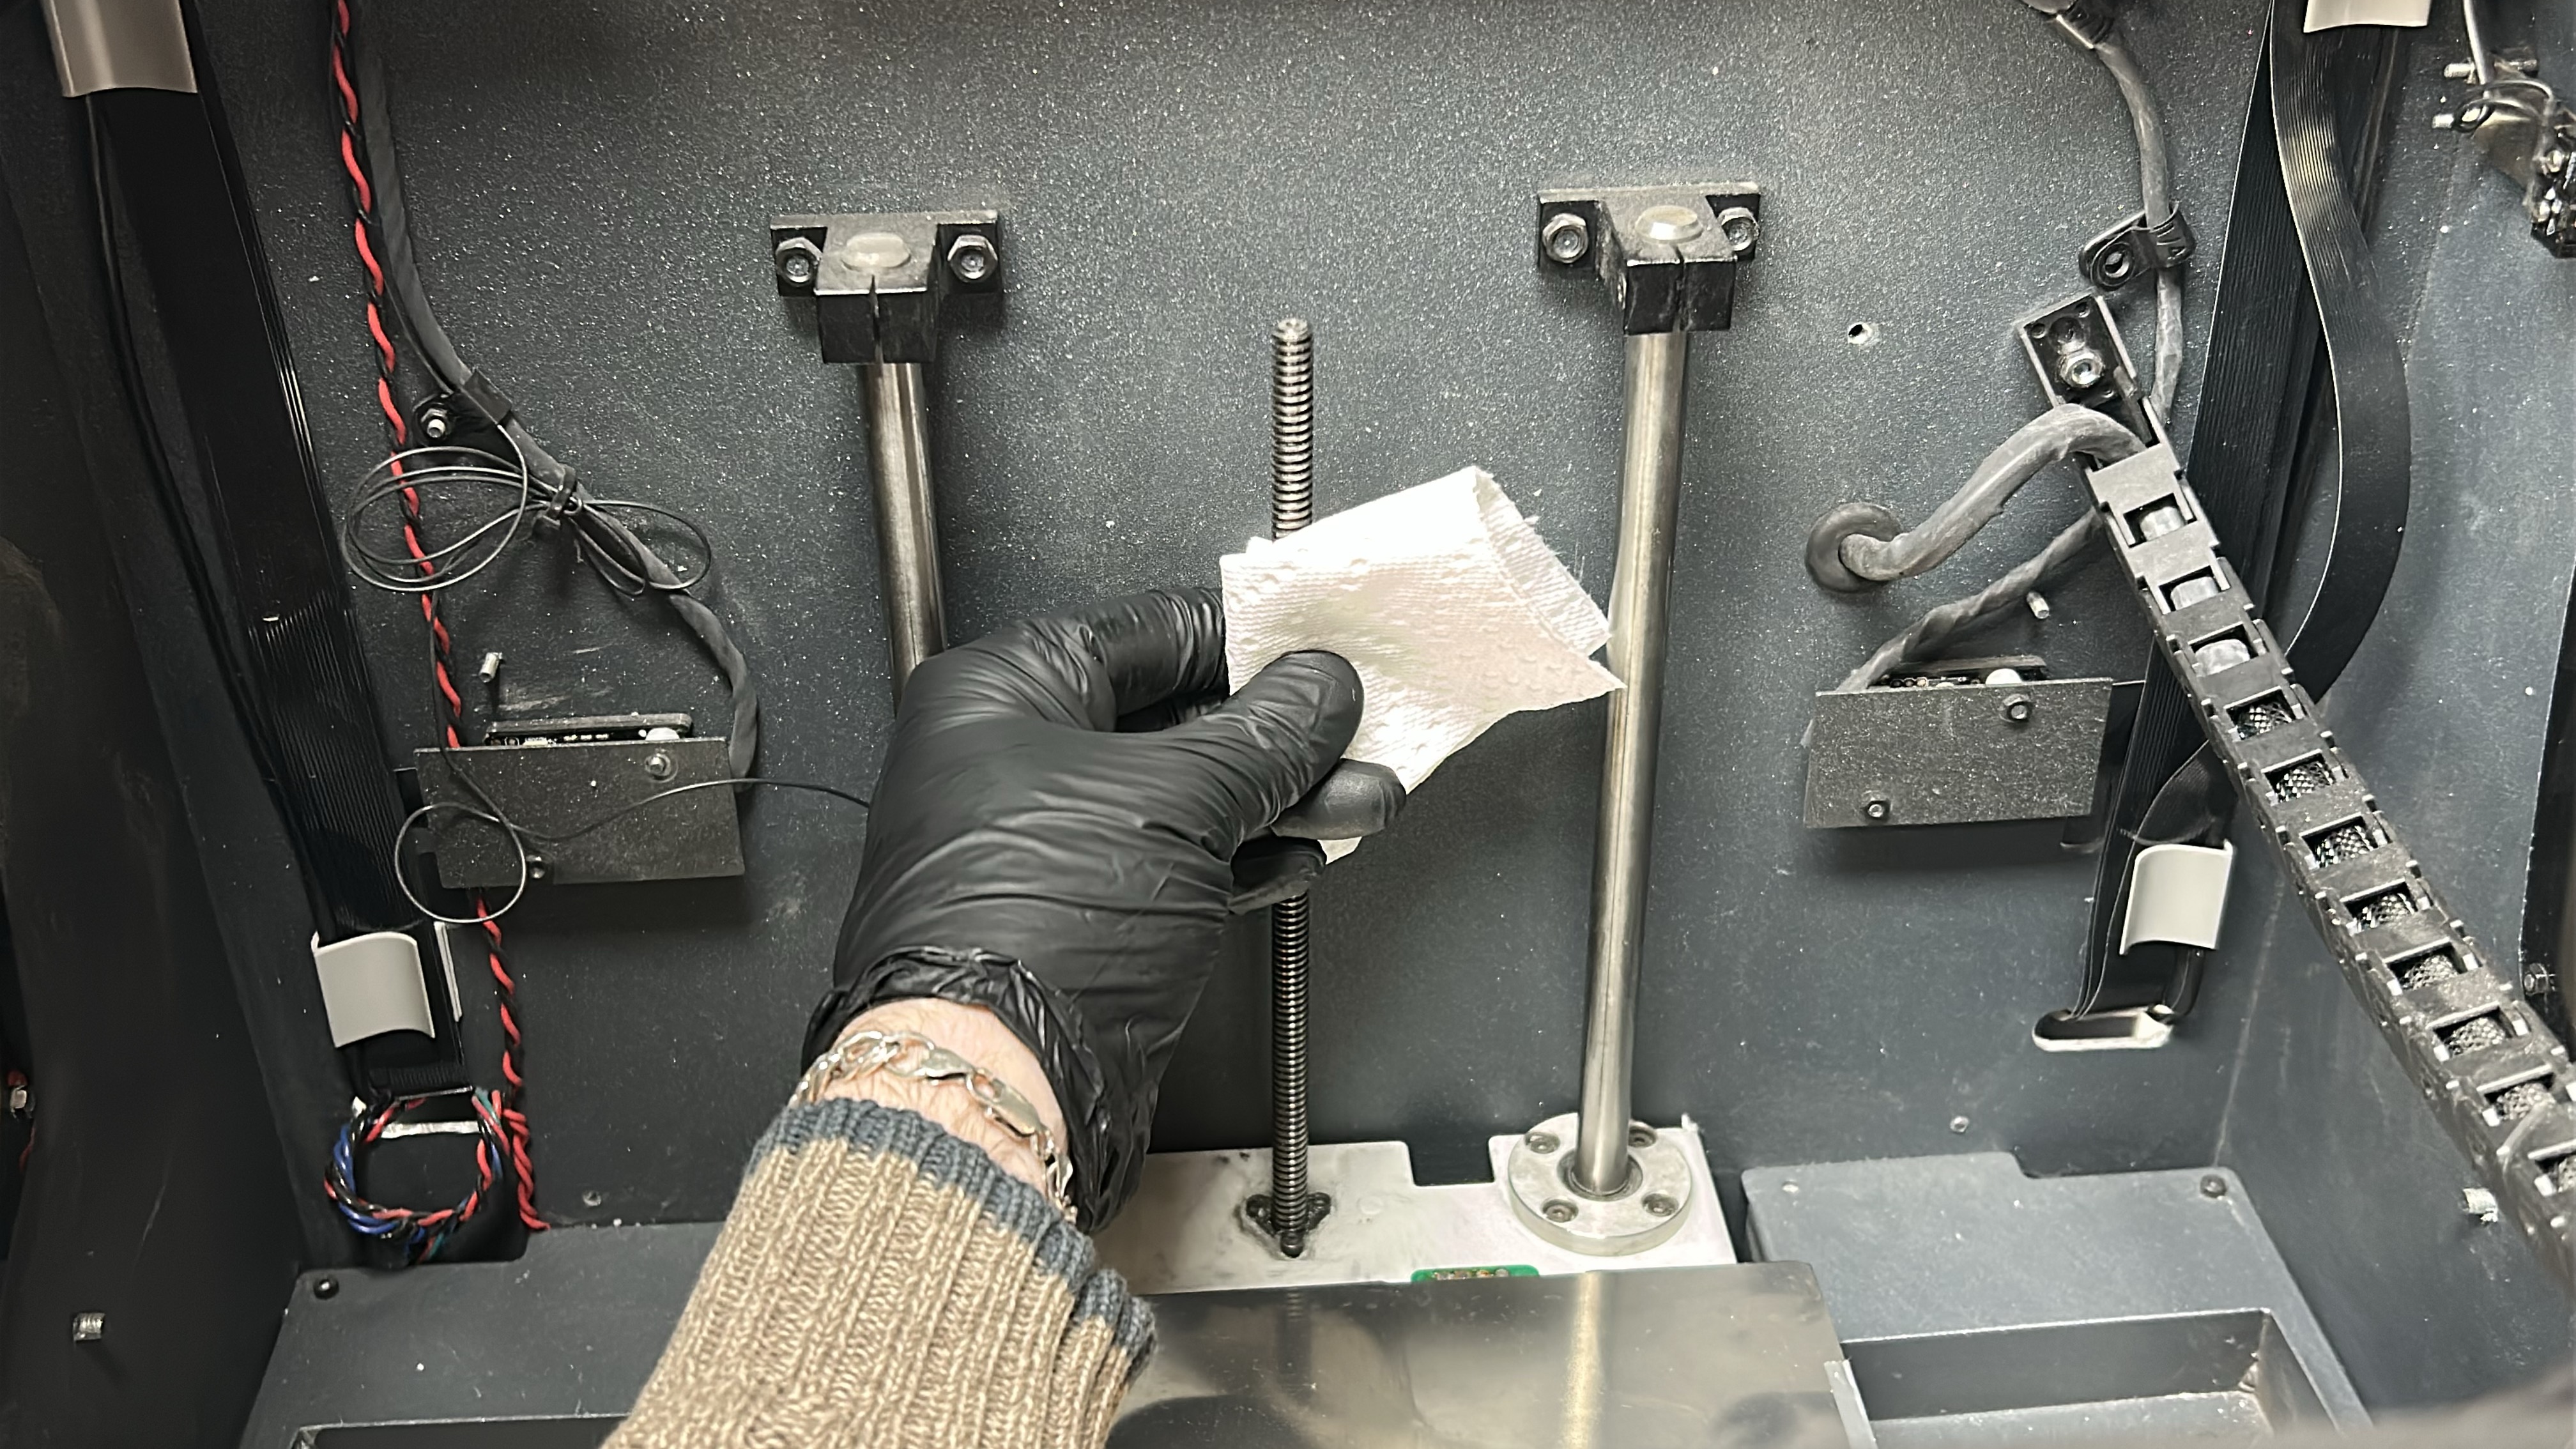
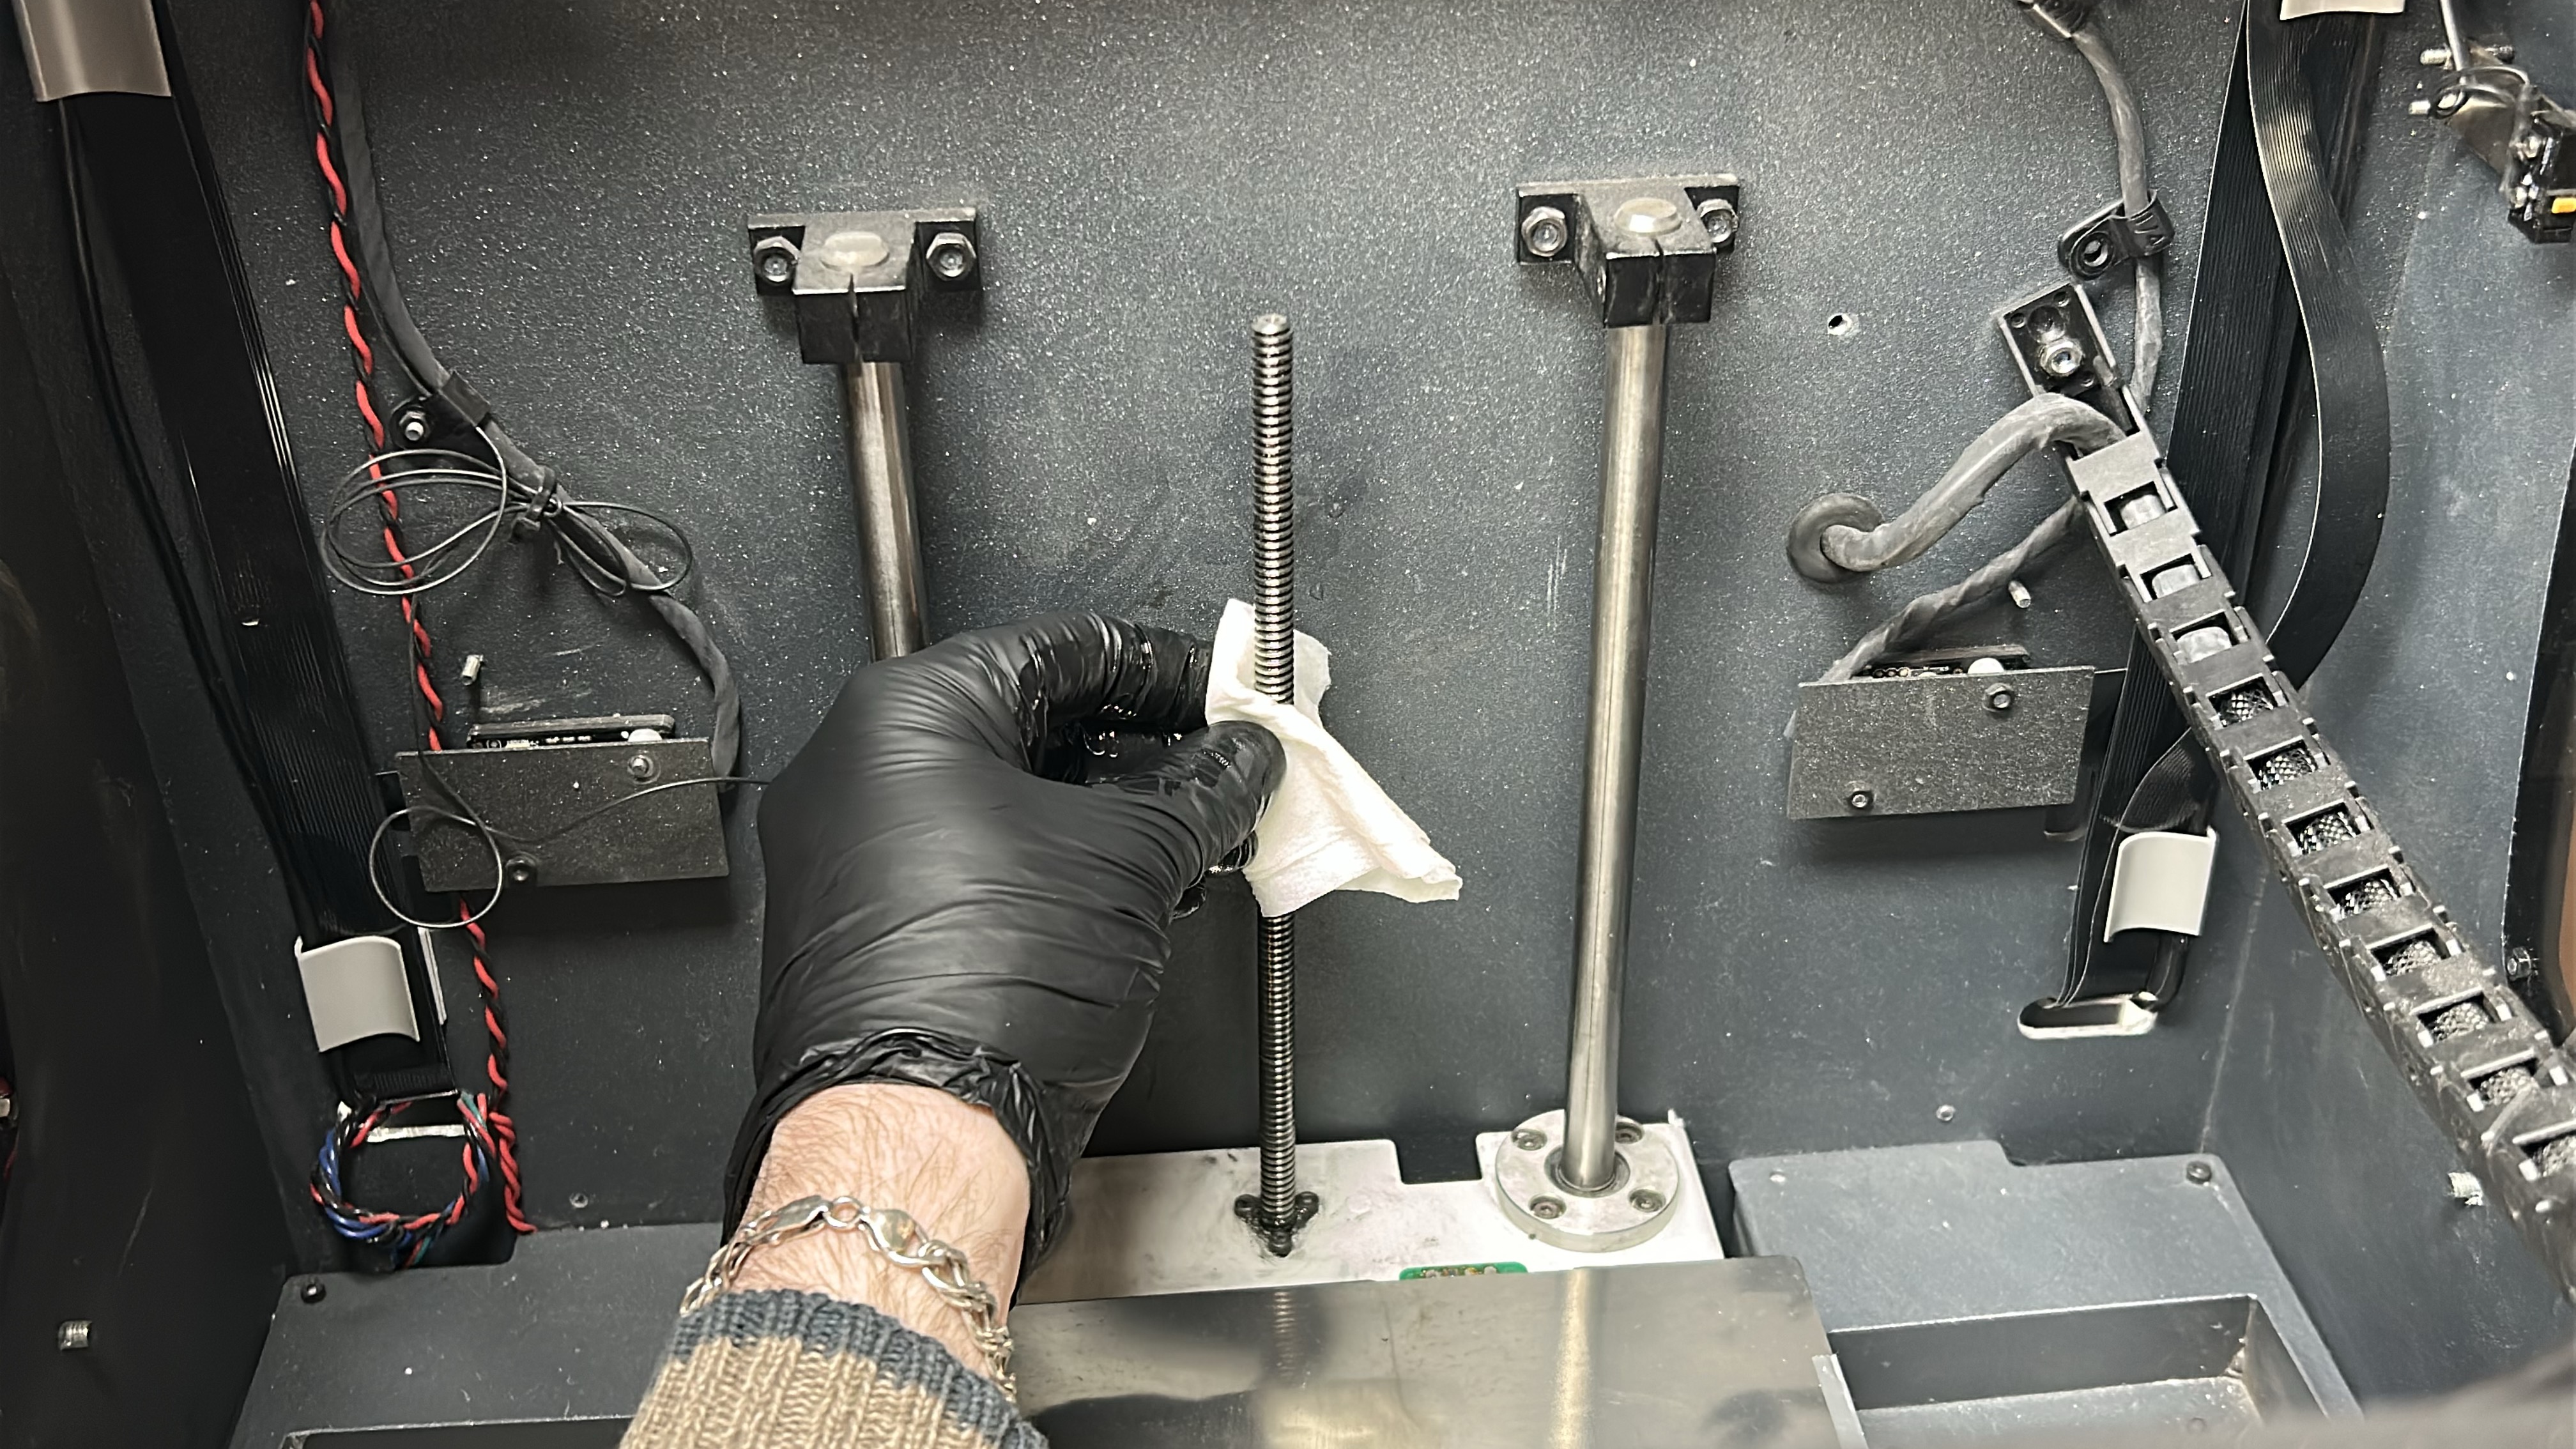
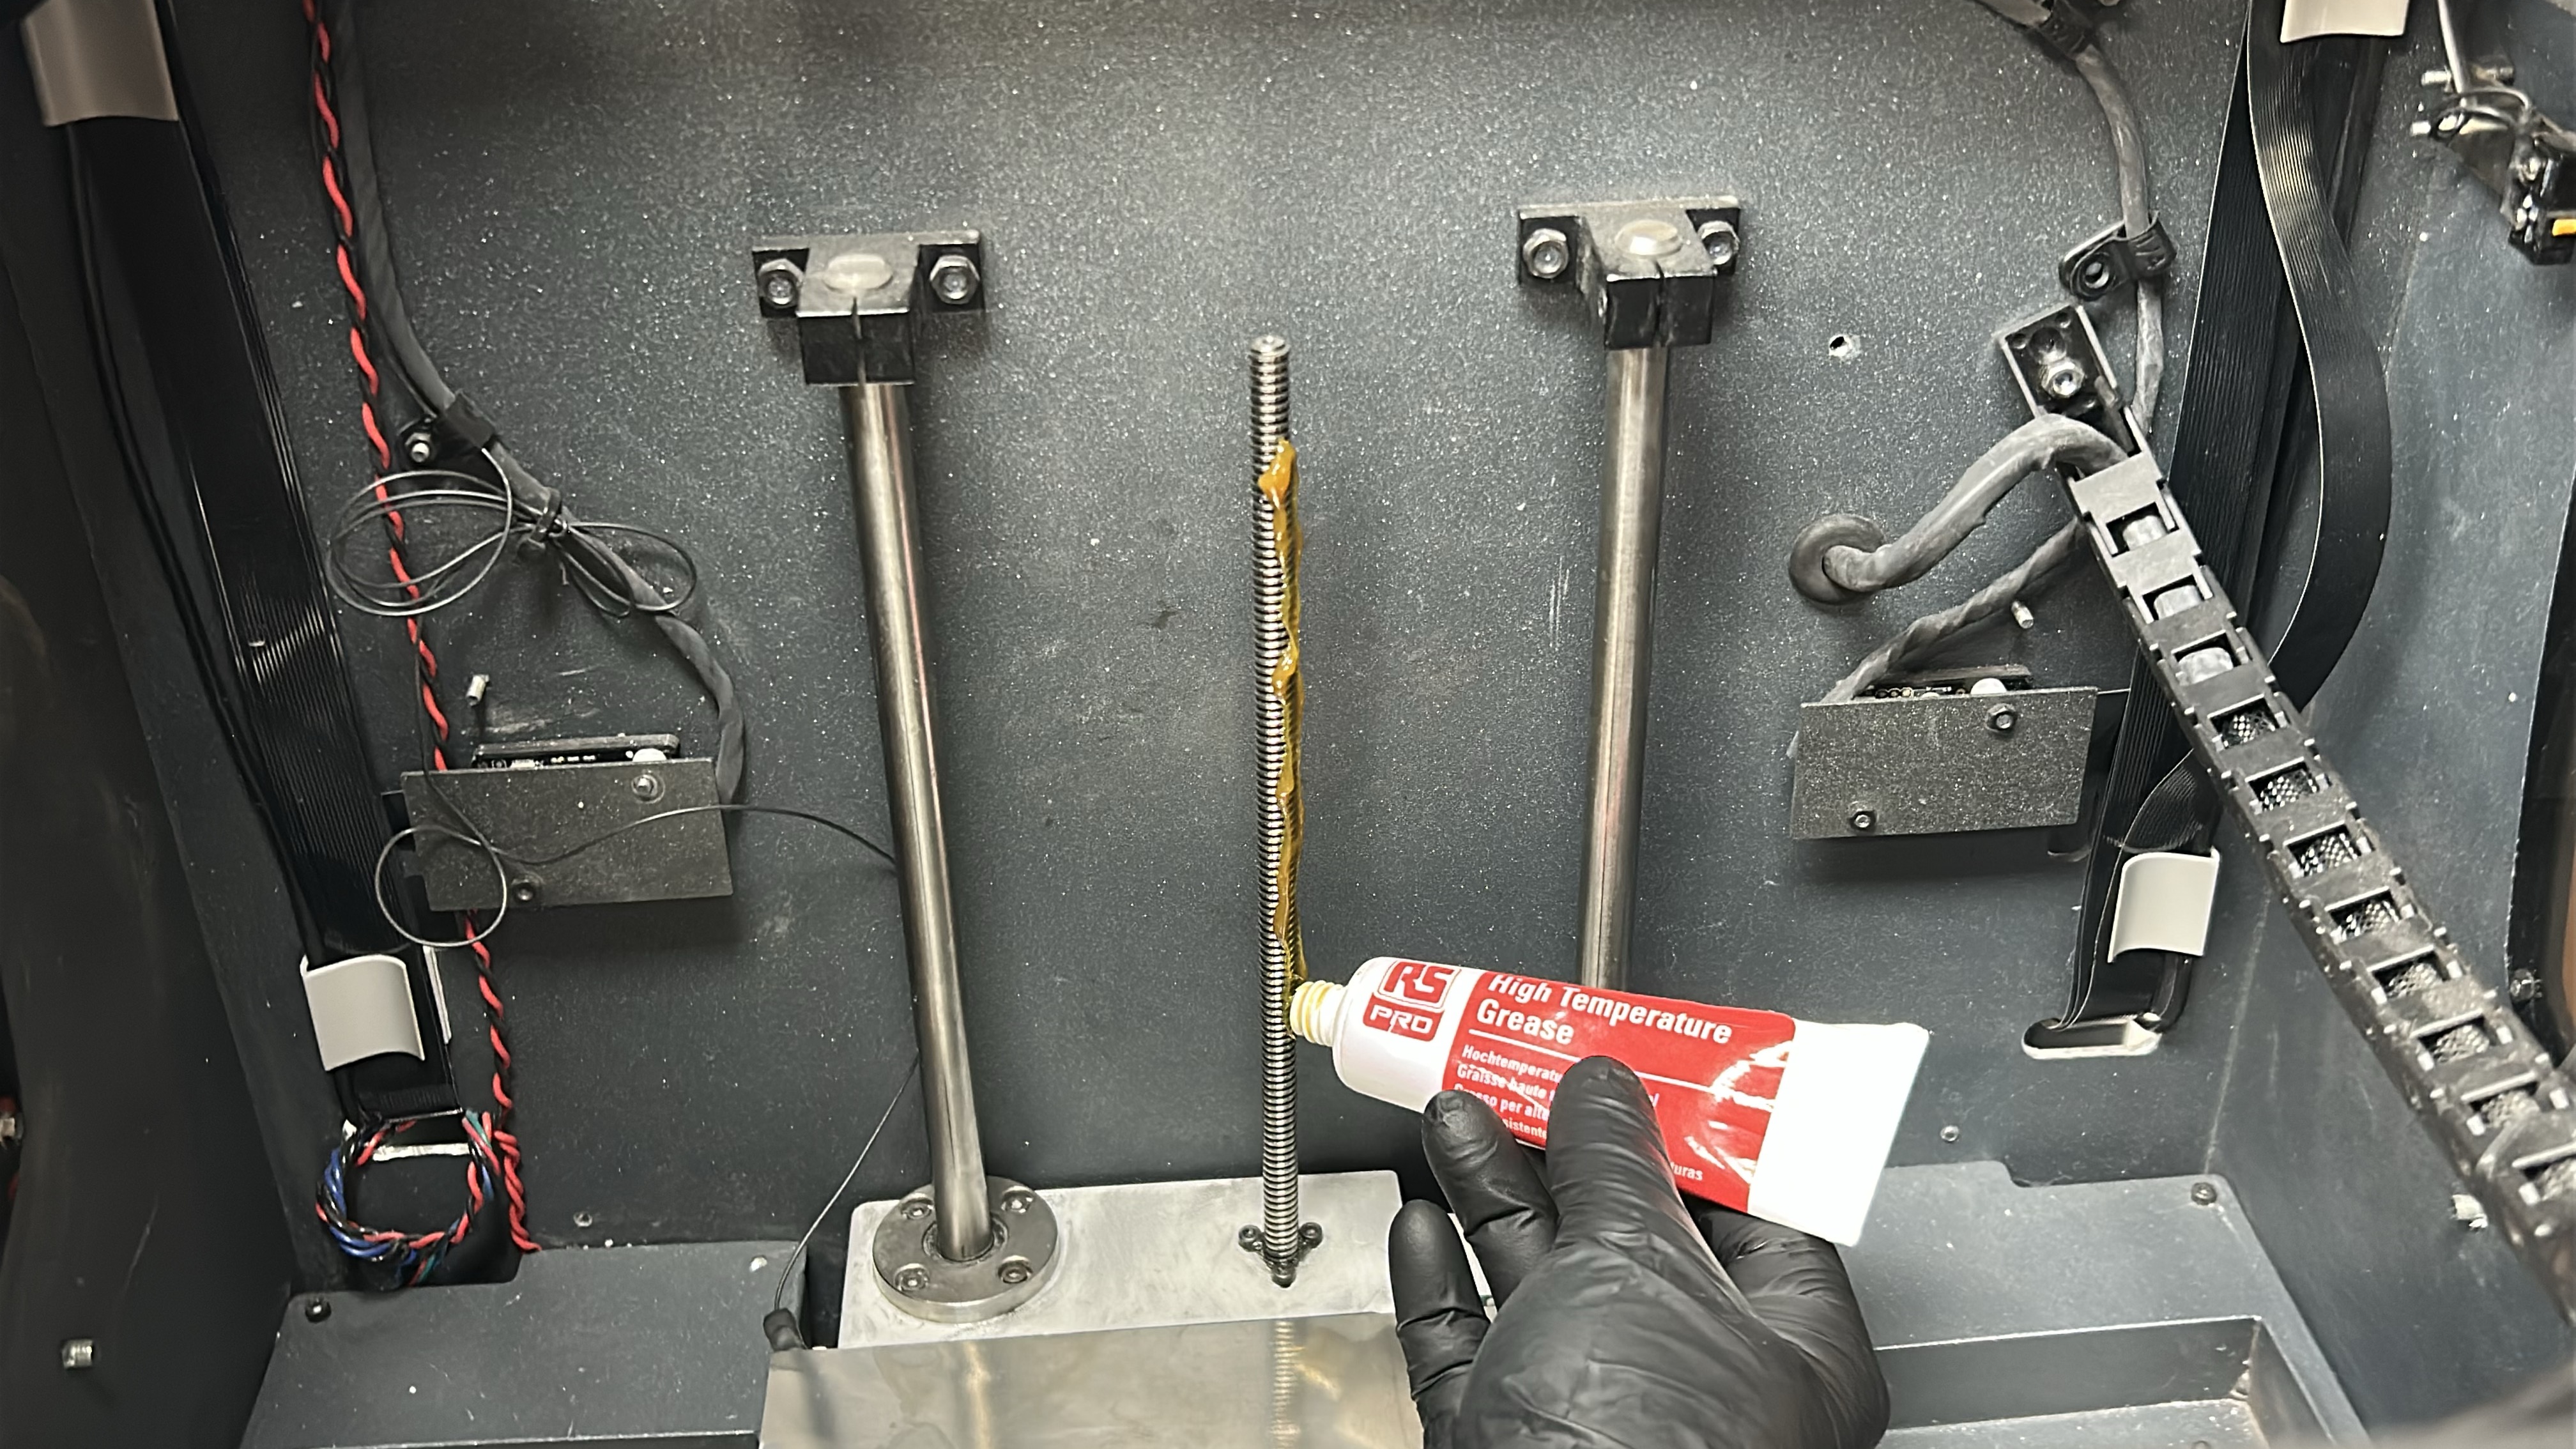
12. Apply solvent (isopropanol) to a paper towel or cloth and clean the Z-axis spindle trying to remove as much of the existing grease as possible. Then once any remaining solvent on the spindle has dried, apply a coat of grease along the spindle.
|
|
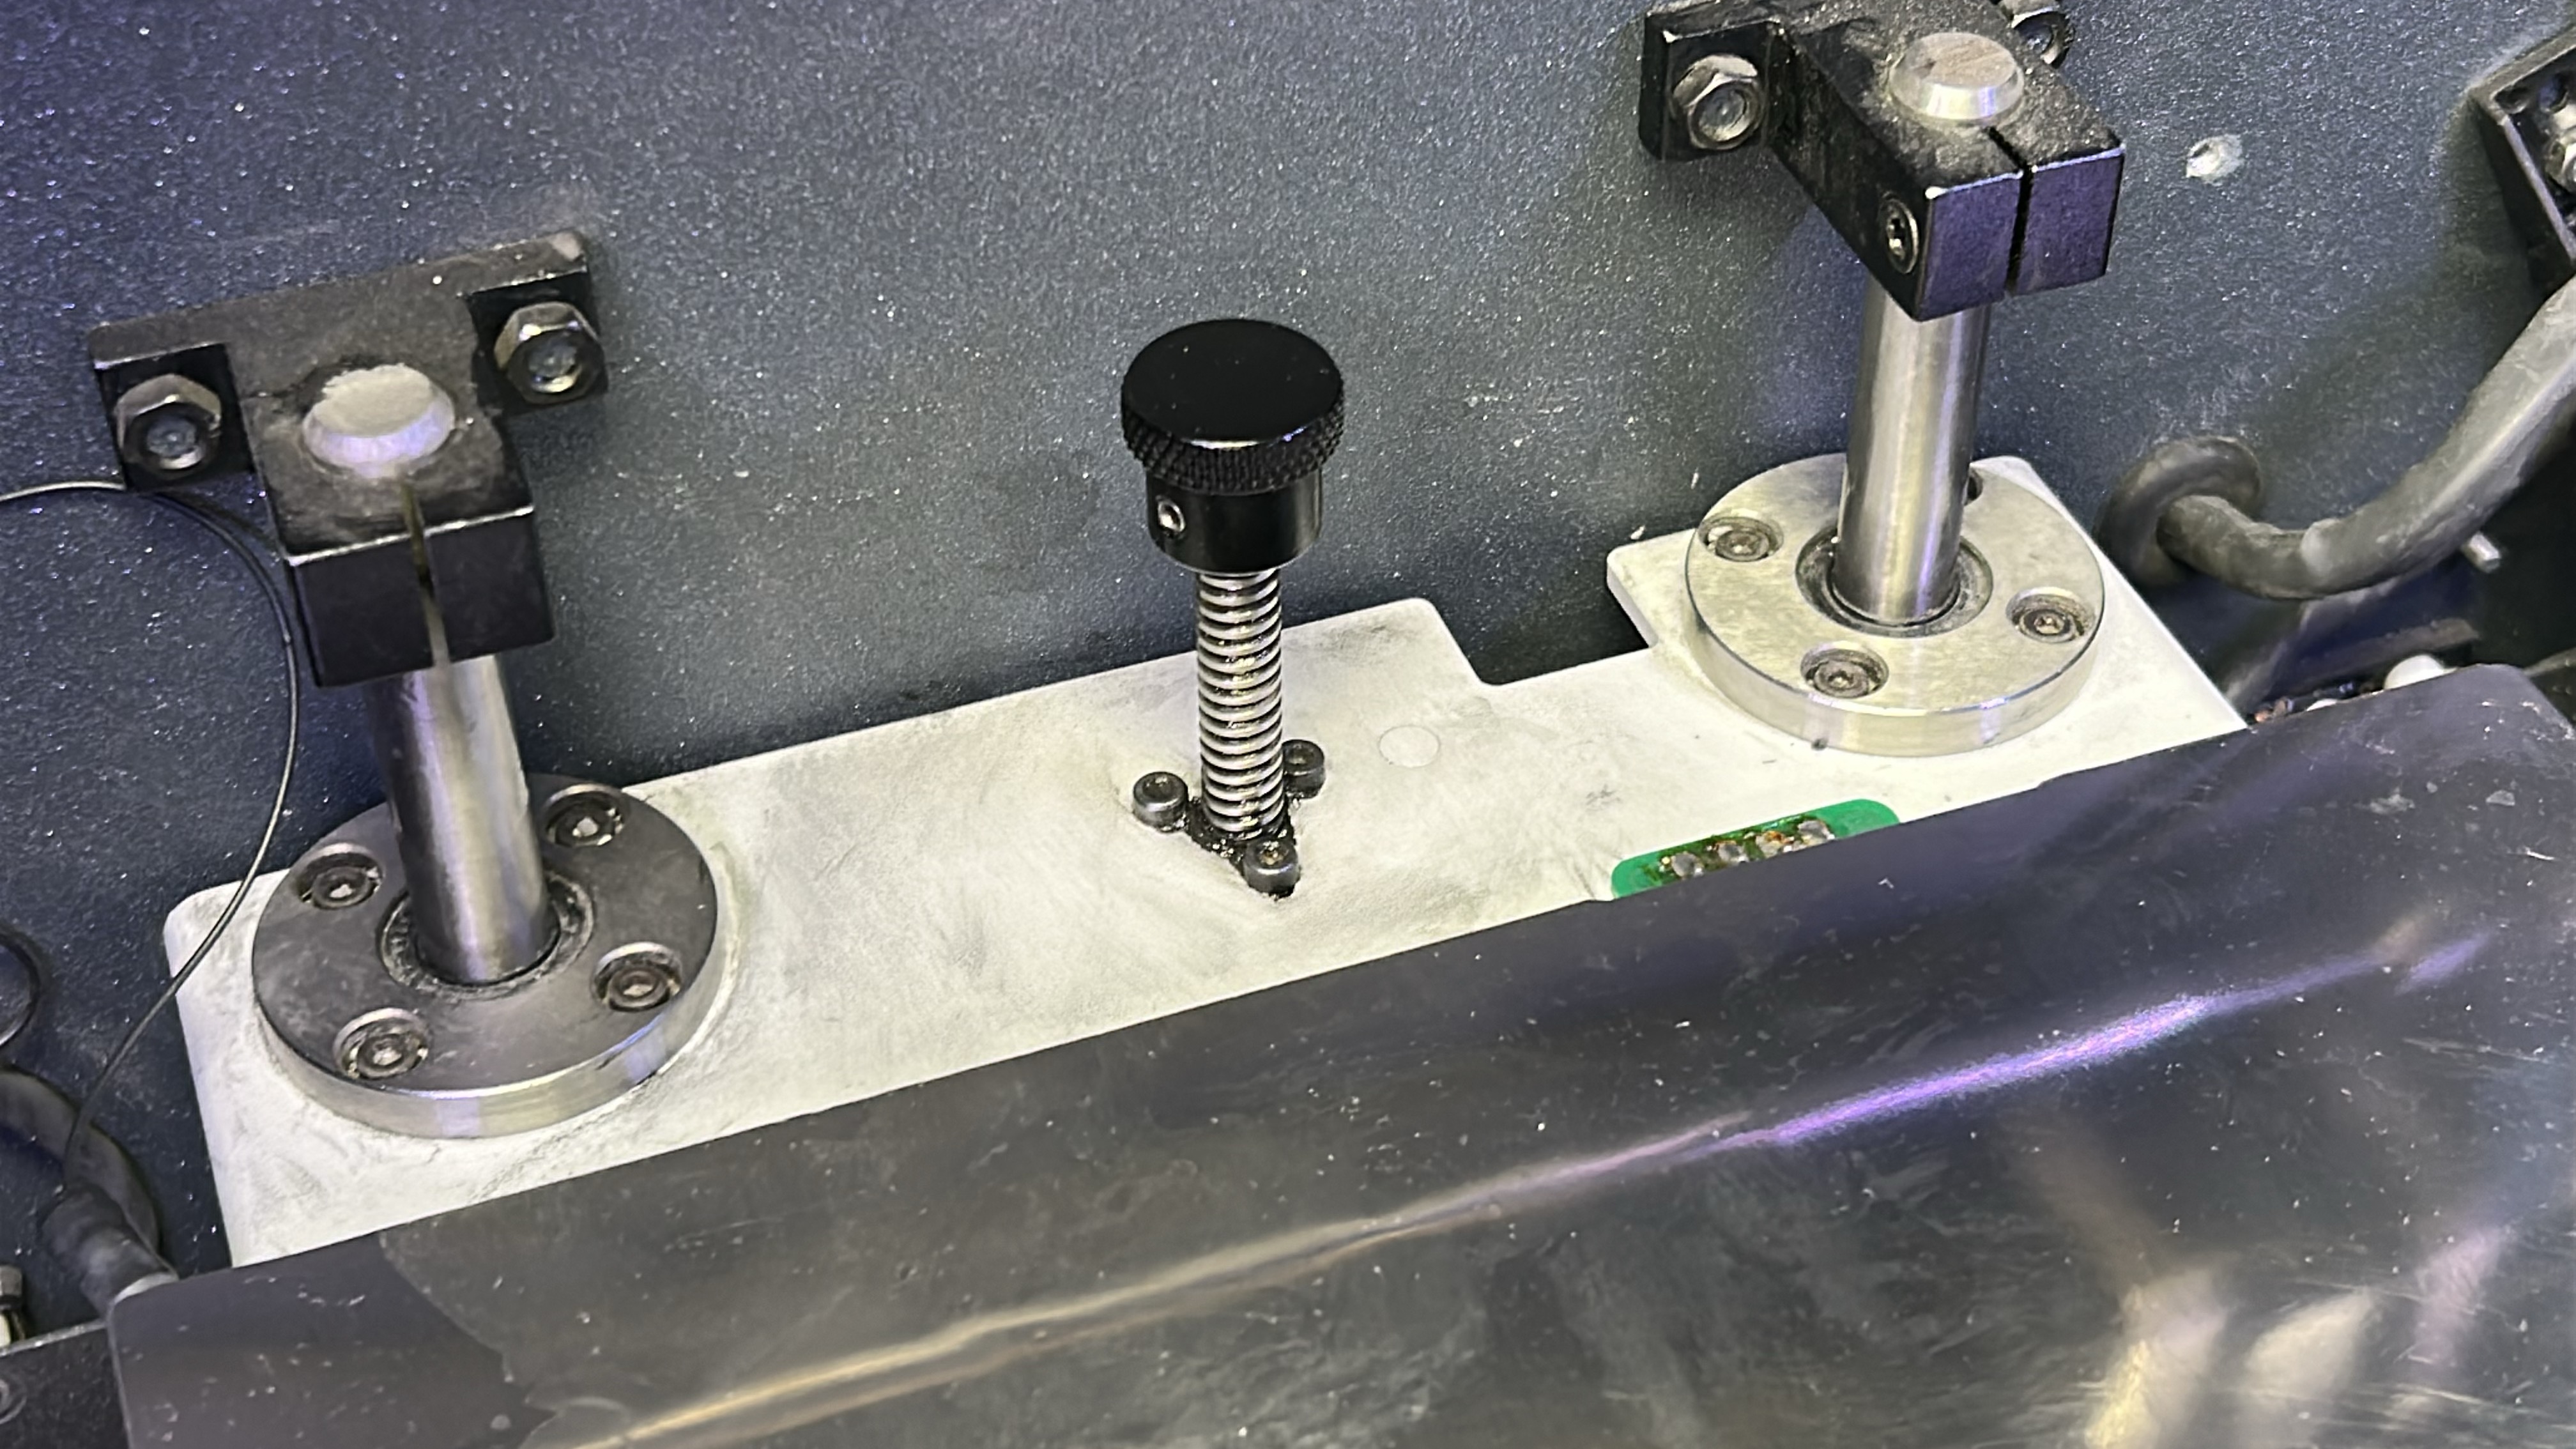
13. Turn the printer back on via the switch on the lower cabinet. Using the host software interface home the printer, then raise (Z-) and lower (Z+) the printing bed between its upper and lower positions two times to evenly distribute the oil and grease along the Z-axis sidebars and spindle. Once the printing platform has reached the upper position for a second time, wipe away any excess grease from the Z-axis spindle.
|

|
|