 |
Chemical hazard: Chemical vapors and condensates present in the vacuum pressure control valve are harmful, avoid ingestion, inhalation, and skin contact. Wear nitrile gloves, goggles, and a respirator. |
1. It is easiest to access the vacuum pressure control valve after removing the vacuum filter (see Replacing the Vacuum Filter Media for removal instructions), making the servicing simpler.
2. The ball valve must be in the Open position for this procedure, cleaning cannot be performed in the closed position (see images below, a and b respectively). In the Status Panel interface, verify that the ball valve is in Open position. If not, use the buttons to shift the valve into Open position. The Close Ball Valve button must be deselected.
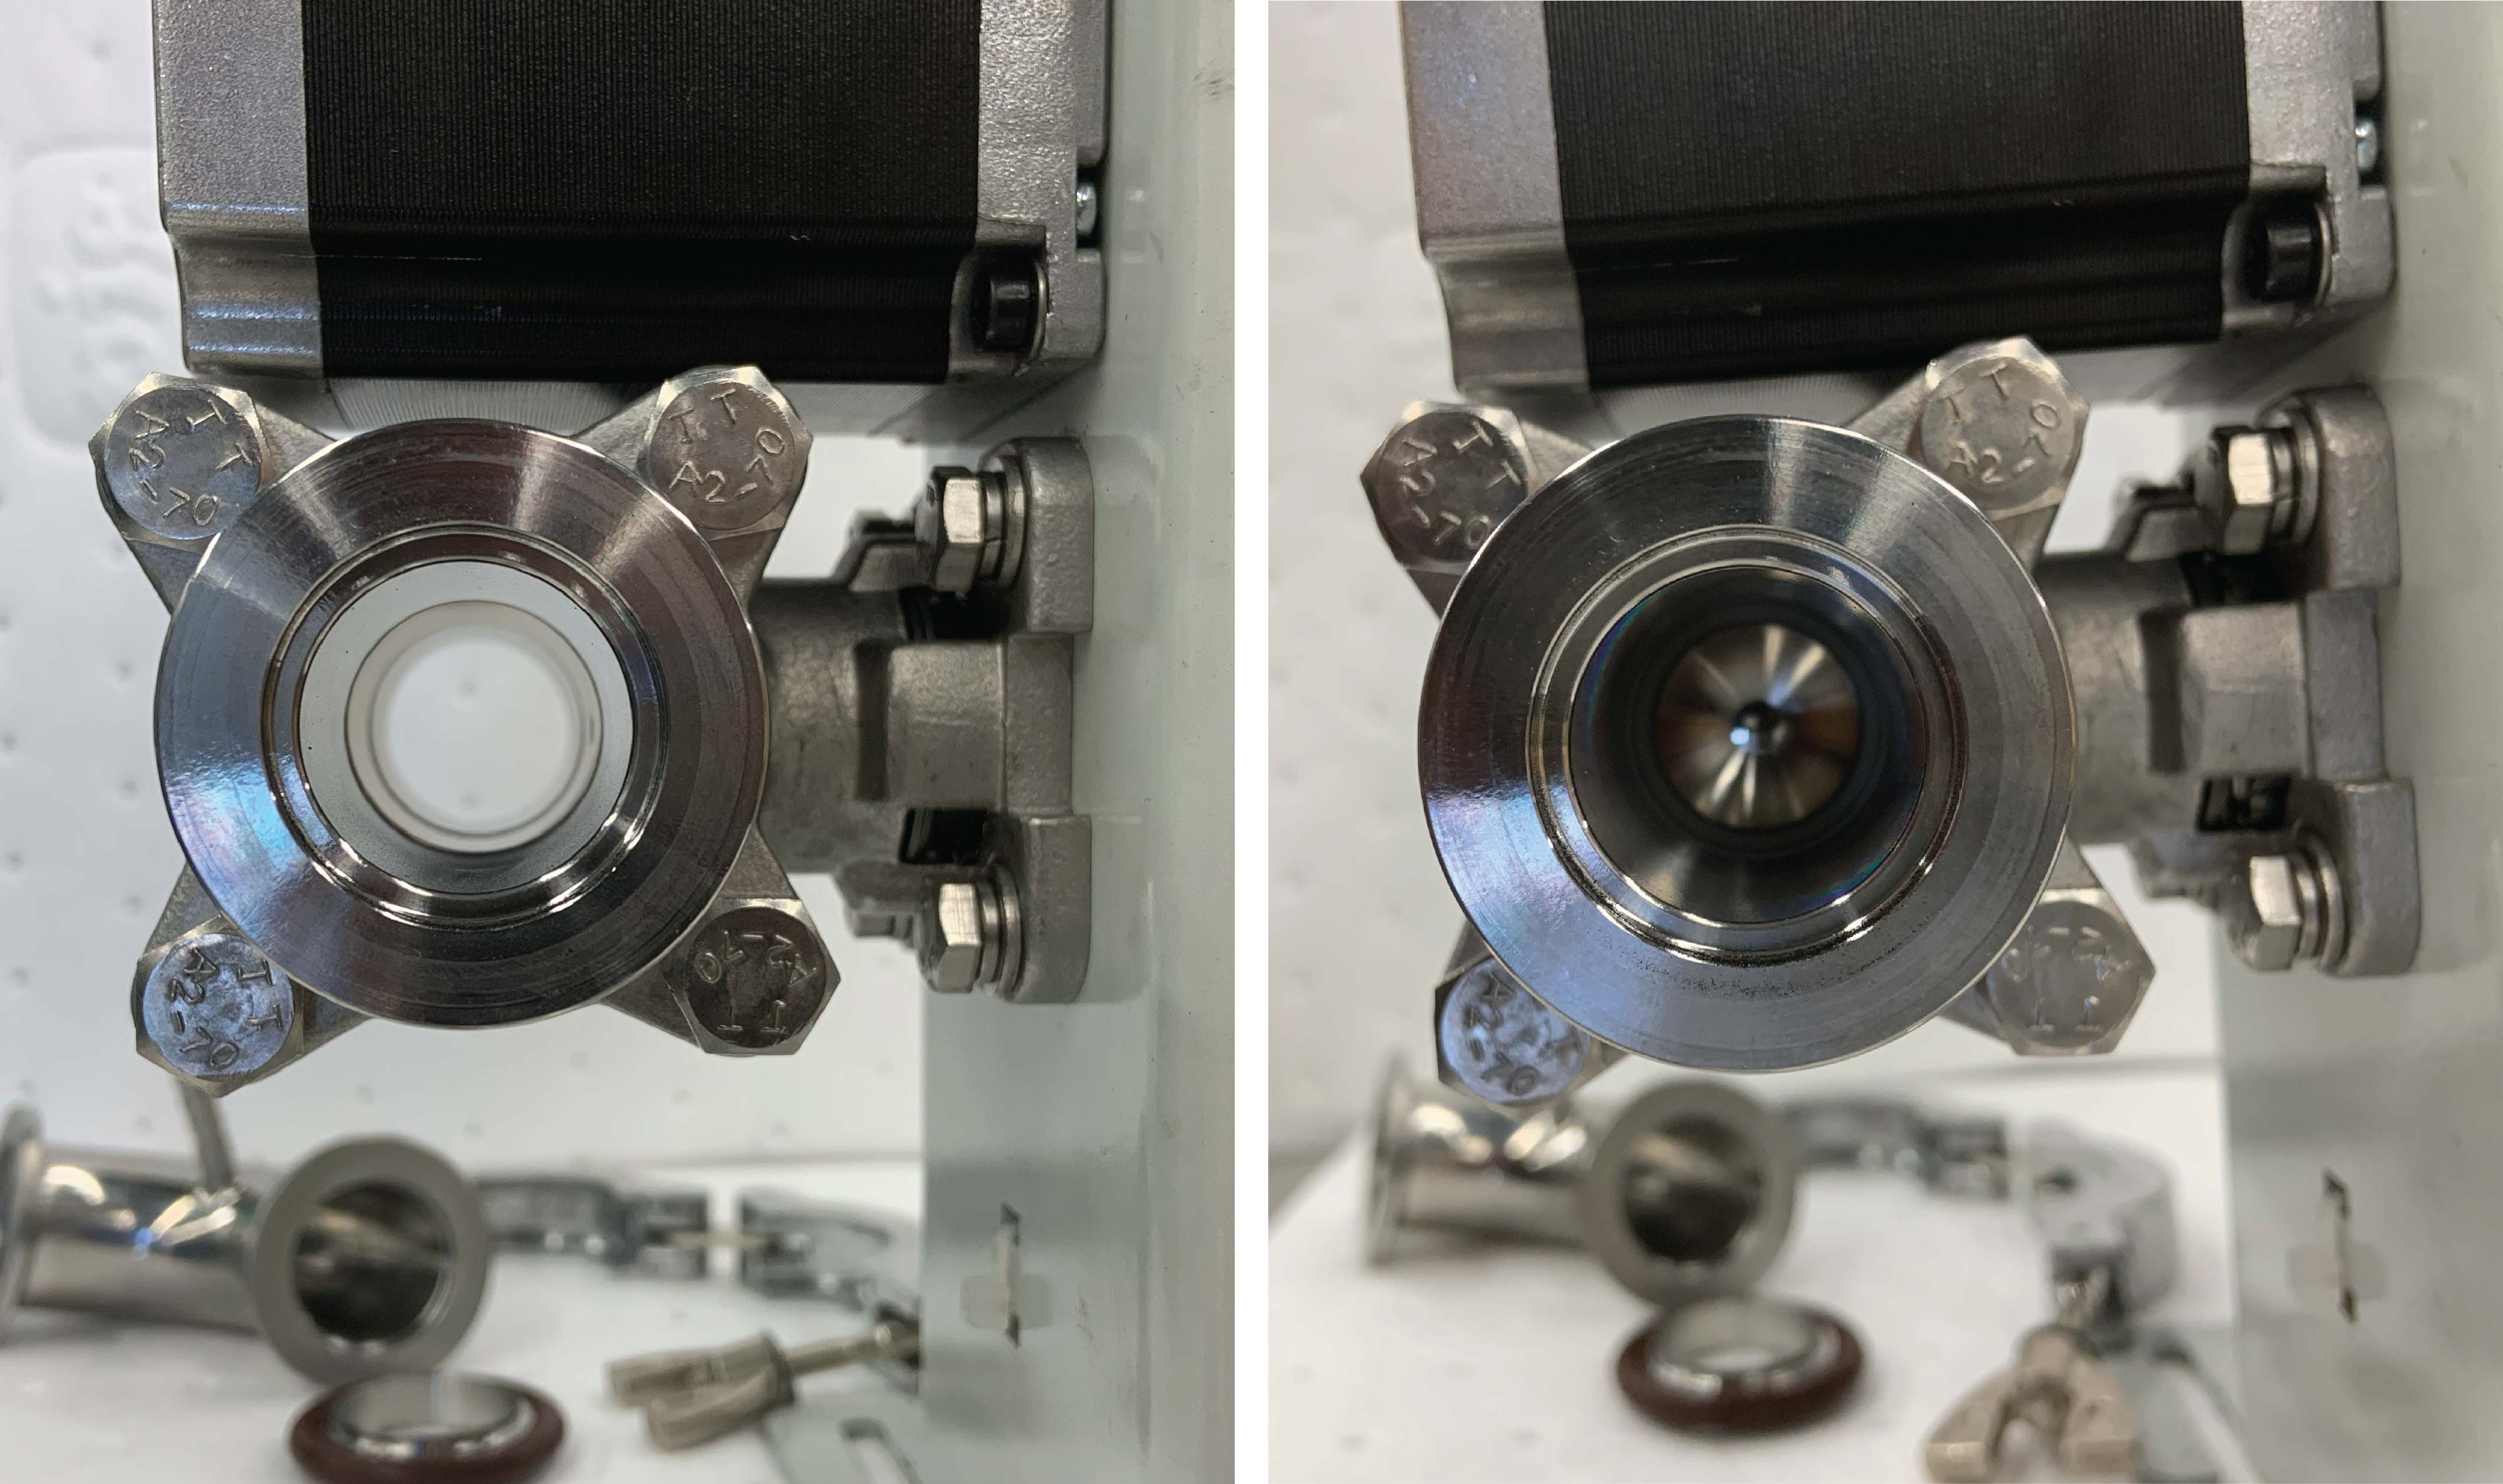
Note: If needed, it is possible to manually open the ball valve by turning the manual override, located under the rubber cover, with a 5mm Allen wrench.
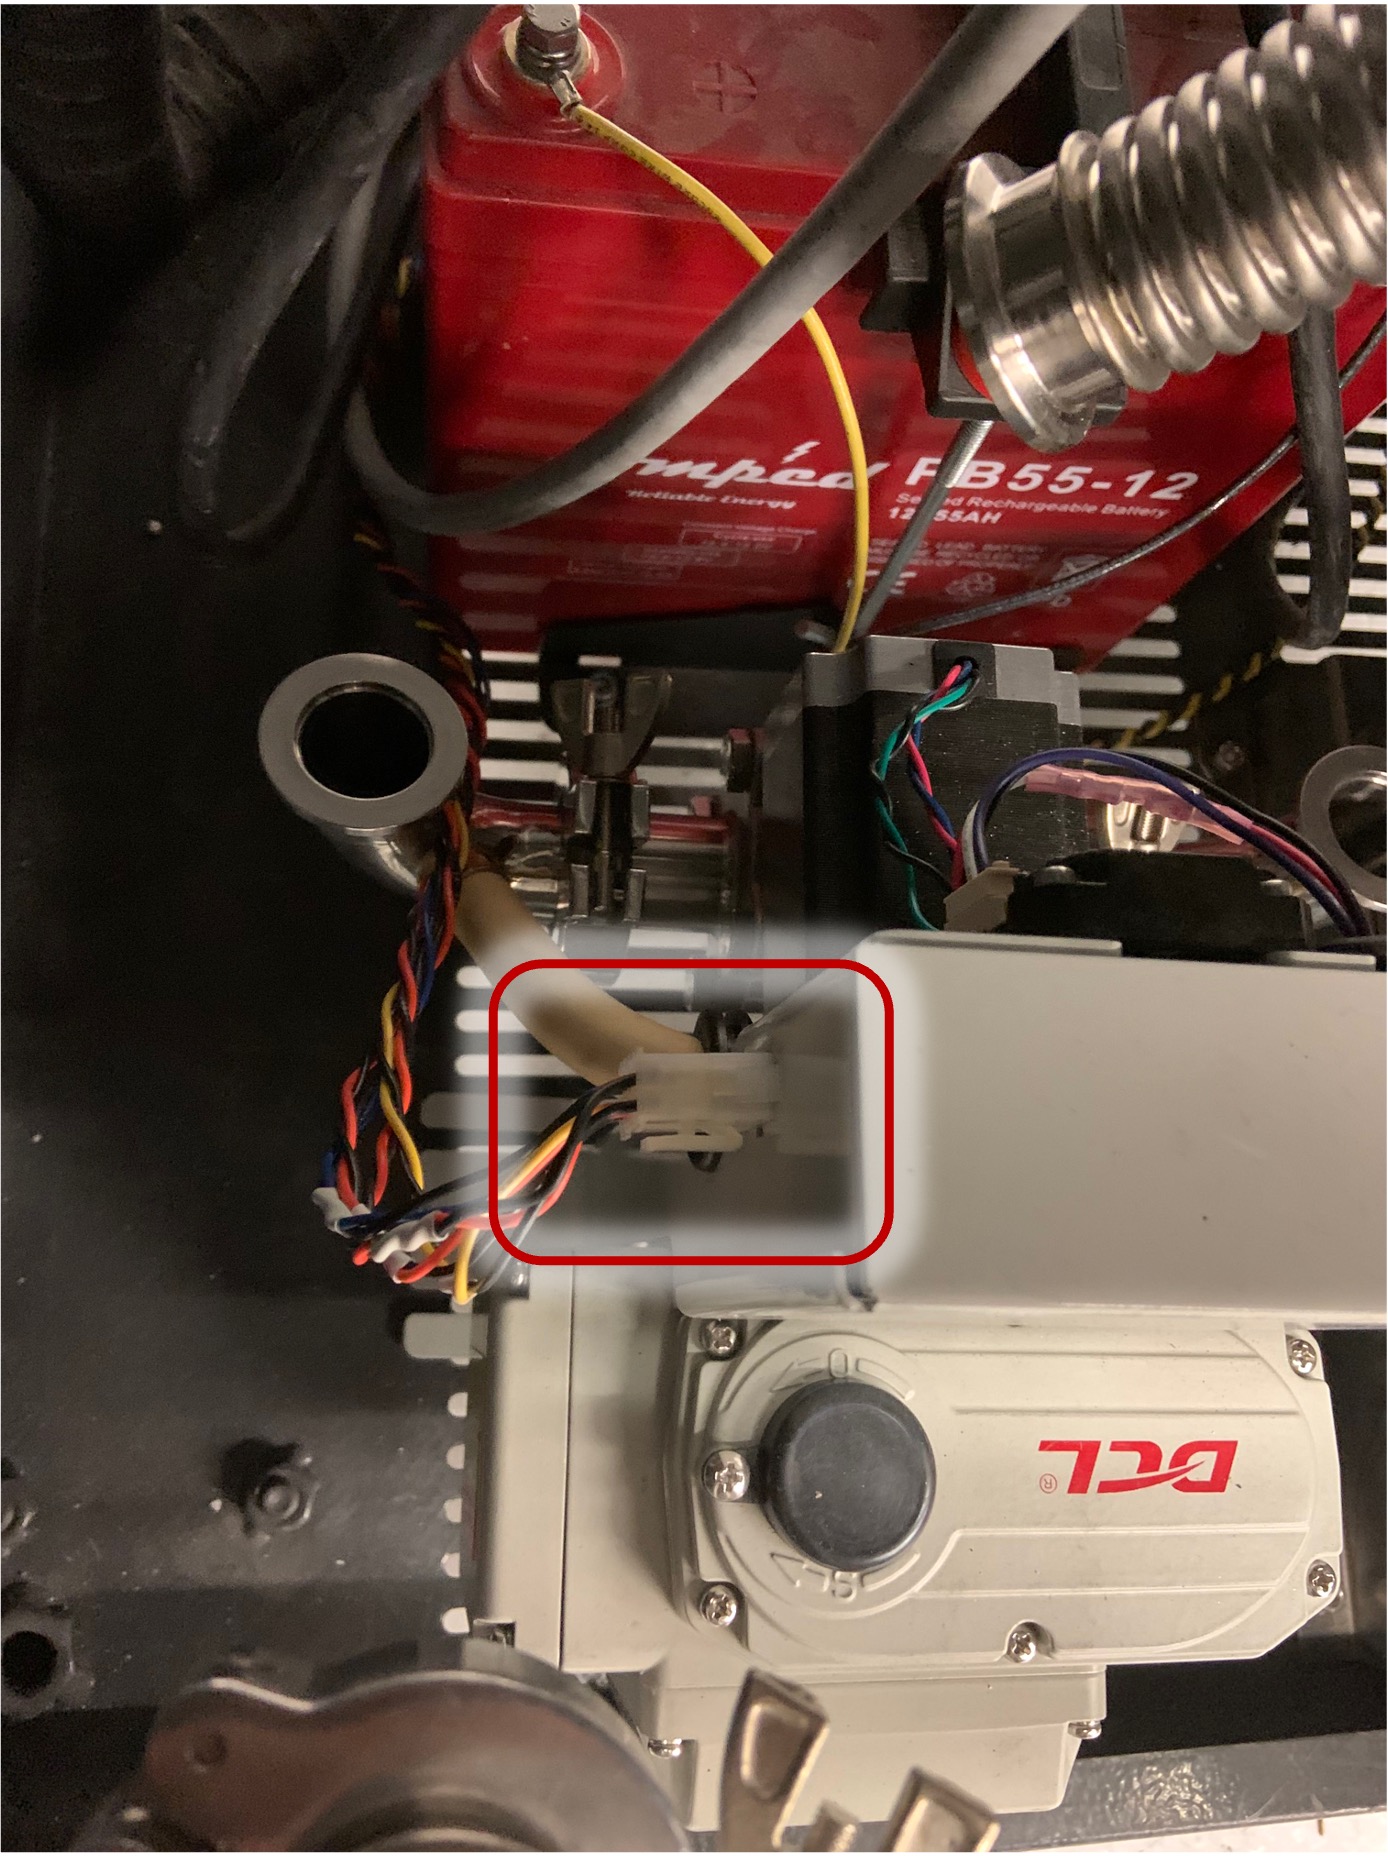
3. Open the lower front door and unplug the power connection of the vacuum pressure control valve, see image below.
4. Shut down and unplug the machine.
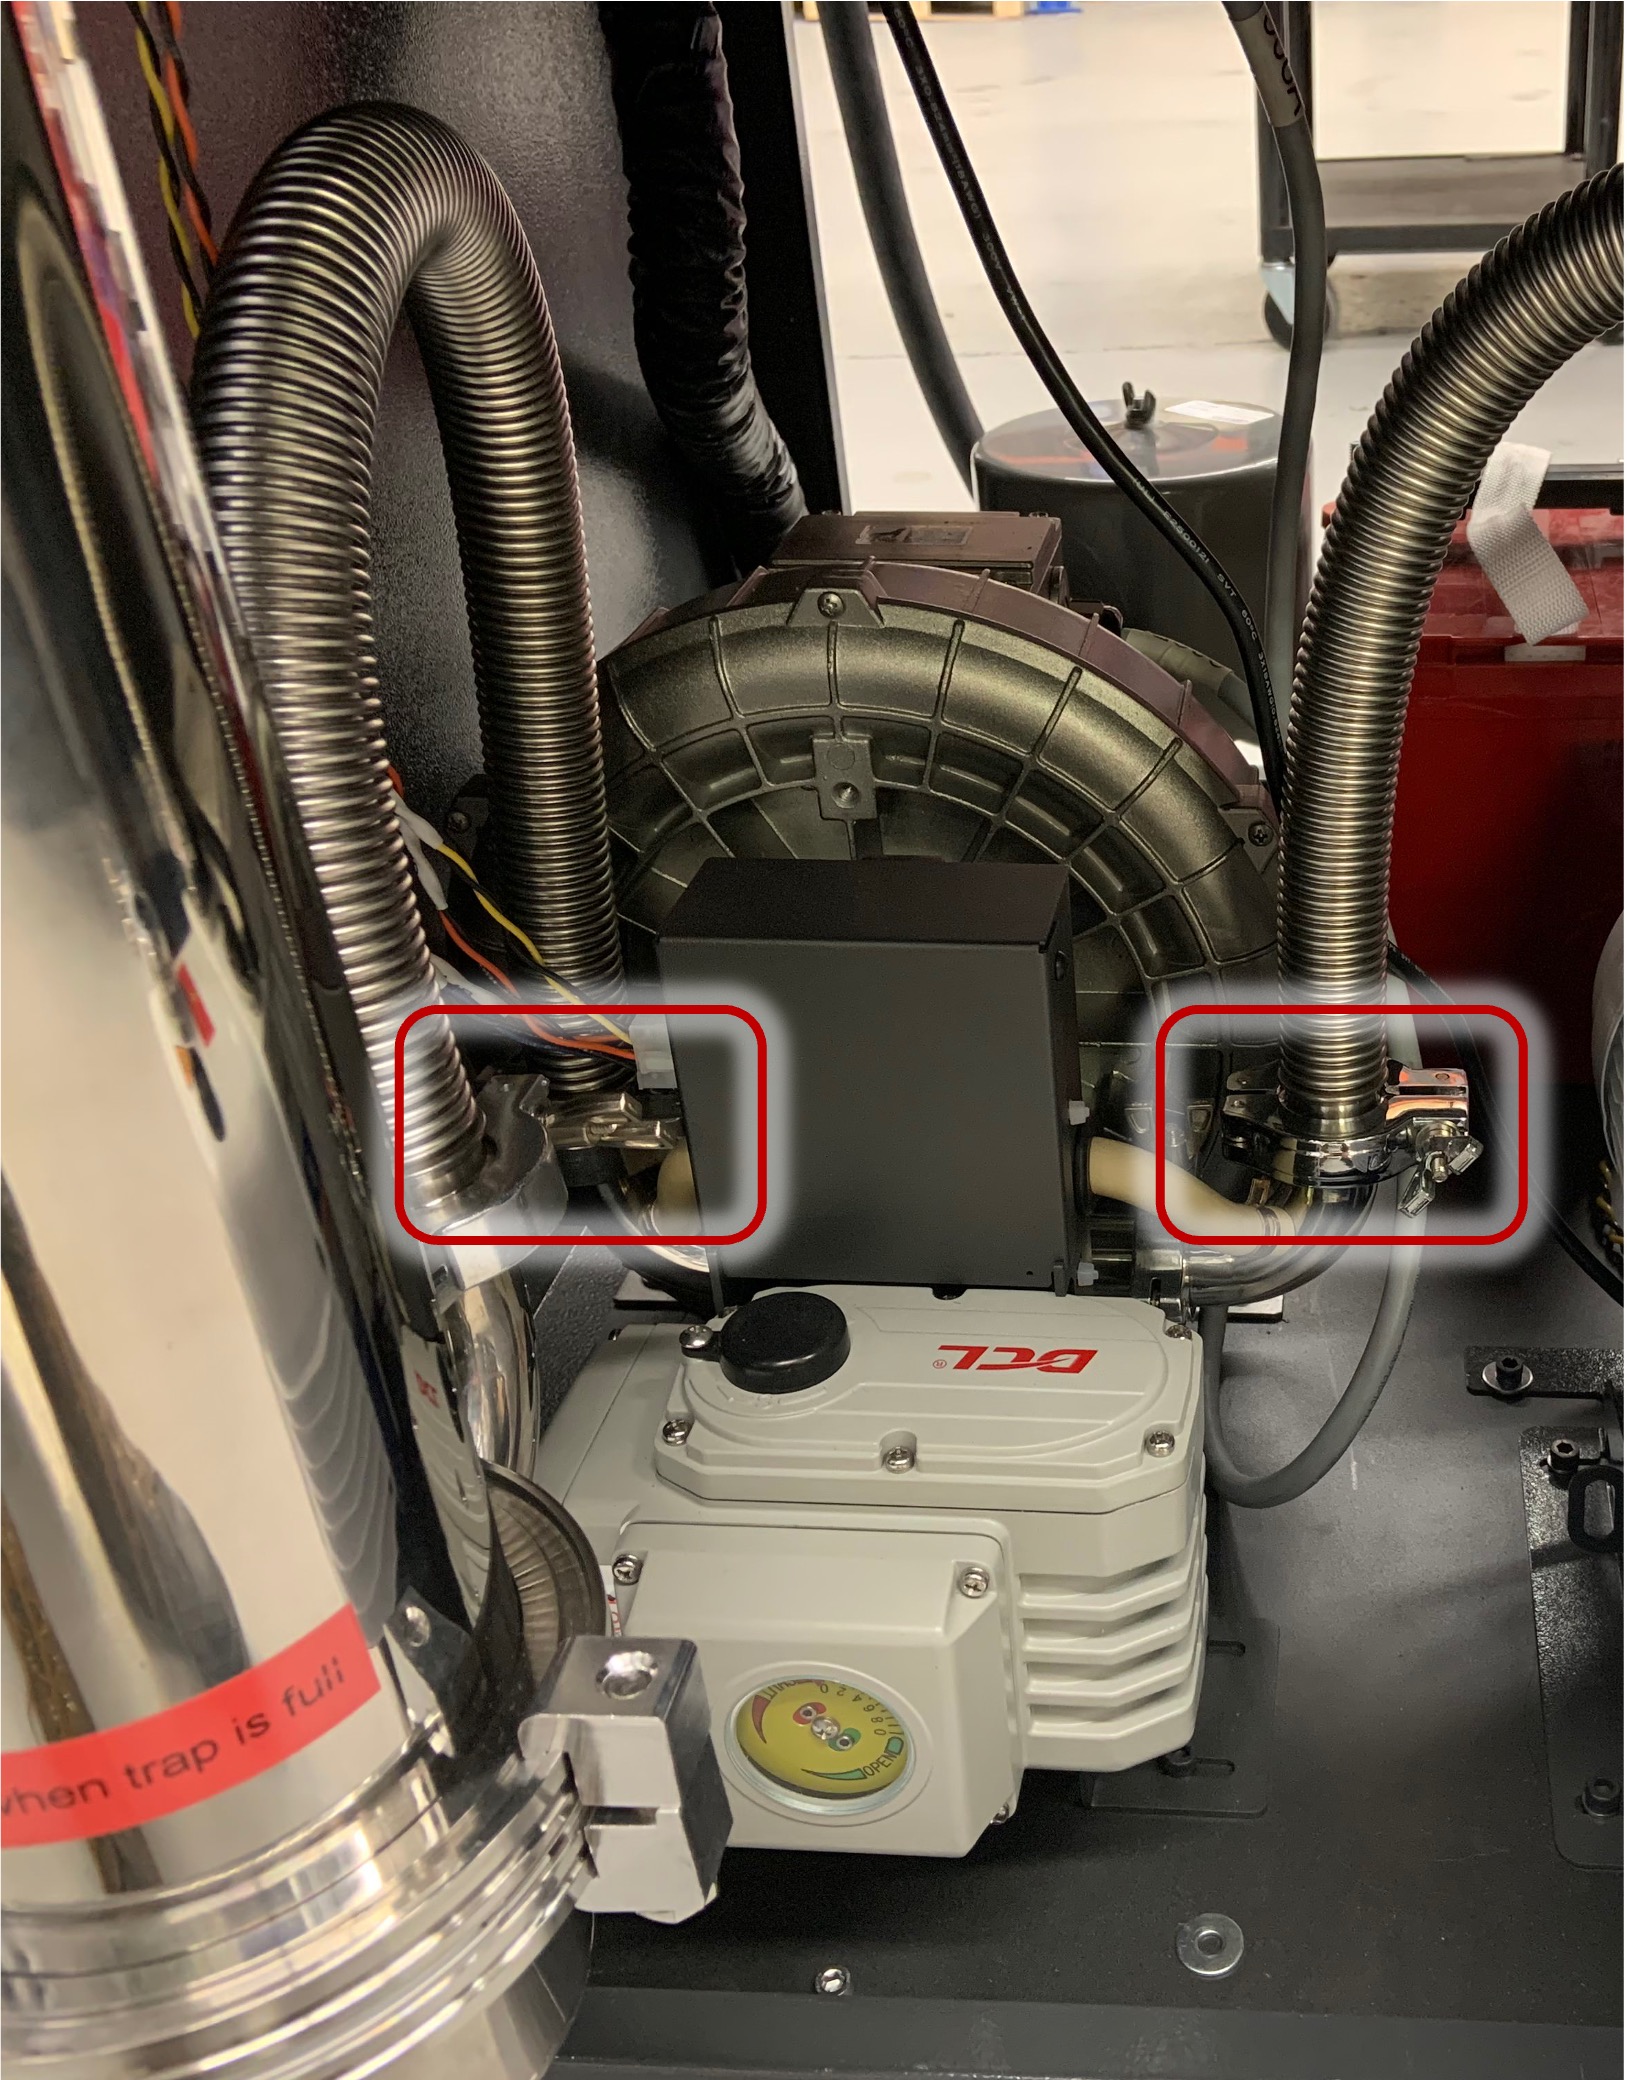
5. Disconnect the inlet and outlet fittings of the valve, see image below.
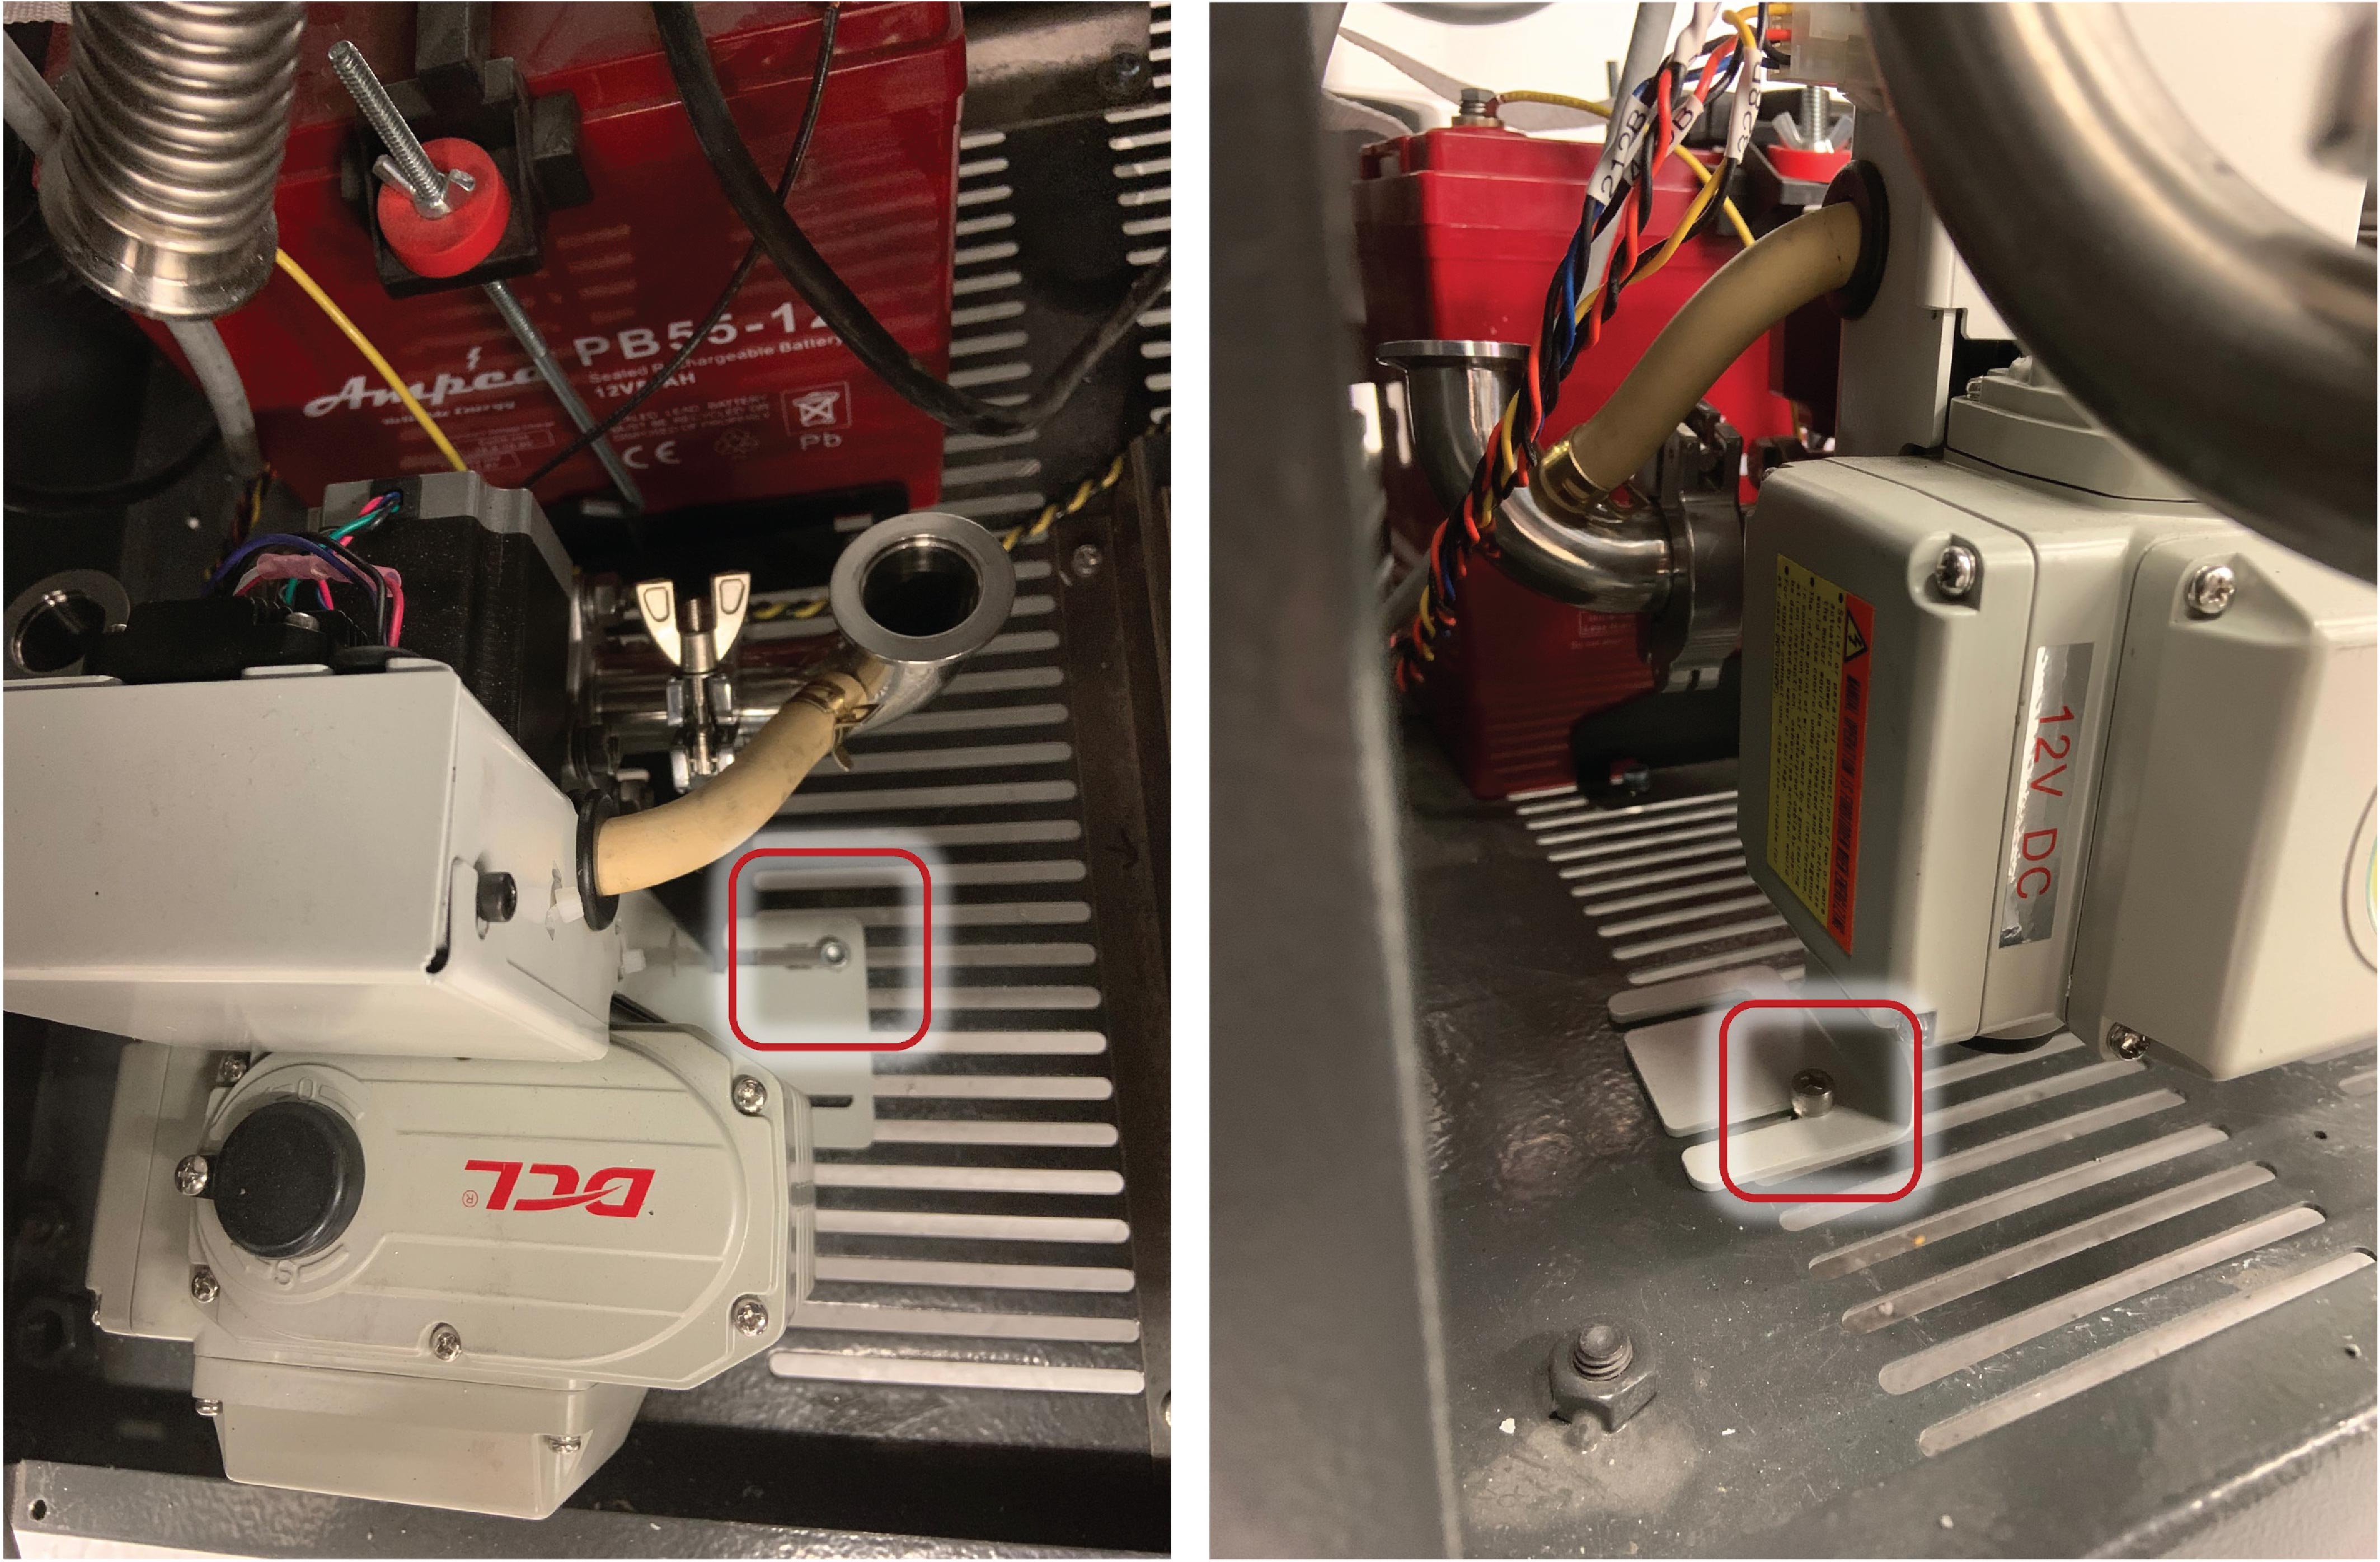
6. Loosen the 2 mounting screws on the base and slide the valve to the right to remove it and set it on your workspace.
7. On the bench, remove:
- The vacuum hose connections on either side (see images below, a and b).
- Slide the hose out by steadily pulling it out.
- The two 90° elbow vacuum fittings.
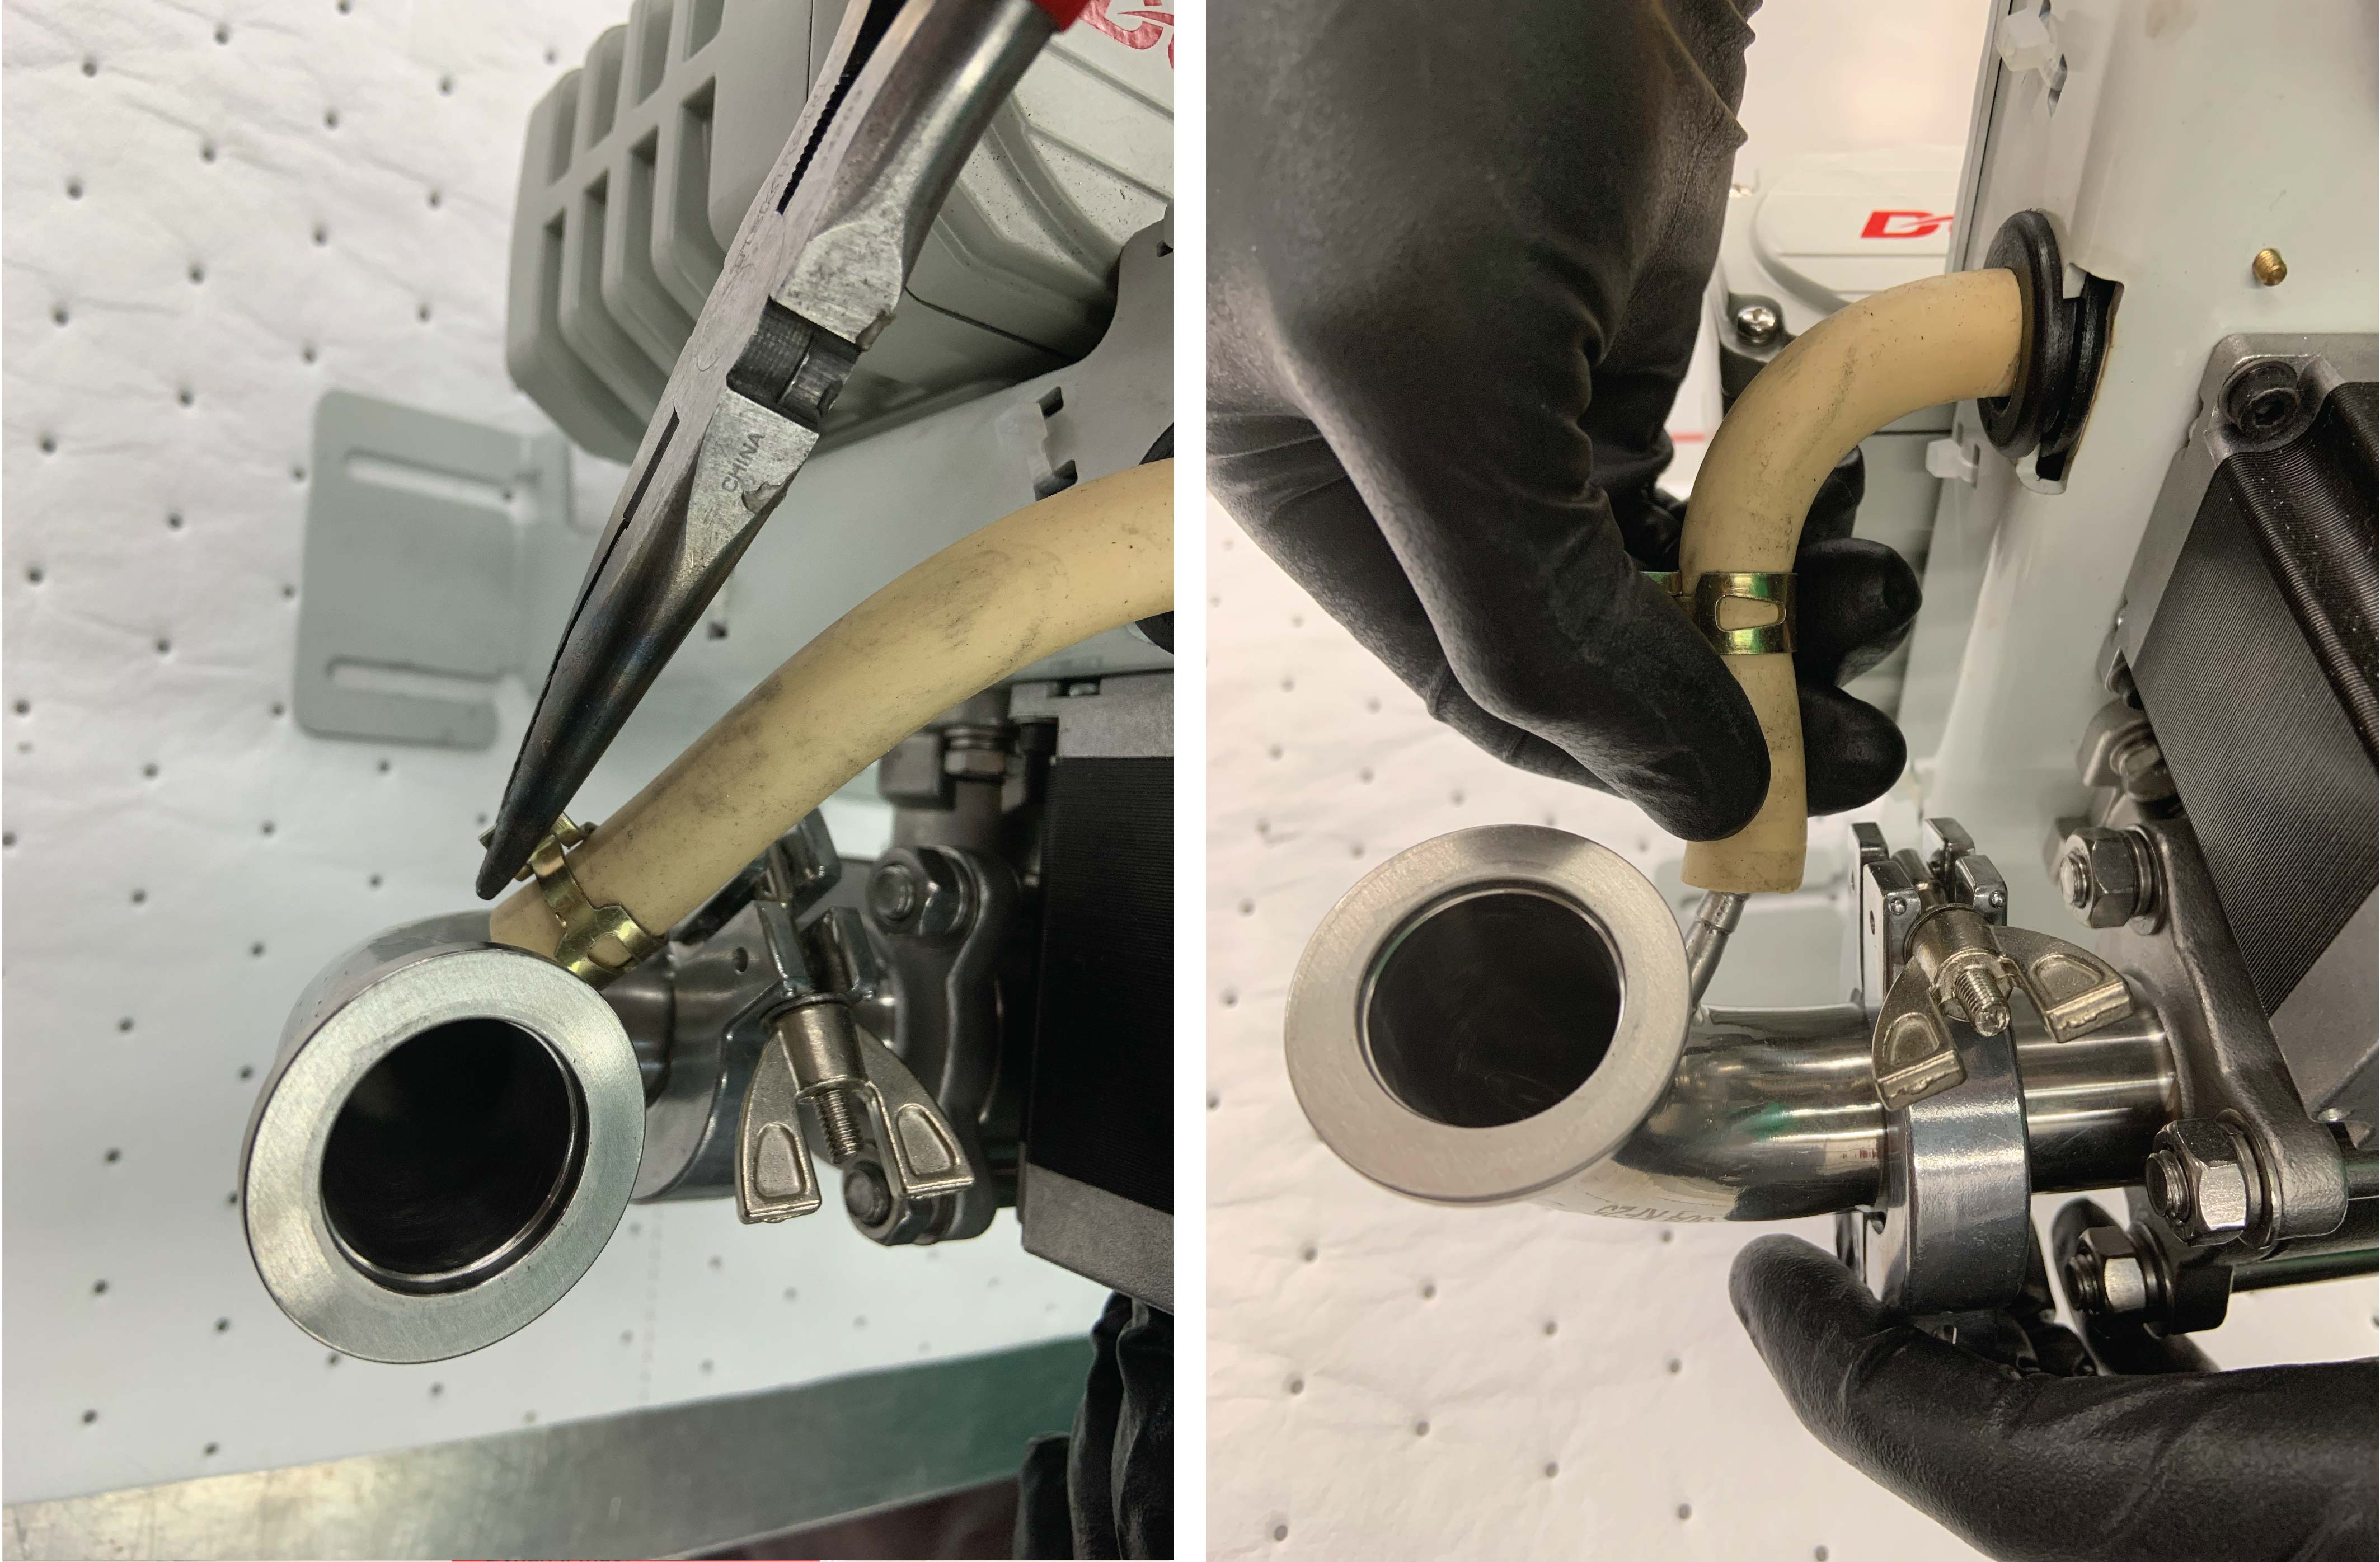
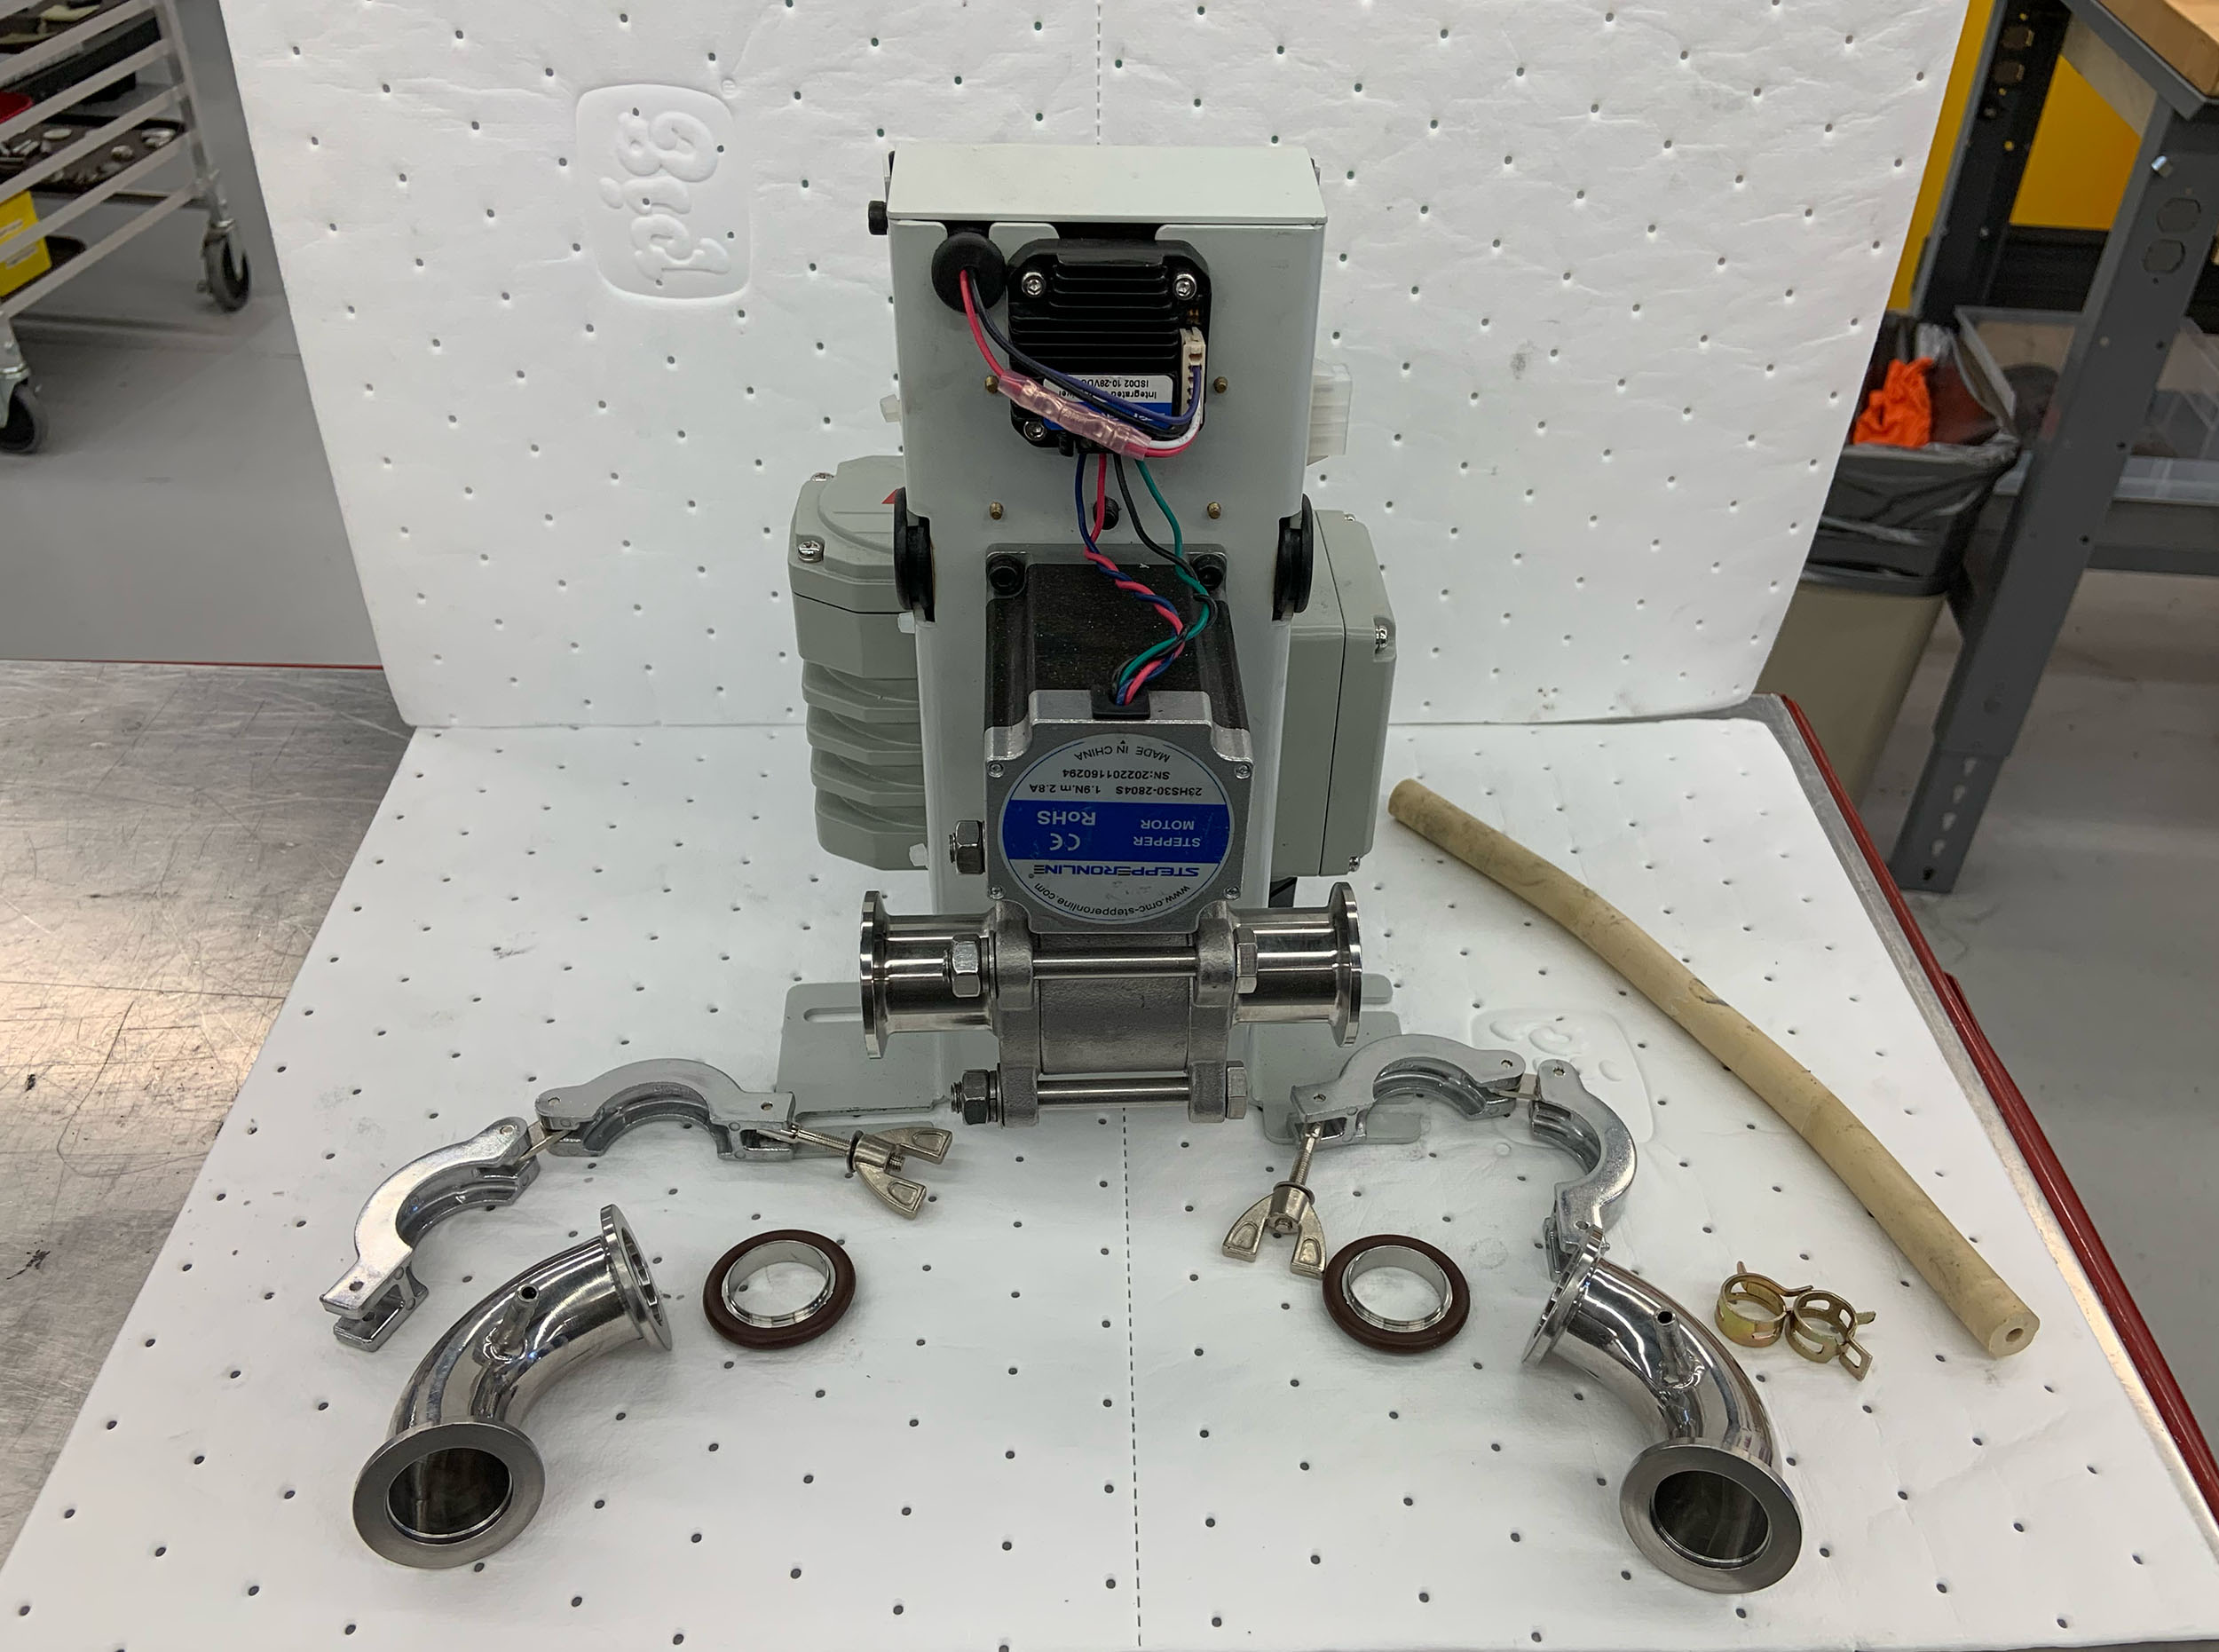
8. The fully disassembled valve should look like the image above (c). Throw away the old hose. Clean all components with isopropanol and acetone and a lint-free cloth.
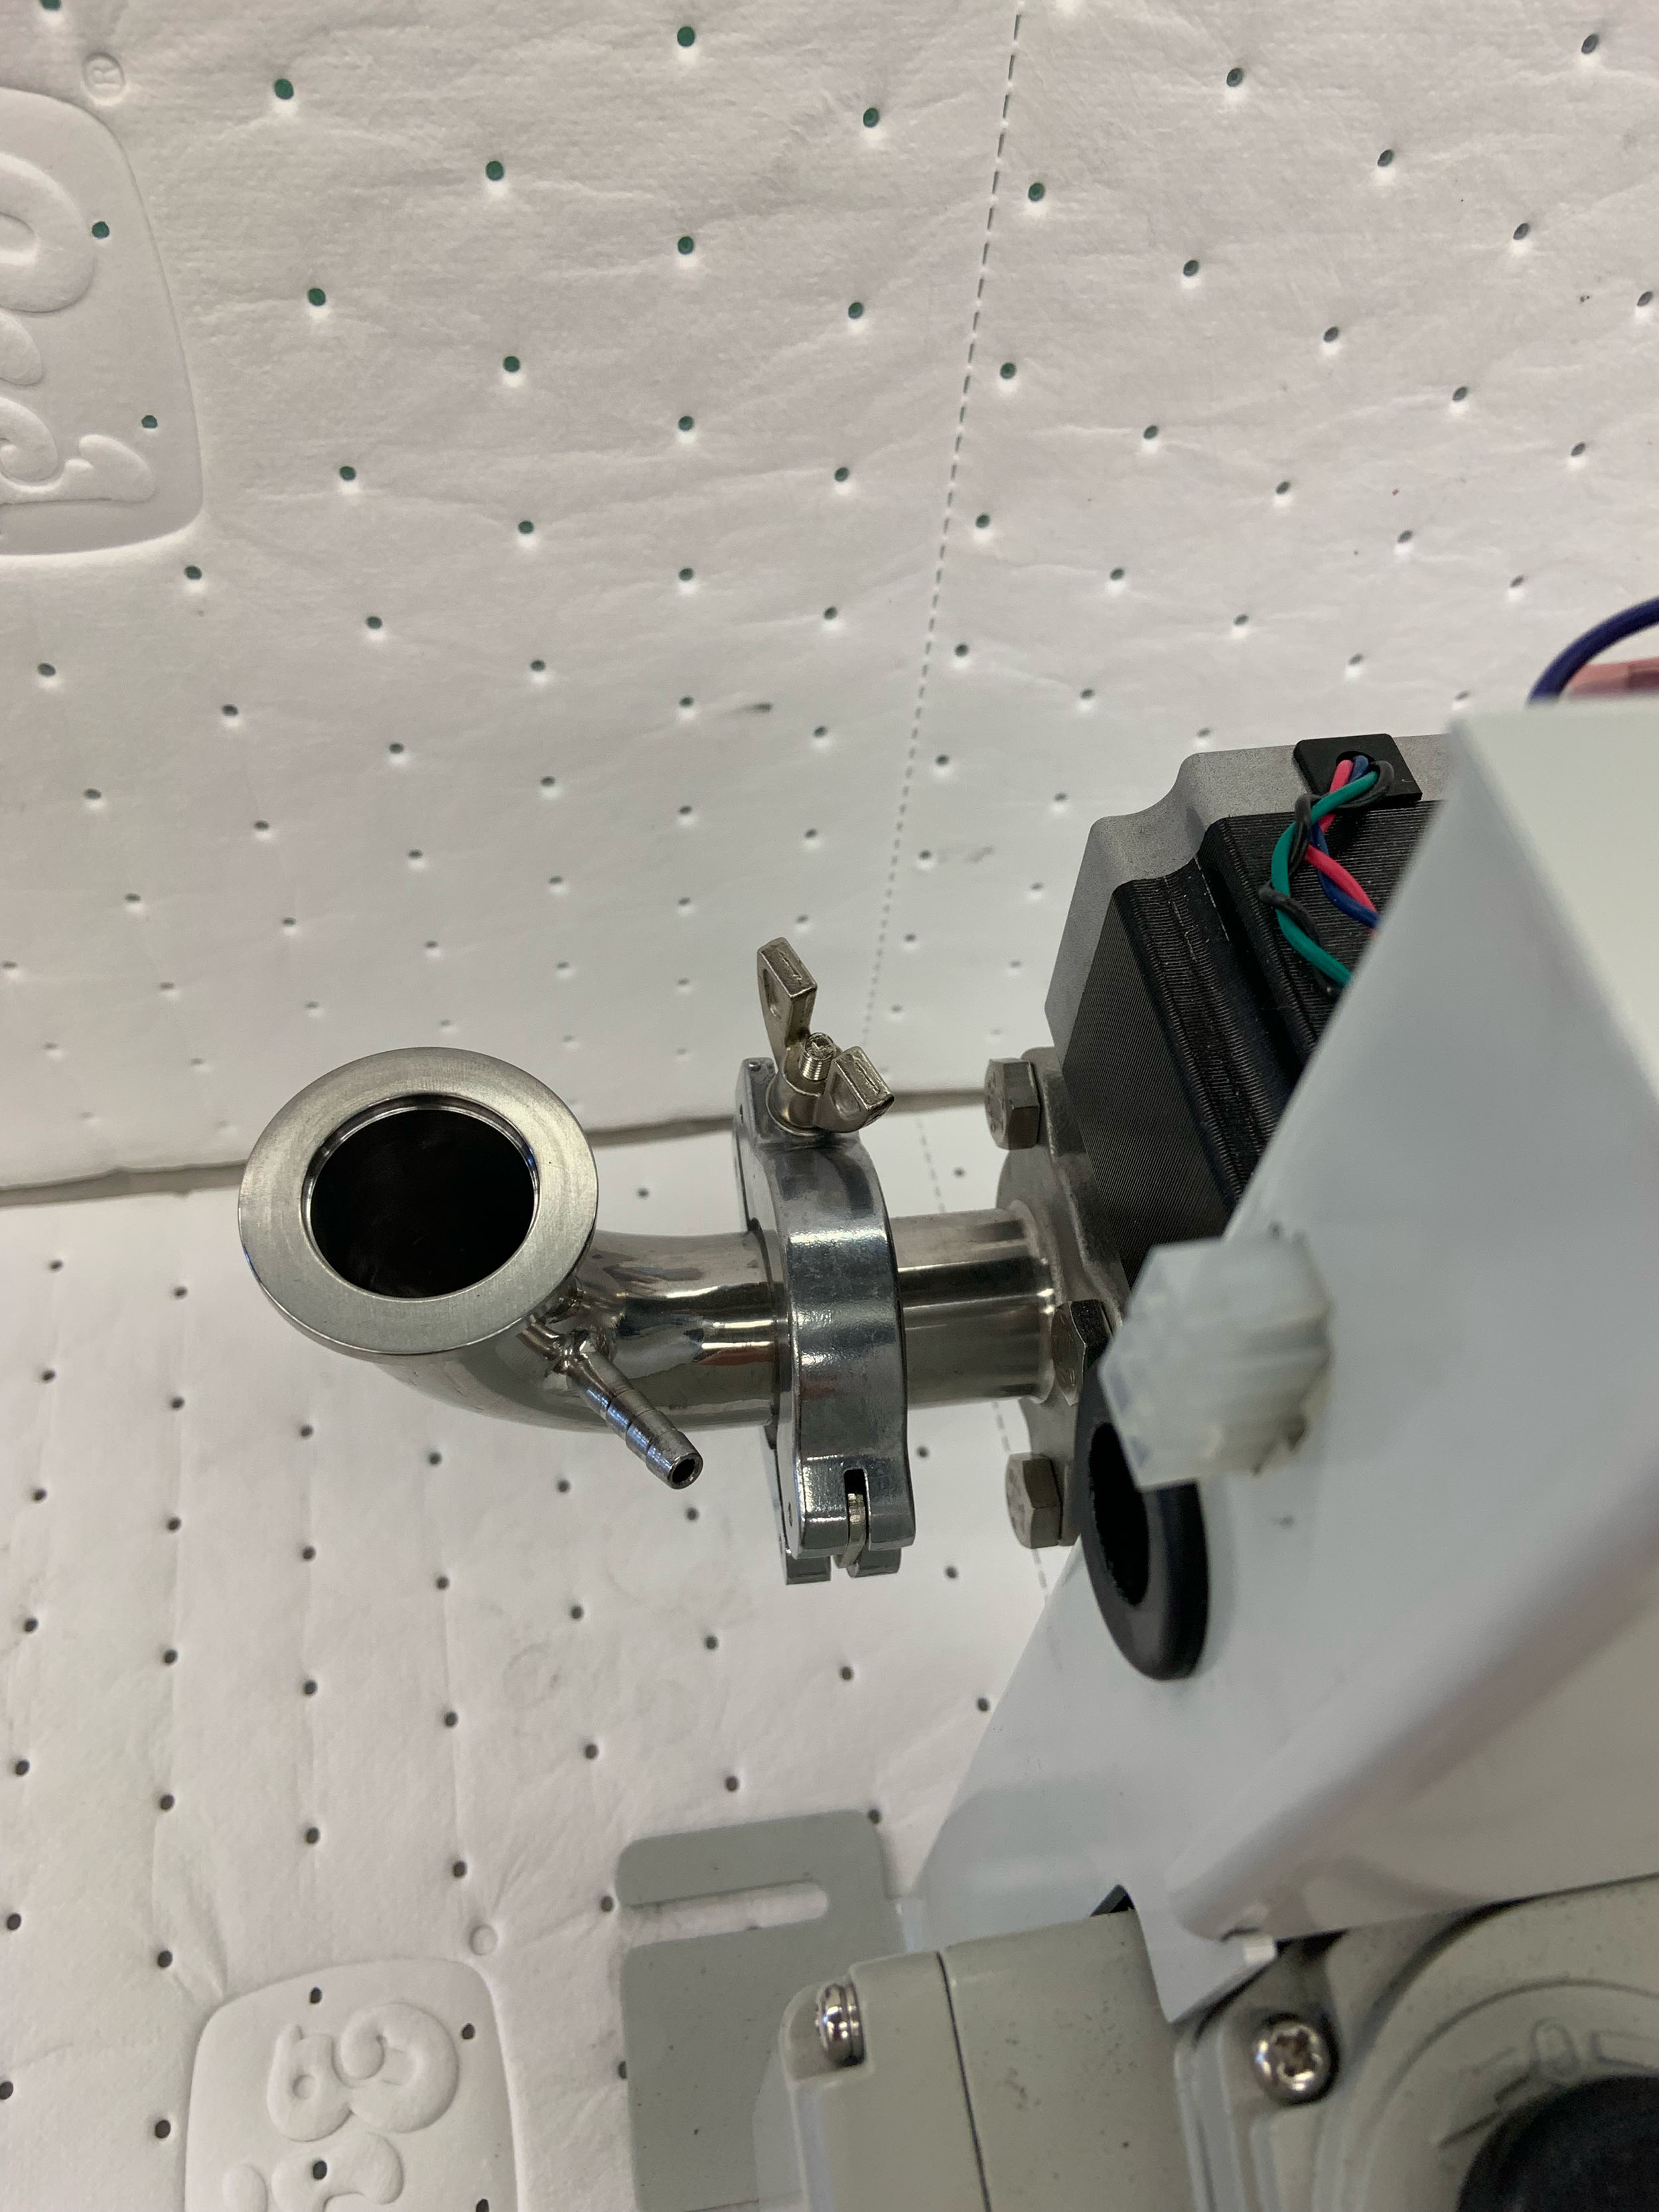
9. Re-attach the two 90° elbow vacuum fittings. Make sure they are in the correct orientation as shown in the image below.
10. Prepare a replacement rubber hose (PN: McMaster-Carr 5543K42, length 280mm).
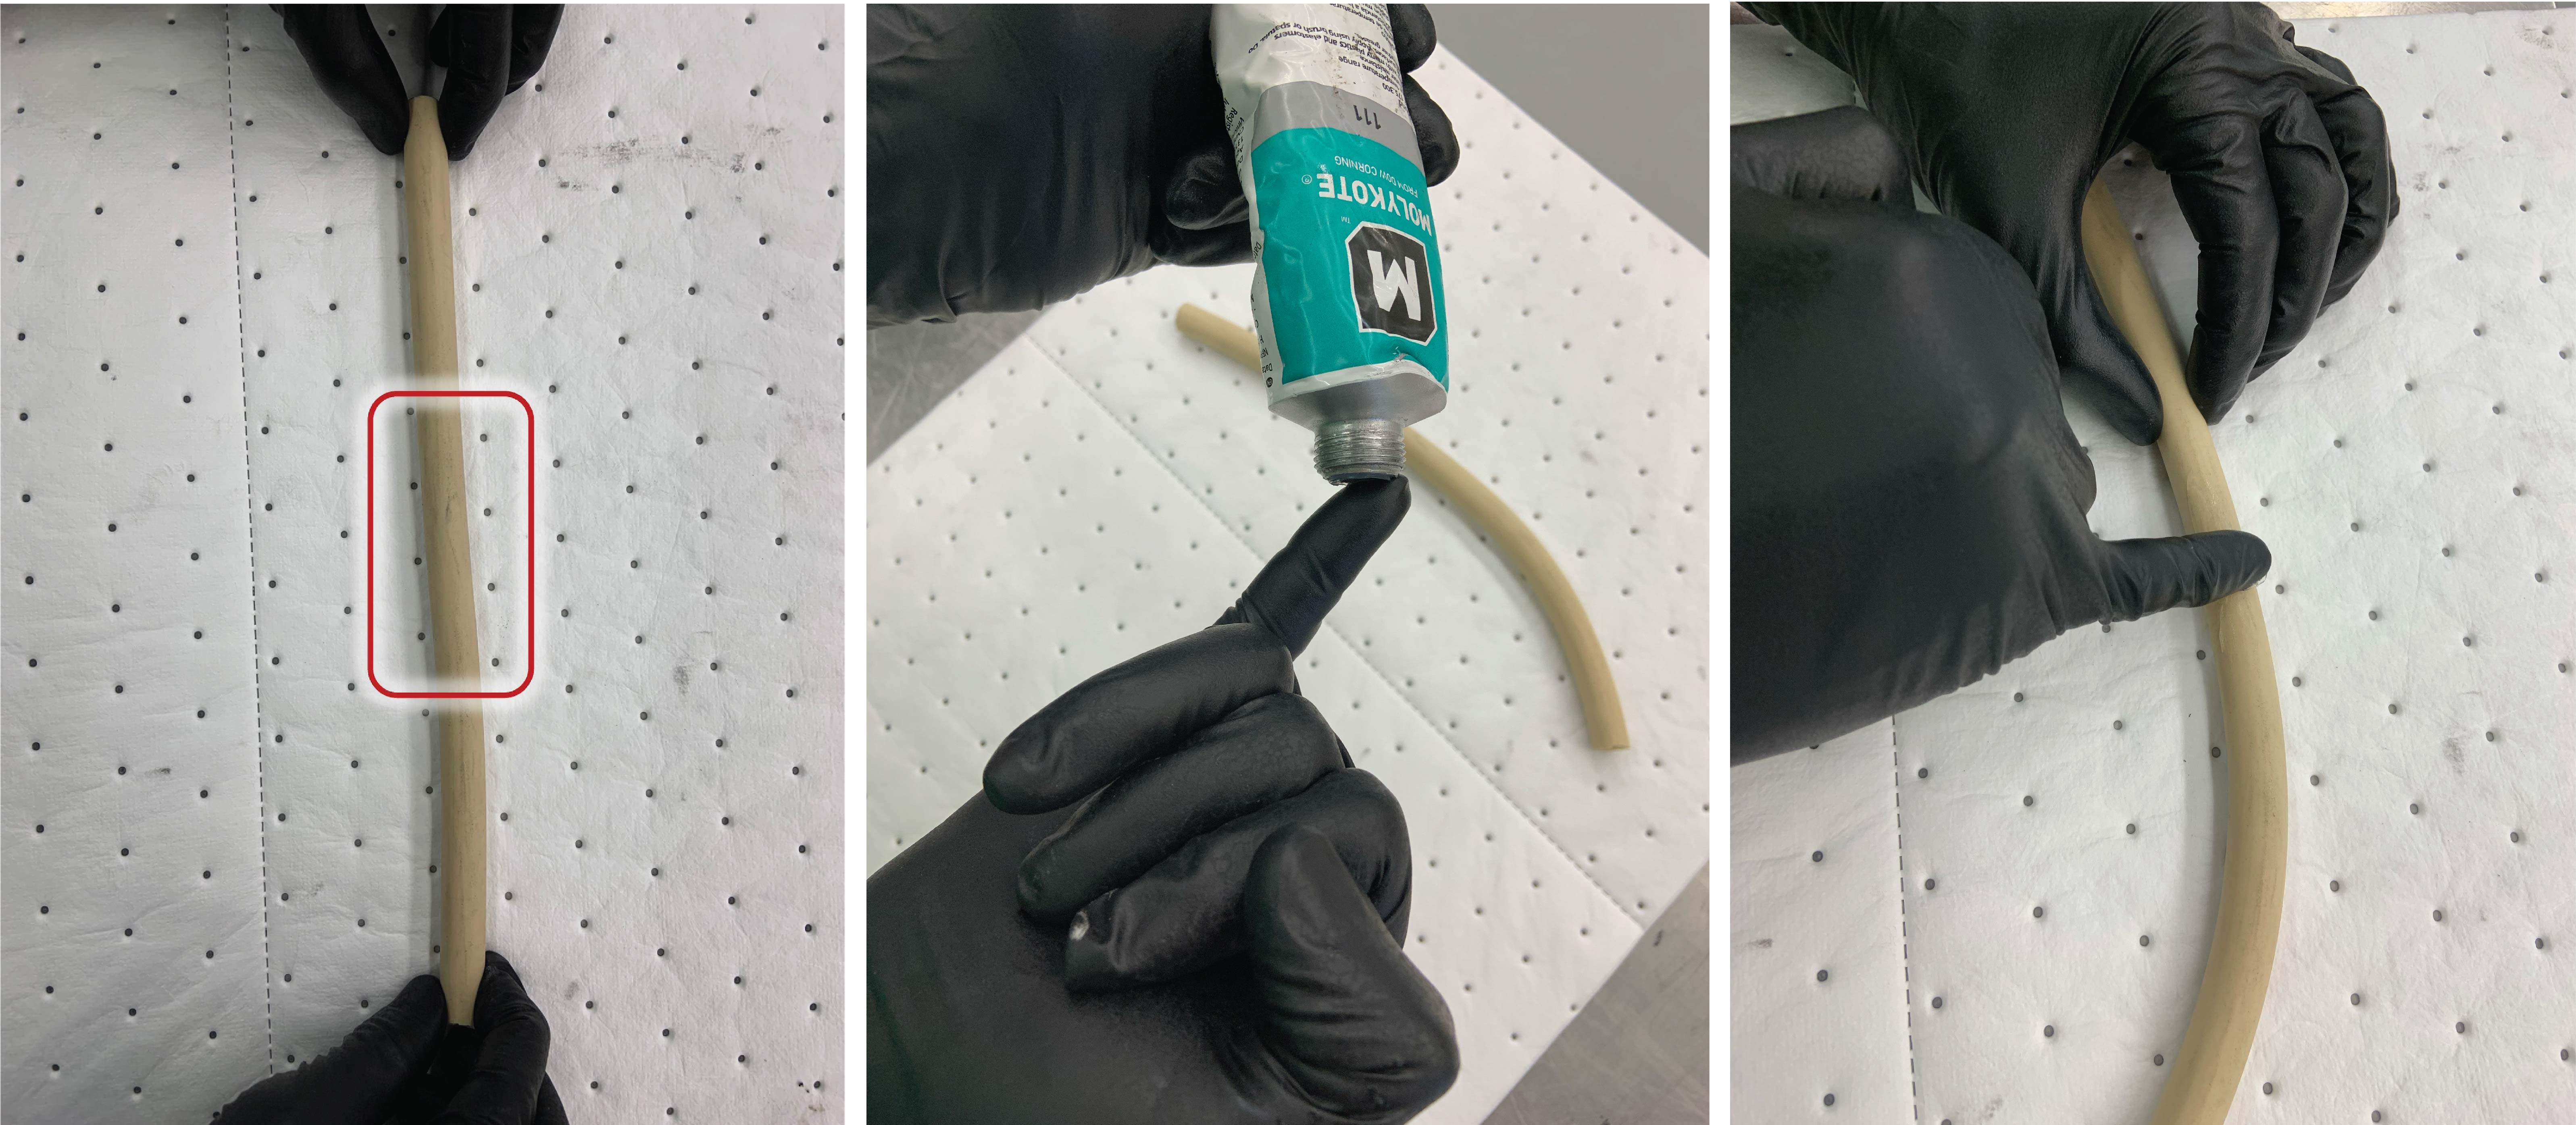
11. Clean the replacement rubber hose of any dust inside by blowing out with compressed air while hitting against a benchtop or other surface.
12. Coat the middle of replacement gum rubber throttle tube with a thin layer of vacuum grease as shown below.
13. Reinstall the new hose into the housing, looking through opening to ensure it passes straight through and ensuring it is centered.

14. Re-attach the ends of the hose to the connectors on the 90° elbow vacuum fittings as shown in image below.
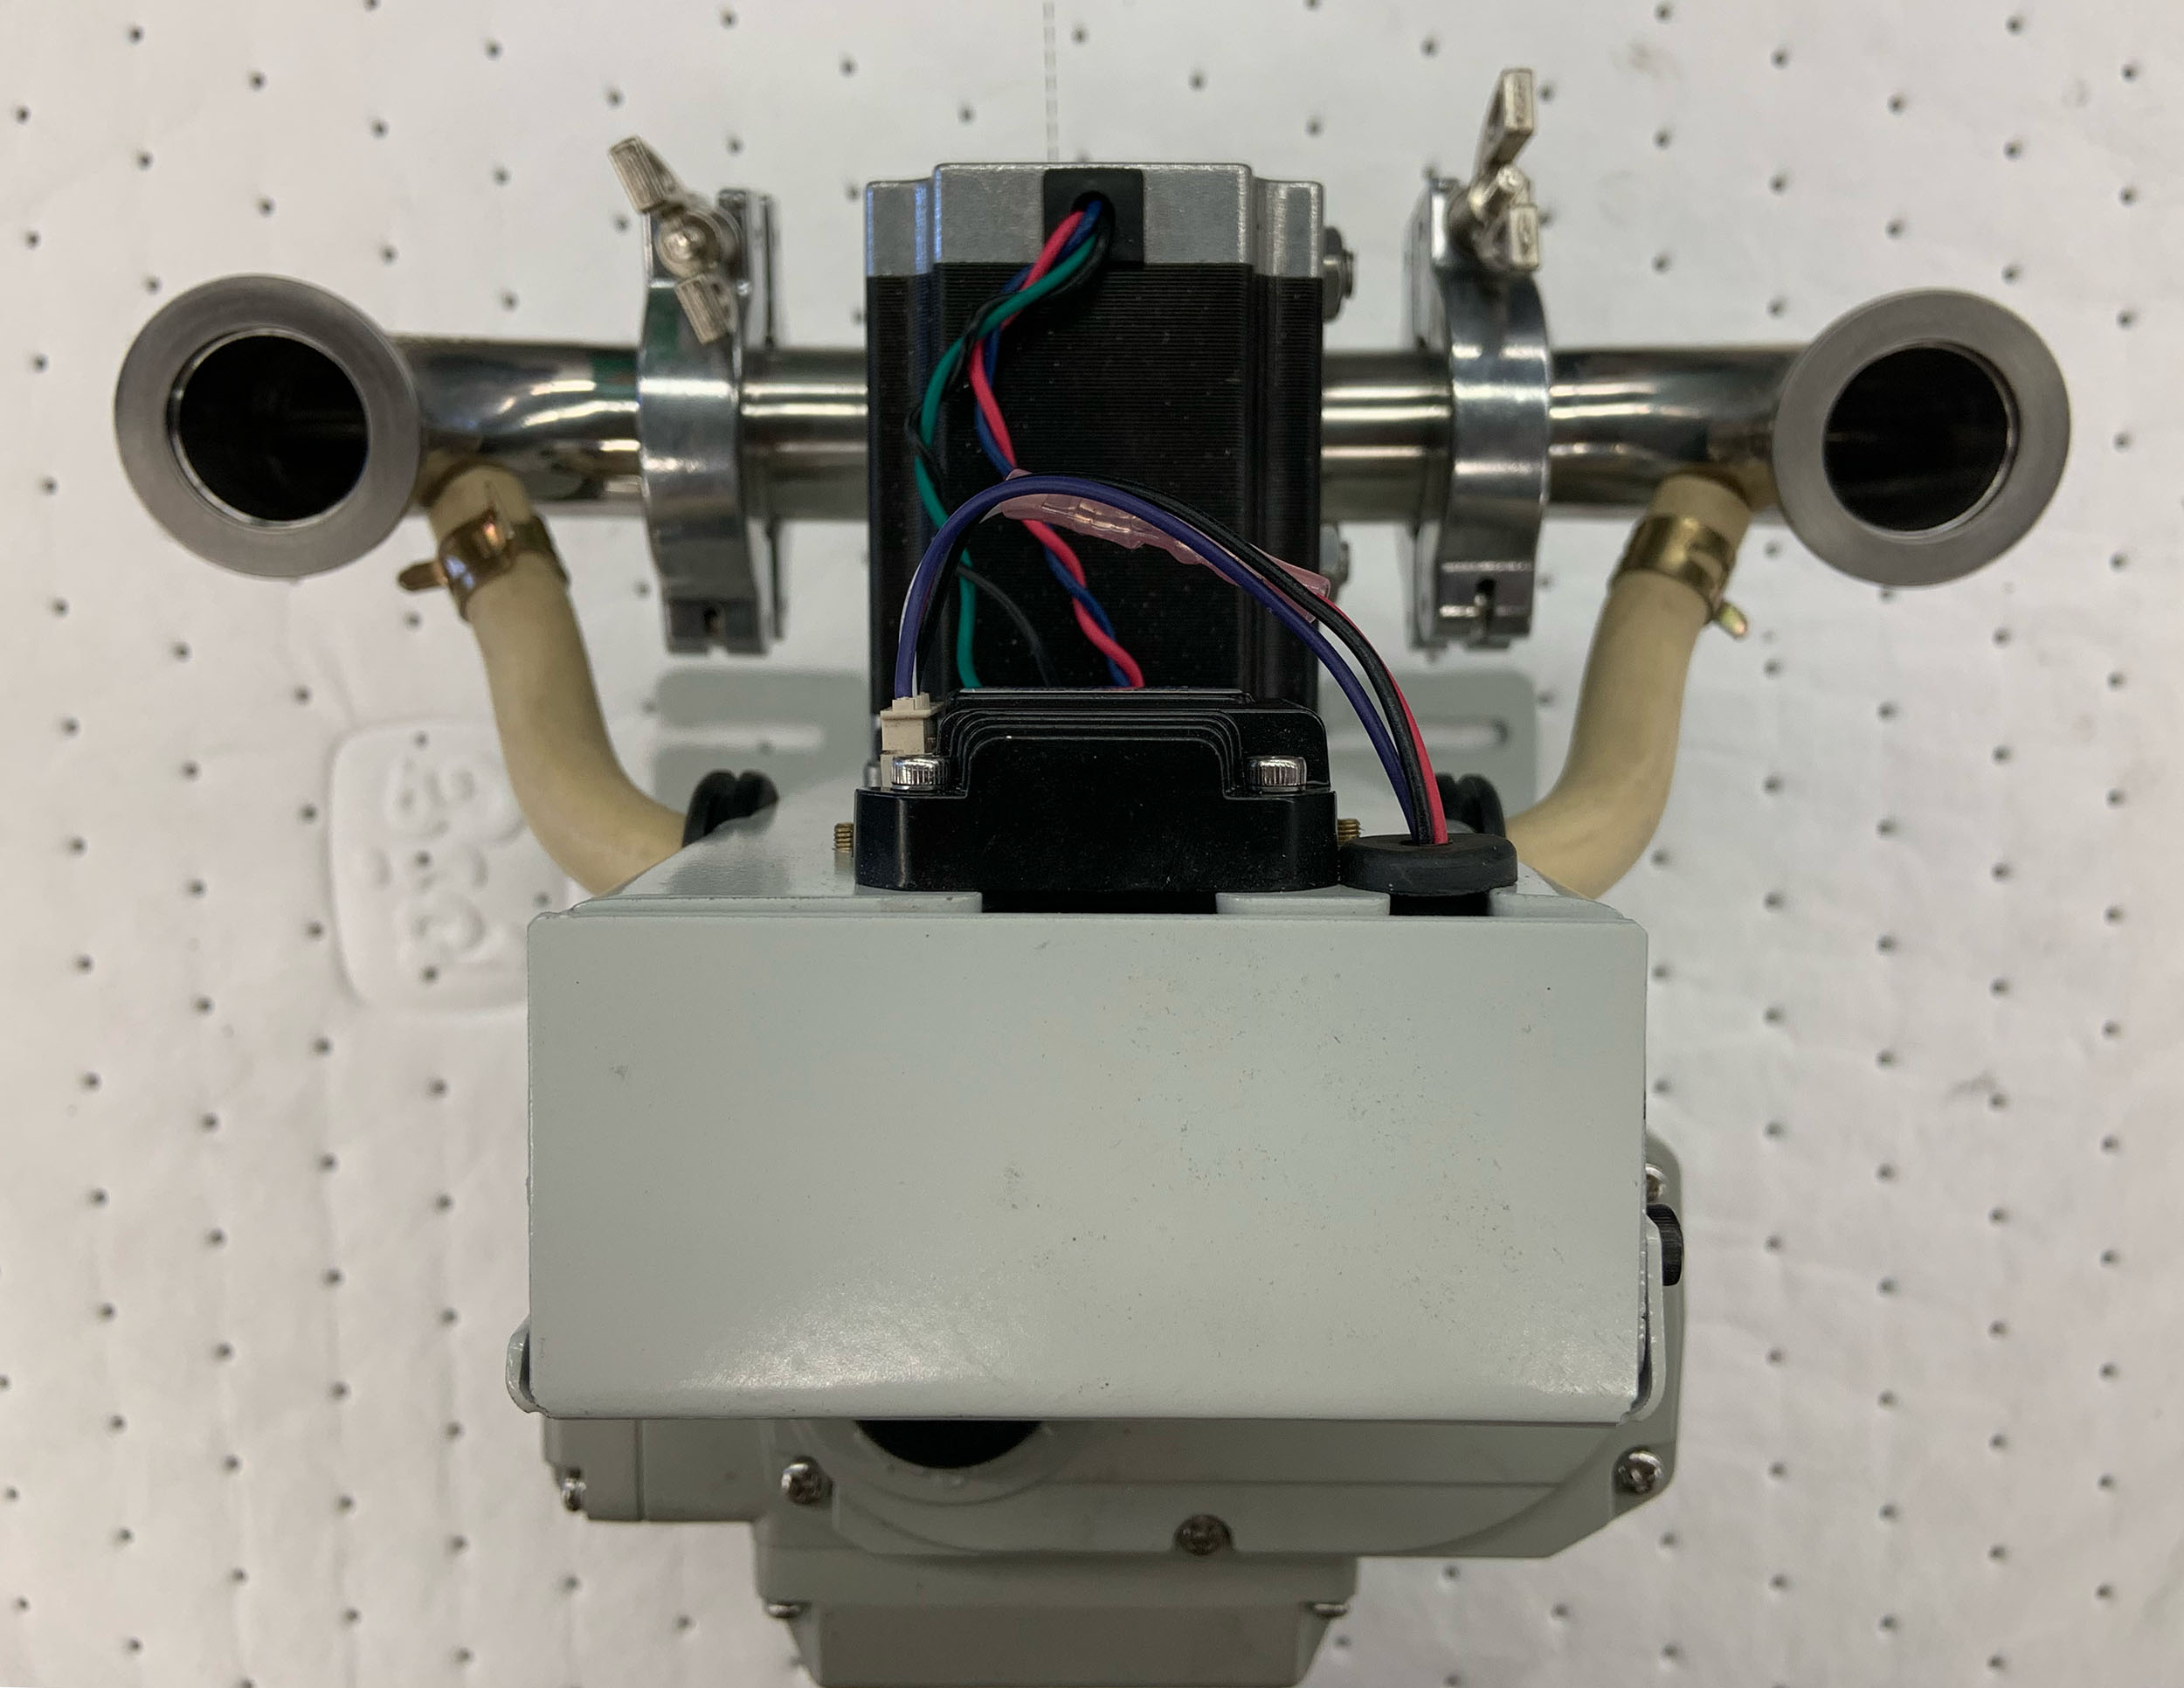
15. Re-install the newly serviced vacuum pressure control valve into the vacuum compartment and tighten the 2 mounting screws on the base as shown above.
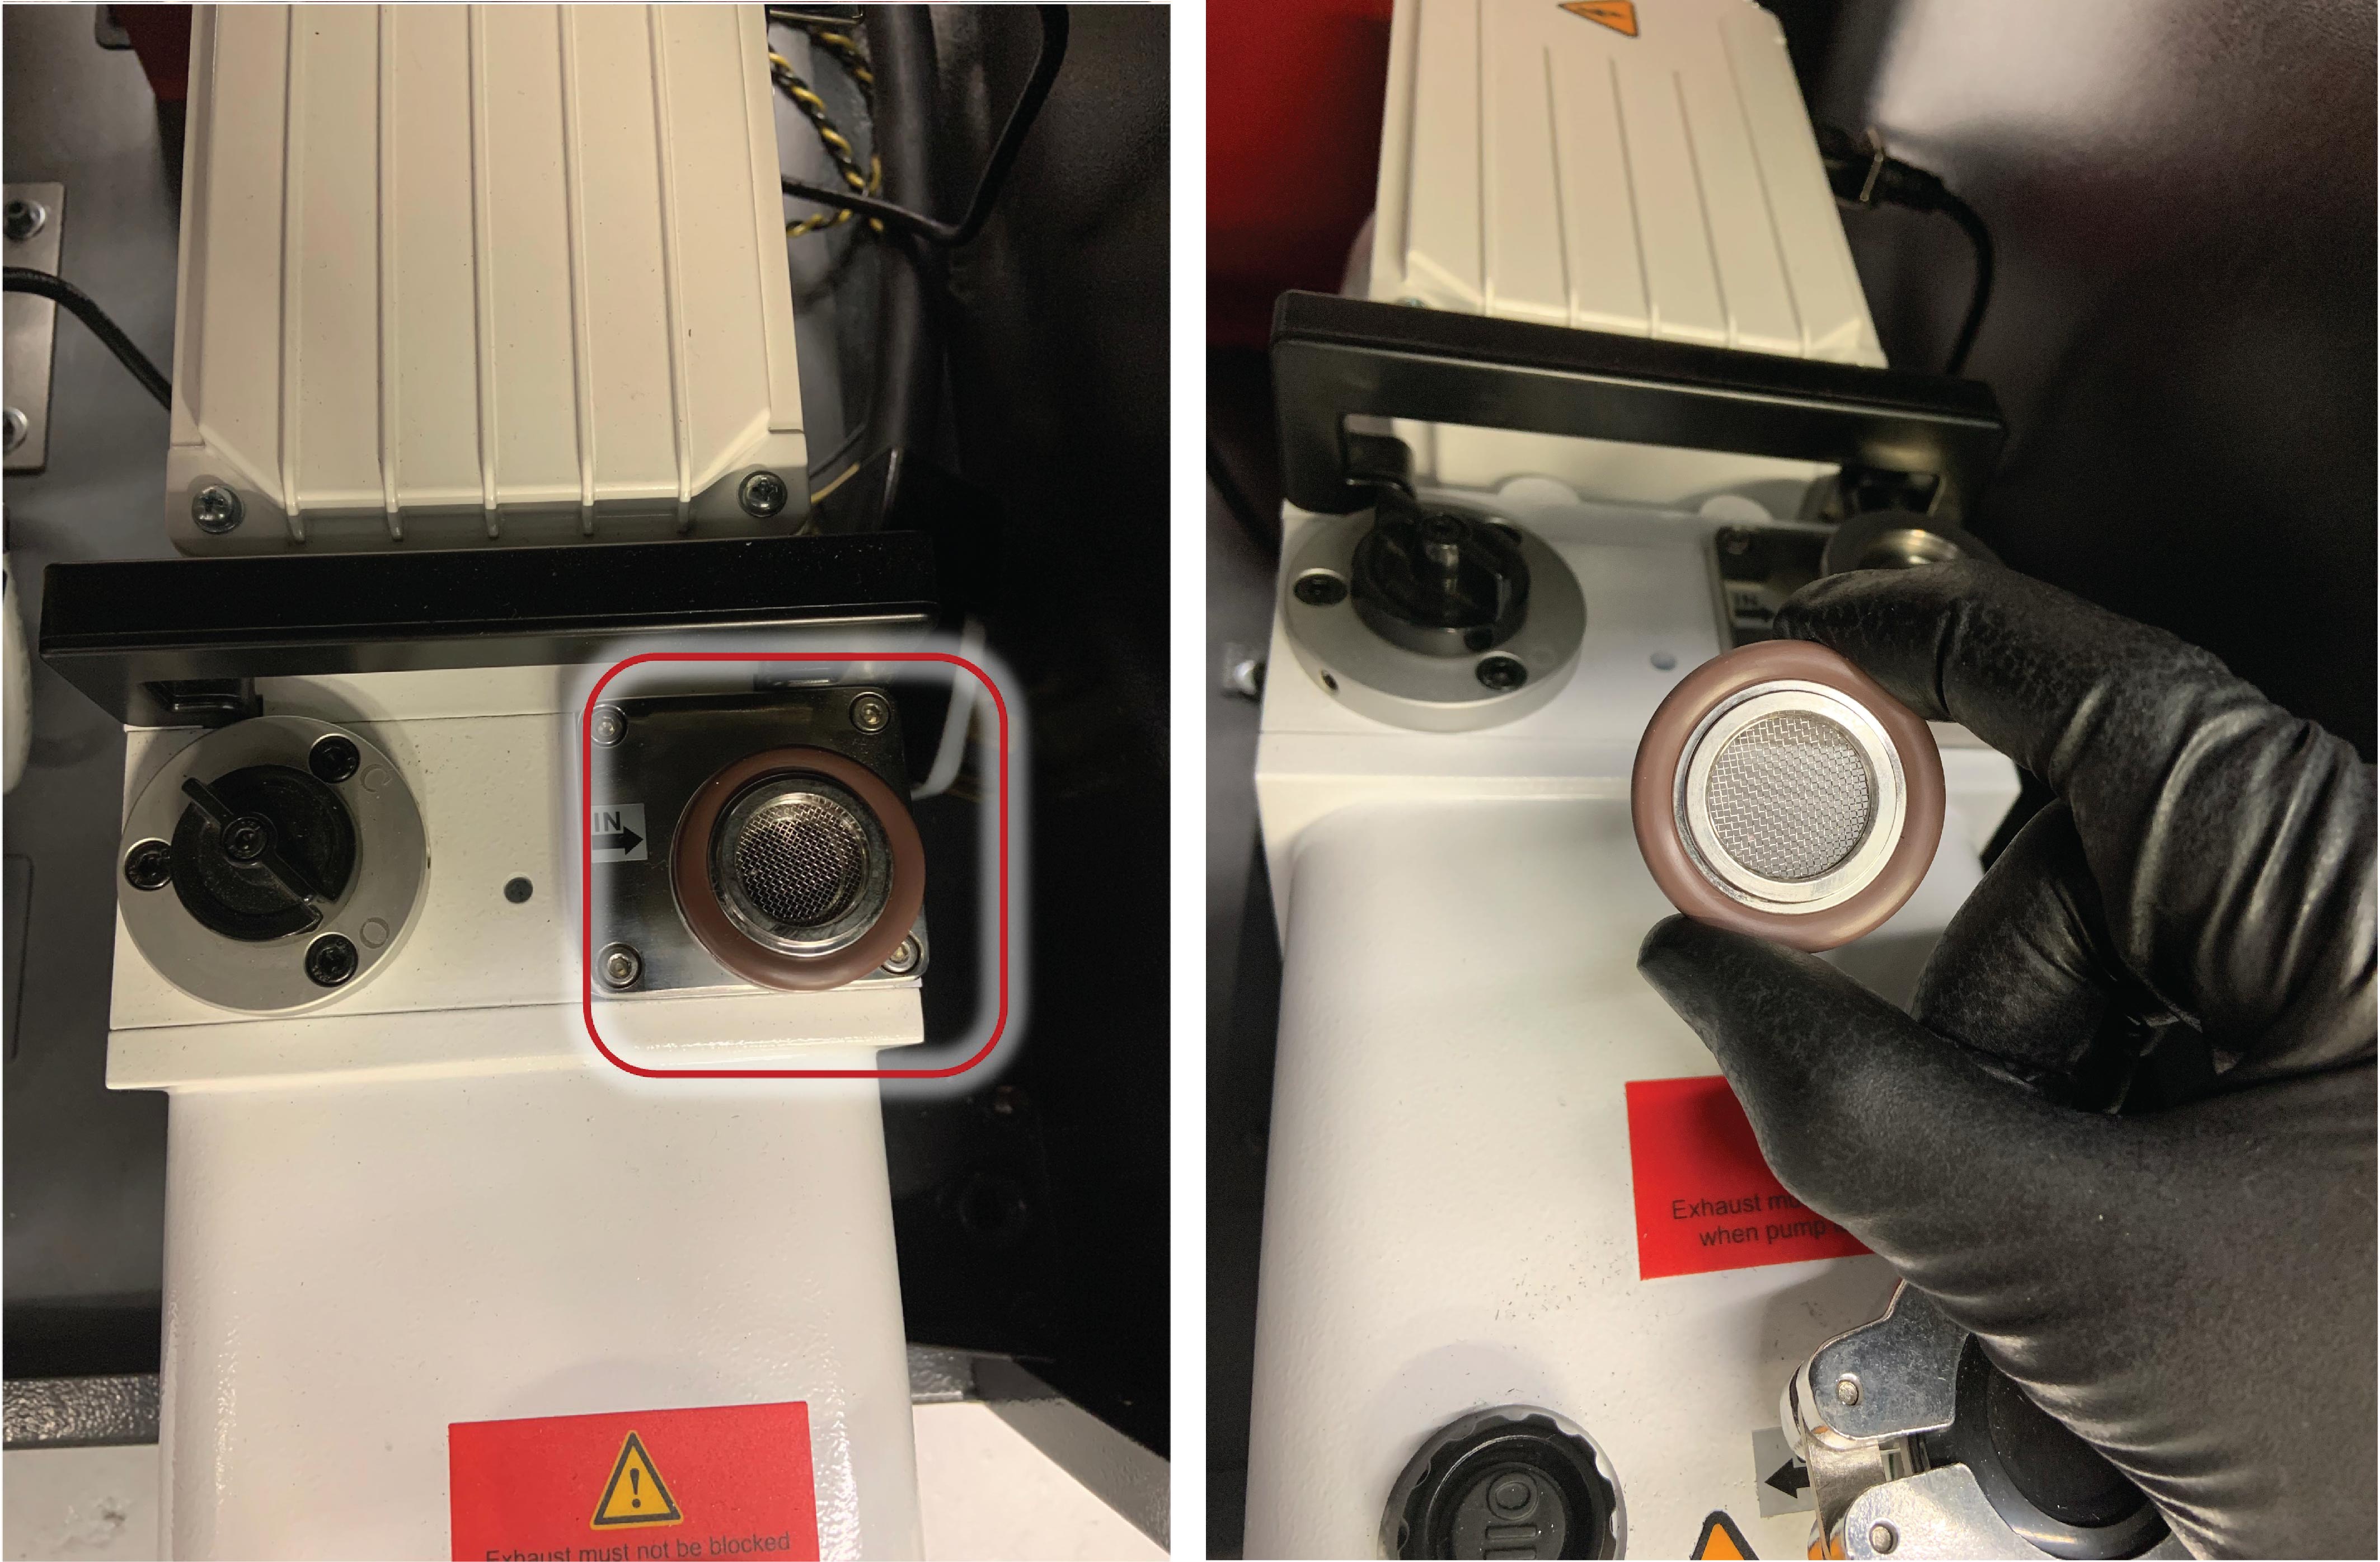
16. Before reconnecting the vacuum hose leading from the Pressure Control Valve to the Vacuum Pump, remove the dirt trap centering ring from the Vacuum Pump intake. Clean it with a solvent and blow it out with compressed air before reassembly.
17. Plug the power connection back in to the valve as shown above.
18. Re-connect the inlet and outlet fittings of the valve as shown above.
19. Plug in the machine and turn it back on. Test the functioning of the valve to confirm that maintenance has been completed successfully.